- 7 min to read
How to send welcome emails with Supabase edge functions and database triggers
Learn how to send automatic emails using Supabase. From setup to Auth and crafting edge functions, right through deploying them and setting up database triggers for a personalized user experience.


Email is one of the best ways to engage with the users of your application, helping you establish strong connections, drive user retention, and generate more sales. You can send emails to onboard users, send notifications, promote special deals, gather feedback, announce events and so much more. When the decision to send these emails hinges on database events, triggers become essential.
What are database triggers?
Database triggers work like event listeners operating within your database. A trigger executes when the database is manipulated, for instance, when data is added, updated, or deleted. Triggers can run before or after an event has occurred.
This guide will walk you through the process of using Supabase database triggers to automatically send welcome emails to newly registered users. The trigger function will listen for the 'insert' event within the user's table and invoke an edge function that uses the SendGrid API to send the email.
Prerequisites
- Node.js and npm are installed on your development machine.
- A code editor like Vs Code.
- A good understanding of Next.js.
Setting up Supabase
Supabase is an open-source Firebase alternative that simplifies database management. It offers a wide range of features, such as a Postgres database, authentication, edge functions, storage, and real-time data collaboration.
To get started, follow these instructions to set up Supabase:
- Visit the Supabase website and sign up for an account if you haven't already.
- Create a new project.
- After signing in, click on Start Project.
- Name your project, enter a password for the database, and choose your preferred region for hosting.
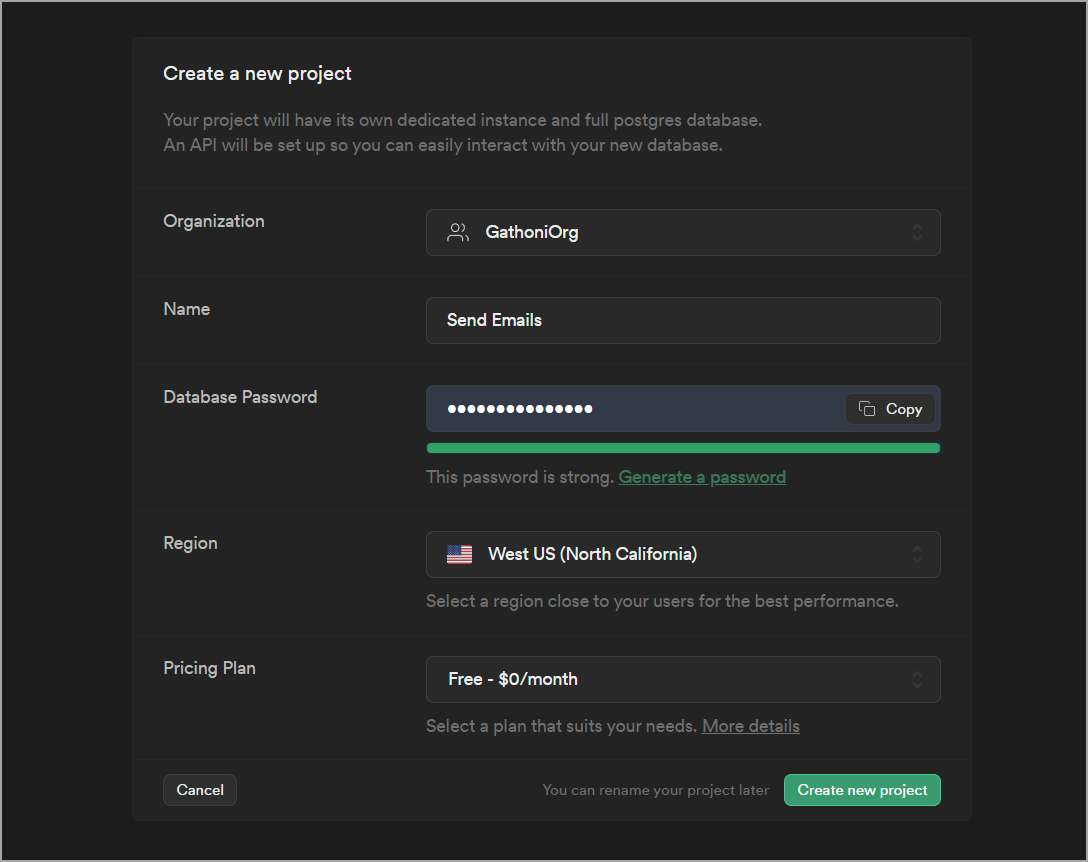
- On the next screen, copy the anon key and the project URL from the Project API keys and Project Configuration sections respectively. We’ll use them later to connect to Supabase.
You don’t need to create a user table manually. Since we’re using the Supabase Auth to authenticate users, Supabase will create the users table in the auth schema when users register.
To start with Supabase, check out our overview in the Discovery section.
Authenticating users with Supabase Auth
Supabase provides an authentication service for authenticating and authorizing users in several ways including email/password, magic links, social providers, and phone numbers.
In this guide, we’ll use email/password to register new users in a Next.js application.
Create a Next.js application
We will use Next.js to create a simple sign-up form. To start, run the following command in your working directory to create a new Next.js project.
This command will create a new folder called send-welcome-email with all the necessary files to get started with Next.js.
Navigate into this folder, and start the development server.
You can access your project by opening the web browser and navigating to http://localhost:3000.
Enable email authentication provider
On the dashboard sidebar of your Supabase project, click on the Authentication tab. In the Configuration section, select the Providers tab and enable the Email provider.
Configure Supabase in Next.js
Supabase provides the Next.js Auth Helpers package that simplifies authentication in Next.js across server and client components.
Install the Next.js Auth Helpers library in your application.
Declare environment variables
Copy the project URL and anon key from your API settings, and create a .env file with the following environment variables:
Instantiate a Supabase client
Create a new folder named lib and add a new file supabase.js to it. In this file, use the Supabase URL and the anon key to create a client component instance.
You can now import the Supbase client across your application and use it to authenticate users.
Create a registration form
In the app directory, create a new folder named sign up and add a page.jsx file. In this file, add the following code to create the sign up form.
The sign up form comprises an email and password input box and a submit button. The form has an onSubmit handler that listens for submit events and calls a function called handleSignUp function.
This function calls the signUp method from Supabase with the email and password as arguments and returns data and an error object.
Before creating it, import the Supabase client from lib/supabase at the top of signup/page.jsx.
Then, add the handleSignUp function to the component.
If an error occurs, the function will throw an error. Otherwise it creates a new user in the database.
Visit the signup page to test out the authentication process. If it works, you should see the user information logged in the console. You can also view the authenticated users by clicking the Authentication section in the left menu of your project’s dashboard.
Creating an edge function to send emails
Supabase edge functions are server-side Typescript functions distributed globally close to the location where they are consumed. They are usually small, lightweight pieces of code that perform specific tasks like sending emails.
To get started with edge functions, set up a Supabase project in your local development environment, by following these steps:
- Install the Supabase CLI.
- Log in to the CLI.
Supabase will prompt you for an access token. Get the access tokens from your Supabase dashboard.
- Create a new folder called send-email-edge and navigate to it. This is where you’ll create your function.
- Initialize Supabase inside the folder.
- Link to your Supabase project.
You can get <your-project-ref> from your project's dashboard URL: https://supabase.com/dashboard/project/<your-project-ref>.
- Supabase edge functions are developed using Deno so follow the official Deno guide to set up Deno in your preferred IDE.
Once you've set up Deno, create a Supabase edge function:
This command will create a new function with boilerplate code to get you started.
Replace the contents within the send-welcome-email/index.js file with the following code. This code includes a try/catch block responsible for extracting an email from the request body and generating appropriate responses for both success and error scenarios.
To send the emails, we will use the Email API provided by SendGrid. You can, however, use whichever email provider you prefer. Note that Supabase blocks connections on ports 587 and 465 therefore, use a provider that has an API or lets you customize the port.
Want to get to know Deno? Read our deep dive into Deno and its comparison with Node.js.
Setting up SendGrid
There are a couple of things you need to do before using SendGrid API:
- Create a SendGrid account if you don’t have one.
- Authenticate the sender.
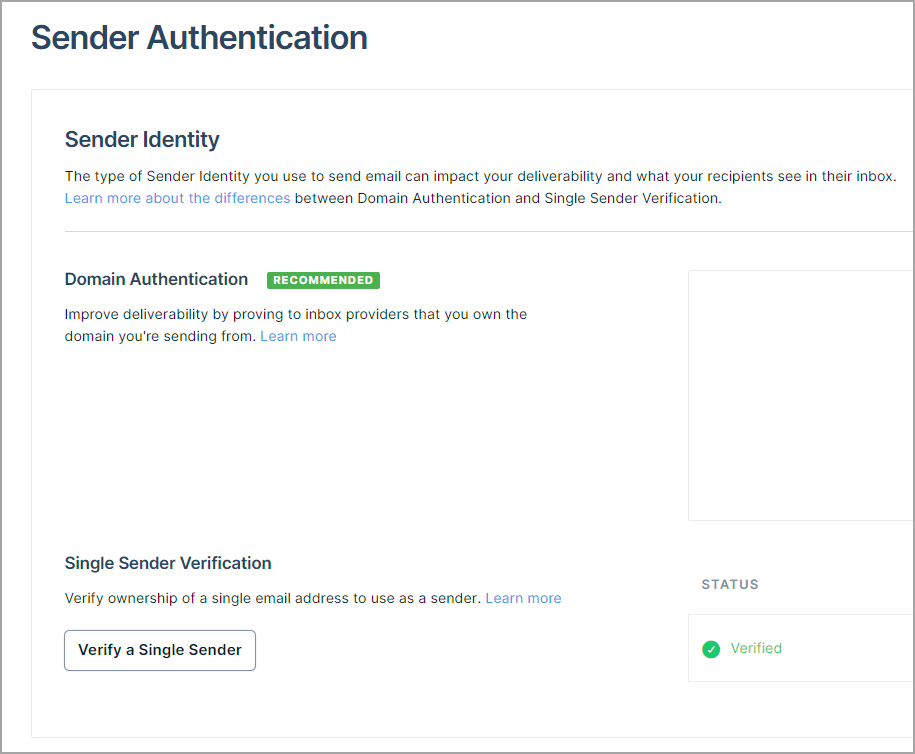
To send emails, you will need to verify ownership of the email address you want to use.
In the left menu, click on the Settings tab, then select Sender Authentication. Click Verify a Single Sender and follow the instructions to add one of your emails as the sender's email.
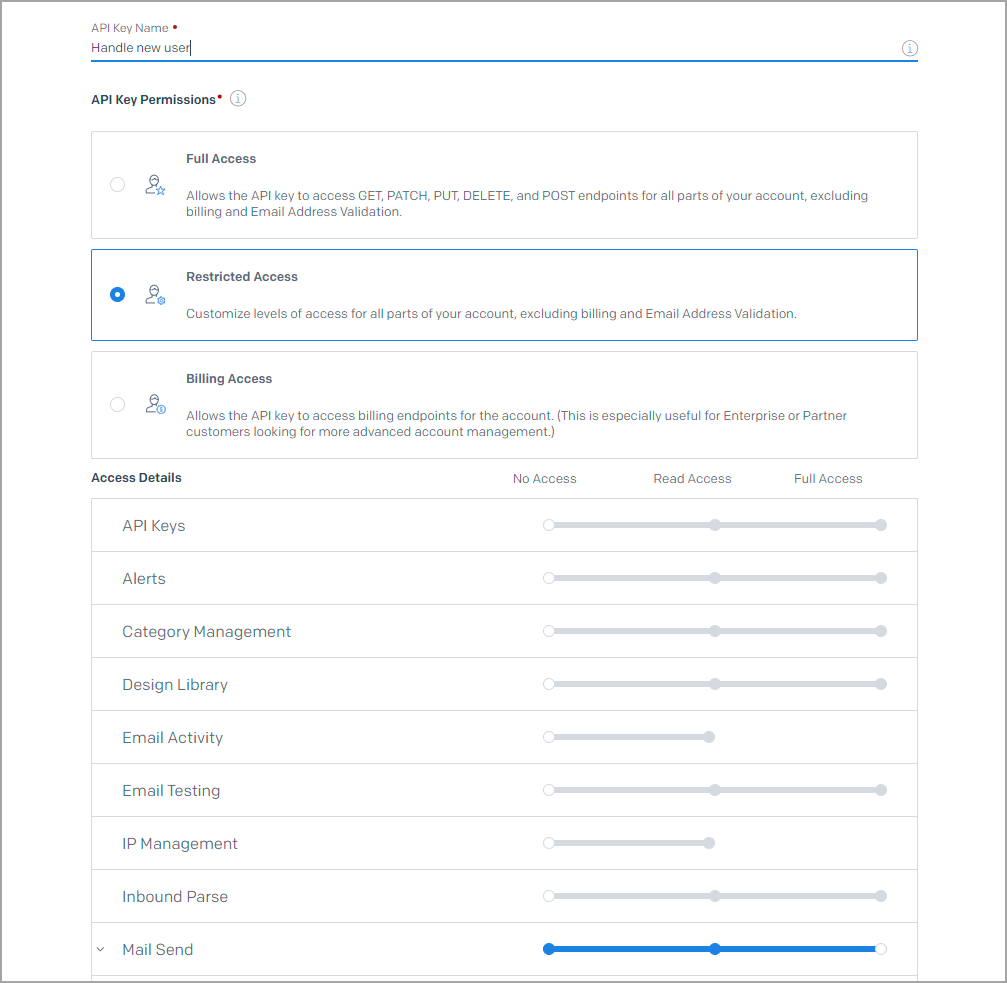
- Get the API key.
Under Settings, click API keys and then click the Create the API Key button.
Give your API key a proper name like handle-new-user. Under API key permissions, choose restricted access and enable full access for the mail send option. Click Create and View to finish the process.
Copy the API key and create a .env file in your Supabase project folder to store it securely. Make sure to use your actual API key.
You will also need to define the SendGrid API endpoint URL, your email, and your name.
Push the variables from the .env file to your remote project using:
The edge function can now access the environment variables when you deploy it.
Send a welcome email using the email API
First, retrieve the SendGrid API key, endpoint URL, sender email, and sender name from the .env file using Deno:
Next, define the email data by adding the following data object to your function. It specifies the sender’s email (to), the subject of the email, its contents, and the email’s recipient (from).
The SendGrid API requires the authorization header, which contains the API key you created and the content-type header. Define them by adding the following to the function.
Then, use fetch to send a POST request c containing the email information to SendGrid.
If the fetch request is unsuccessful, it should throw an error.
Altogether, the edge function should look like this:
Run this command in the terminal to deploy the edge function.
In your project dashboard, click on edge functions in the left menu to view your function. From here, you can view information about the function including logs which come in handy during debugging.
To invoke the function, use a REST client like Postman or use the following curl command.
The function should send the welcome email to the recipient email you specify.
We don’t want to invoke the function manually, we want to create a trigger function that automatically calls this function when a new user signs up.

Join Bejamas newsletter!
Get modern web dev articles (and more) in your mailbox!
Create a trigger function to call the edge function
Follow the instructions below to create a Trigger Function in Supabase’s SQL editor:
- In the left menu of your project’s dashboard, click on the SQL editor tab.
- Click New Query and add the following function.
This function is called handle_new_user. It uses the PG_NET extension to send an HTTP POST request containing the email of the user signing up to the edge function.
- Enable
PG_NETextension by running the statement below in the SQL editor.
This extension allows you to invoke the edge function using HTTP asynchronously.
- Create a trigger that calls the
handle_new_userfunction when a new row is inserted in the users table by running this statement in the SQL command.
- Click run to execute the statement.
Now, if a new user signs up, they should receive a welcome message in their email.
Conclusion
In this article, you learned how you can use edge functions and database triggers to send emails to newly registered users. Aside from sending welcome emails, you can tweak the trigger and email content to do other things too. For instance, you could send confirmation emails to users after they make a purchase or sign up for an event. And it's not just about emails. You can also perform actions such as calculations before adding data to a table. The possibilities are endless.
Find the code for the edge function and the code for authenticating users on GitHub.