- 8 min to read
How Lee Robinson created his Guestbook, and you can do it too
Ready to dive in and build a guestbook app using the Vercel stack? Let's do this!


Building full-stack web apps used to be a complex task. But then came Next.js, a game-changer for React developers like you and me. This powerful framework from Vercel makes full-stack development very easy.
Let's build a guestbook app together to see the process in action using the Vercel stack. Inspired by Lee Robinson's project, this article will be your step-by-step guide to craft your own personalized version in no time.
Prerequisites
We'll start from the ground up, but to make things smooth, make sure you have some HTML, CSS, and JavaScript skills, along with a basic understanding of React concepts. Familiarity with Next.js (pages) is a bonus.
Check out the final demo here and grab the source code from this repository.
The Vercel stack
Building modern web apps became easier with Vercel development tools. The Vercel stack combines Next.js, its powerful storage, and lightning-fast hosting for a smooth and efficient development experience. We'll use "Next.js" for the app's front-end, and "Tailwind CSS" (a friendly CSS framework) for beautiful styling without the hassle. For the backend, Vercel's "serverless functions" will handle everything seamlessly. We'll connect it to their "PostgreSQL database" and host the whole app on "Vercel's cloud" to make it ready for your audience.
The state of Next.js
Back in 2016, Next.js was introduced as a simple open-source project for React developers. But it quickly grew into more than just a tool. It became a powerful all-in-one solution, taking React to the next level with server-side rendering and static site generation.
This helped in building full-stack web apps faster and easier, with some developer-friendly features like automatic image optimization, pre-rendering, and even file-based routing for serverless functions. By 2021, Next.js had become a popular JavaScript framework in the entire developer community.
Server-side rendering loads the webpage load super fast, without heavy JavaScript. Instead of relying on the client's browser to build the page, your server creates the complete HTML file and sends it over, making your app appear instantly. Learn more about server rendering here.
Next.js moved from 11th place in 2022 to 6th in 2023. The developer experience sky-rocketed after Next.js released the awesome new features: the app router powered by React Server Components for better routing, and "server actions" add even more power. Together, they make Next.js one of the best frameworks out there for creating modern web apps.
Create a new Next.js app
You can easily create a new Next.js app by typing the npx create-next-app my-guestbook command in your terminal. Don't worry if the questions seem confusing - just keep hitting Enter.
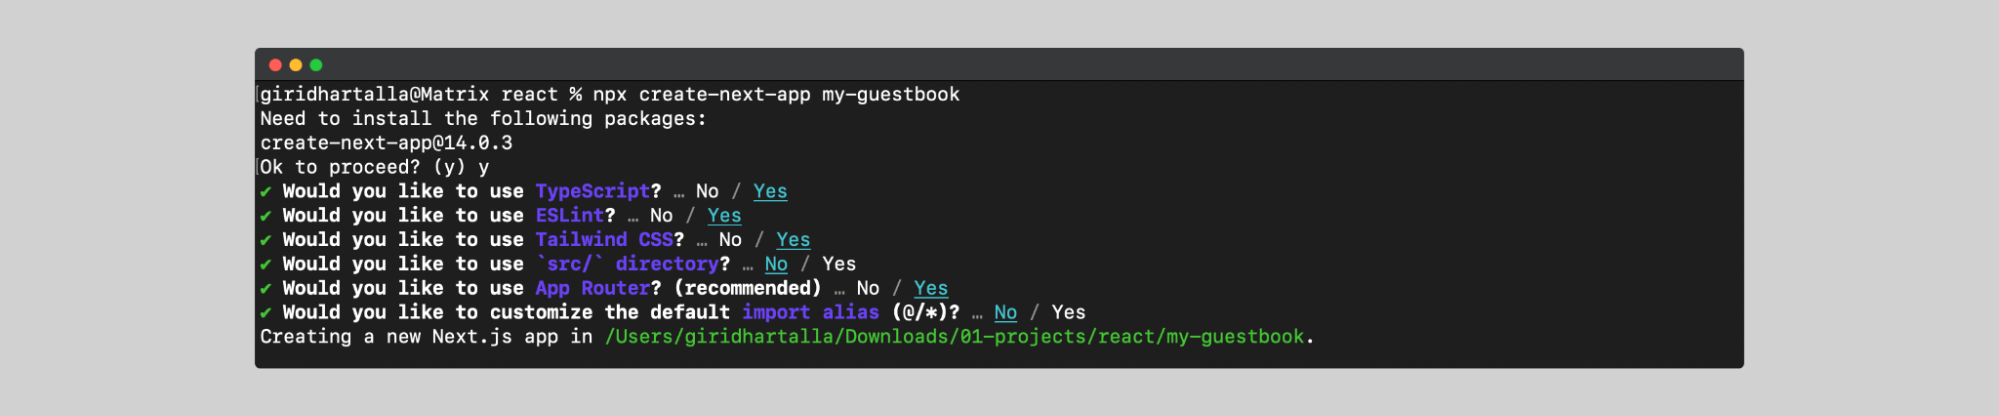
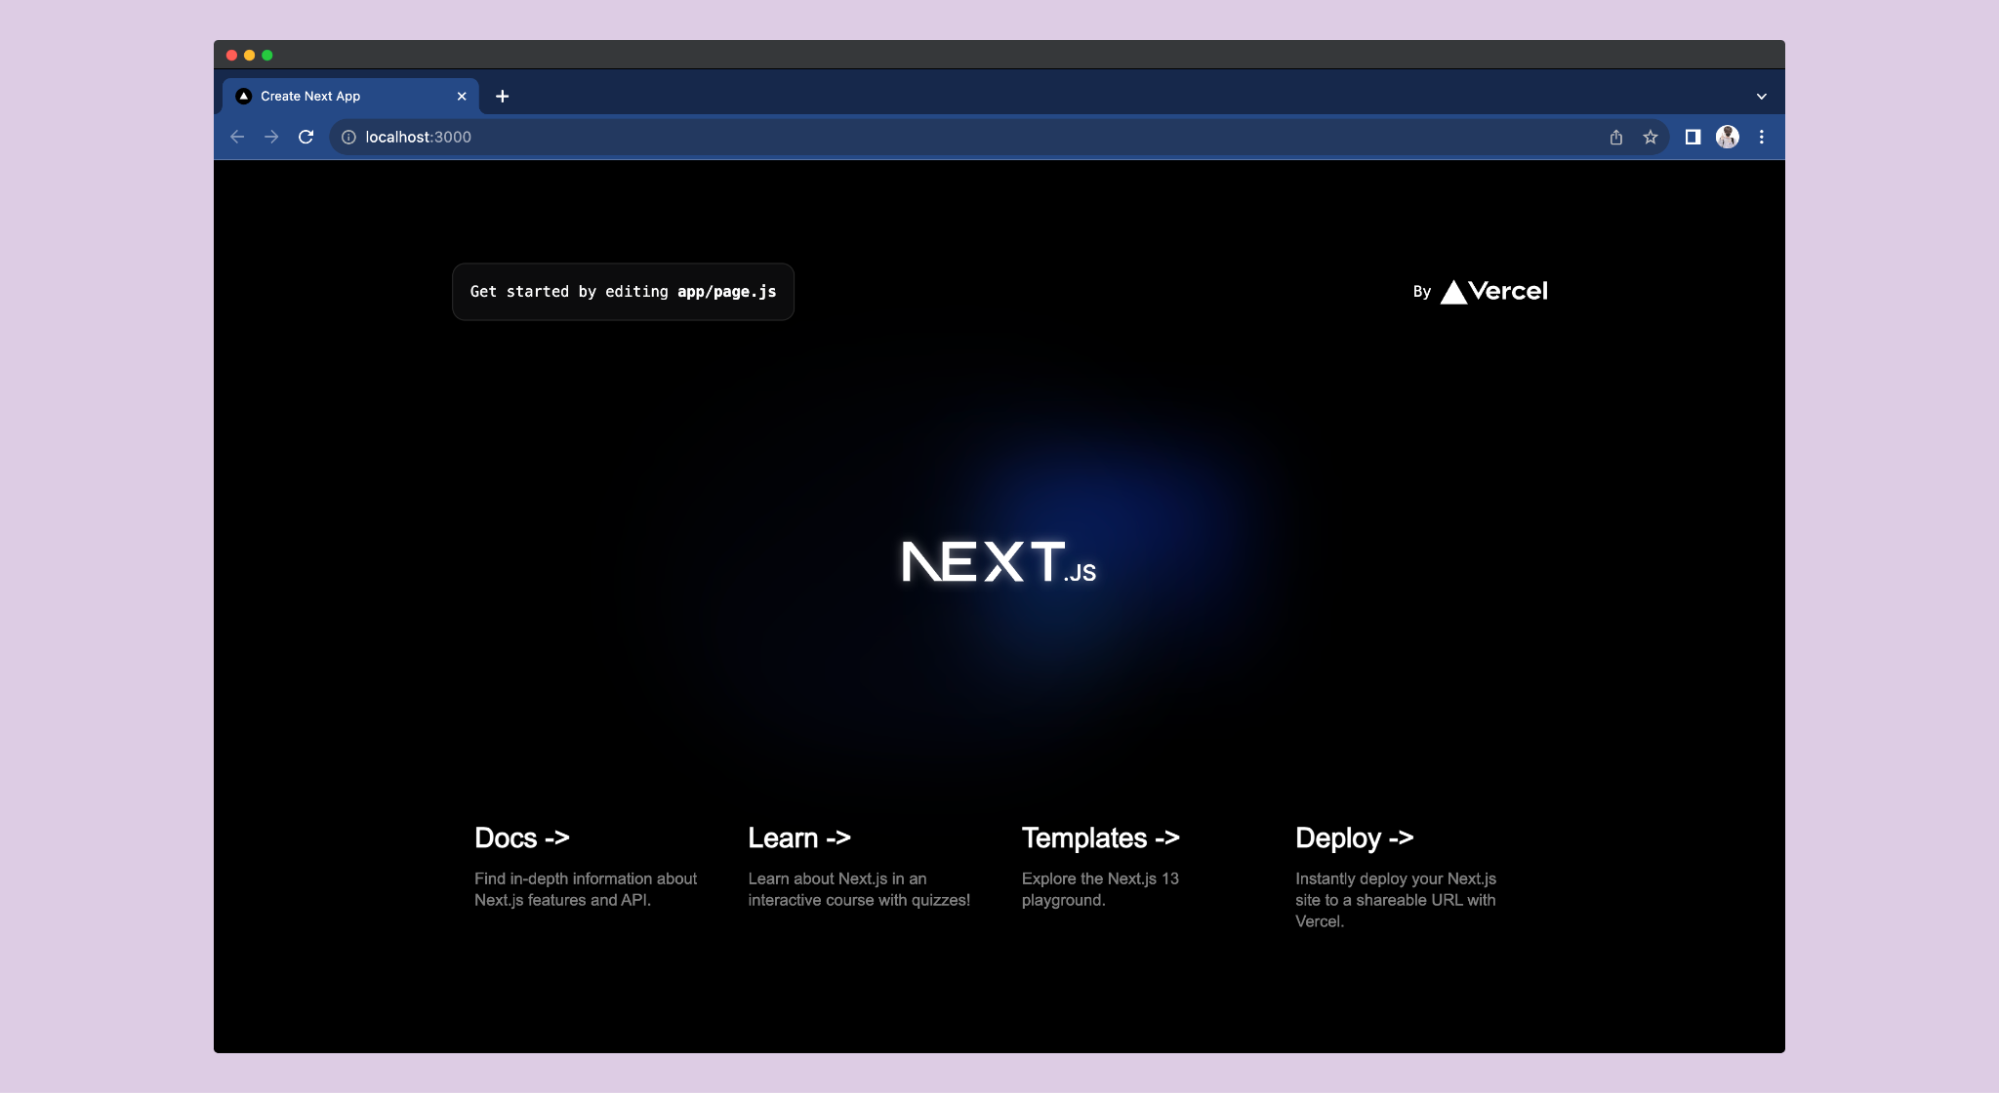
This will create a folder called my-guestbook with everything you need. Open it in your favorite code editor and use the npm run dev command to see the demo app.
As you build your guestbook, you'll need two extra packages: next-auth and @vercel/postgres. Install them using the commad below.
Understanding the app directory
Starting with Next.js 13, there's a new way to handle routes called the app router. If you used Next.js before 2023, you might be familiar with the pages router. Unlike pages, the app directory uses "folders" for routing. For example, the /home folder inside /app becomes a route, and the file inside (like page.js or page.tsx) gets displayed when you visit that route.
In this architecture, every component is a React Server Component by default. This means you don't need functions like getServerSideProps anymore for server-side rendering. If you want a component to render on the client instead, just add "use client" at the beginning.
The app directory also lets you have nested and parallel routes, and use layout components to share formatting across pages. To learn these features in more detail, visit the documentation here.
Creating the guestbook page
The page.tsx and layout.tsx files in the /app directory are like the main entrance of our application. The layout.tsx sets the overall layout for both the home page in page.tsx and any other routes we add later. For now, let's focus on these files to build our guestbook. You can later add a separate route for this and even showcase your portfolio on the home page.
We do not need to change much in layout.tsx, we'll just adjust the "metadata" configuration to change the title of the app.
Open up the file page.tsx. This is where we'll create the main page for our guestbook application. You'll see it's already styled using Tailwind CSS by default.
Now, navigate to page.tsx. This is where we will build our application home. You can notice that it is styled using Tailwind CSS. We'll just tidy up this page a bit by removing things we don't need, then add our guestbook components.
We cleaned up the template, keeping only the header. You can add your name to the header. Below the header, I added a new section with a title (h1) and a Suspense component to handle loading forms. Suspense, in React, lets us display a placeholder while forms are fetching, then smoothly switch to the real thing when they're ready.
Now, let's build the two main parts of our app: the form for writing messages (GuestbookForm) and the list to display messages (GuestbookEntries).
Building the input form
Next.js works with React server components by default. If you need a client-side component, like a form, use the "use client" directive at the top of your component file.
Before we render this form component, let's set things up by adding a login step to gather user information.
Implementing user authentication
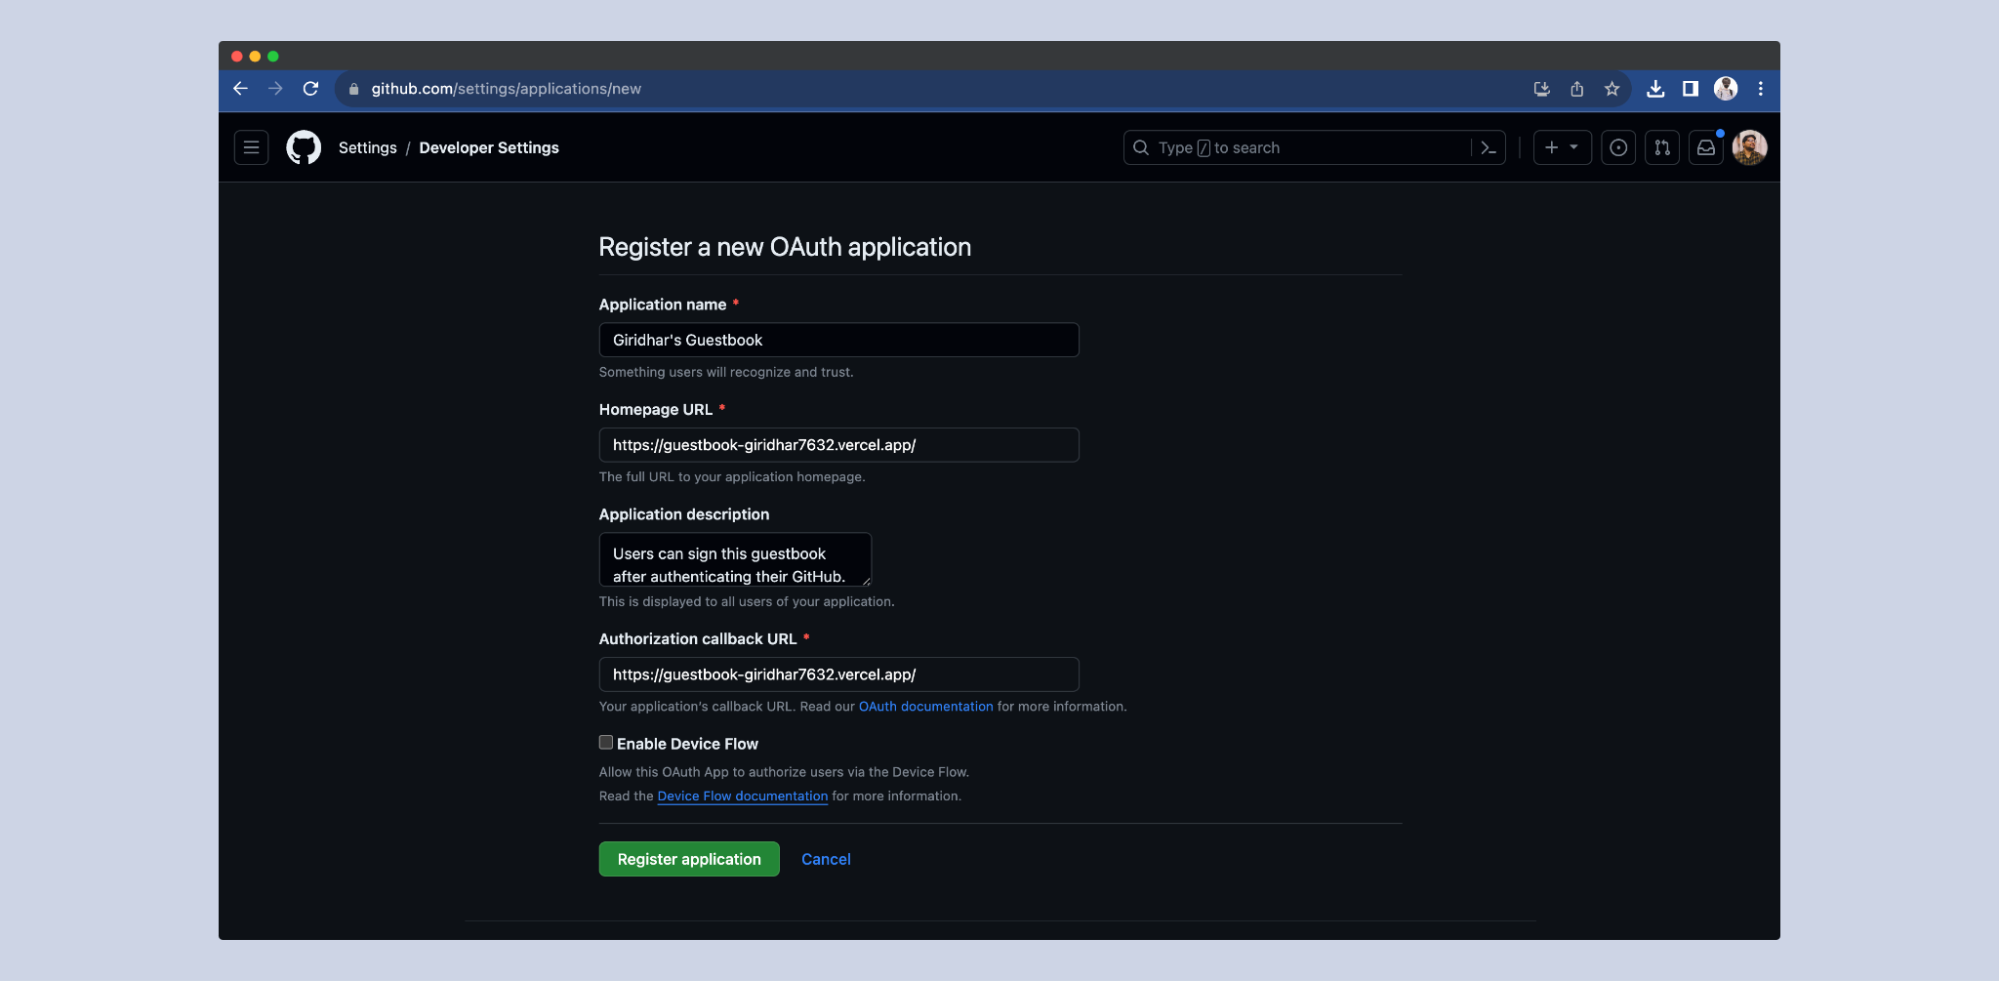
To handle logins in our Next.js app, let's use a reliable library called Next-Auth.js. It takes the pain out of complex OAuth setups, making it easy to integrate your Next.js app with popular providers like Google, Facebook, and even GitHub - the developer's go-to platform. So, let's use GitHub to implement authentication.
Go to the developer settings, and create a new OAuth app to use for authentication.
Click "Generate new client secret" to generate a new client secret which you can use to connect your app using Next-auth.
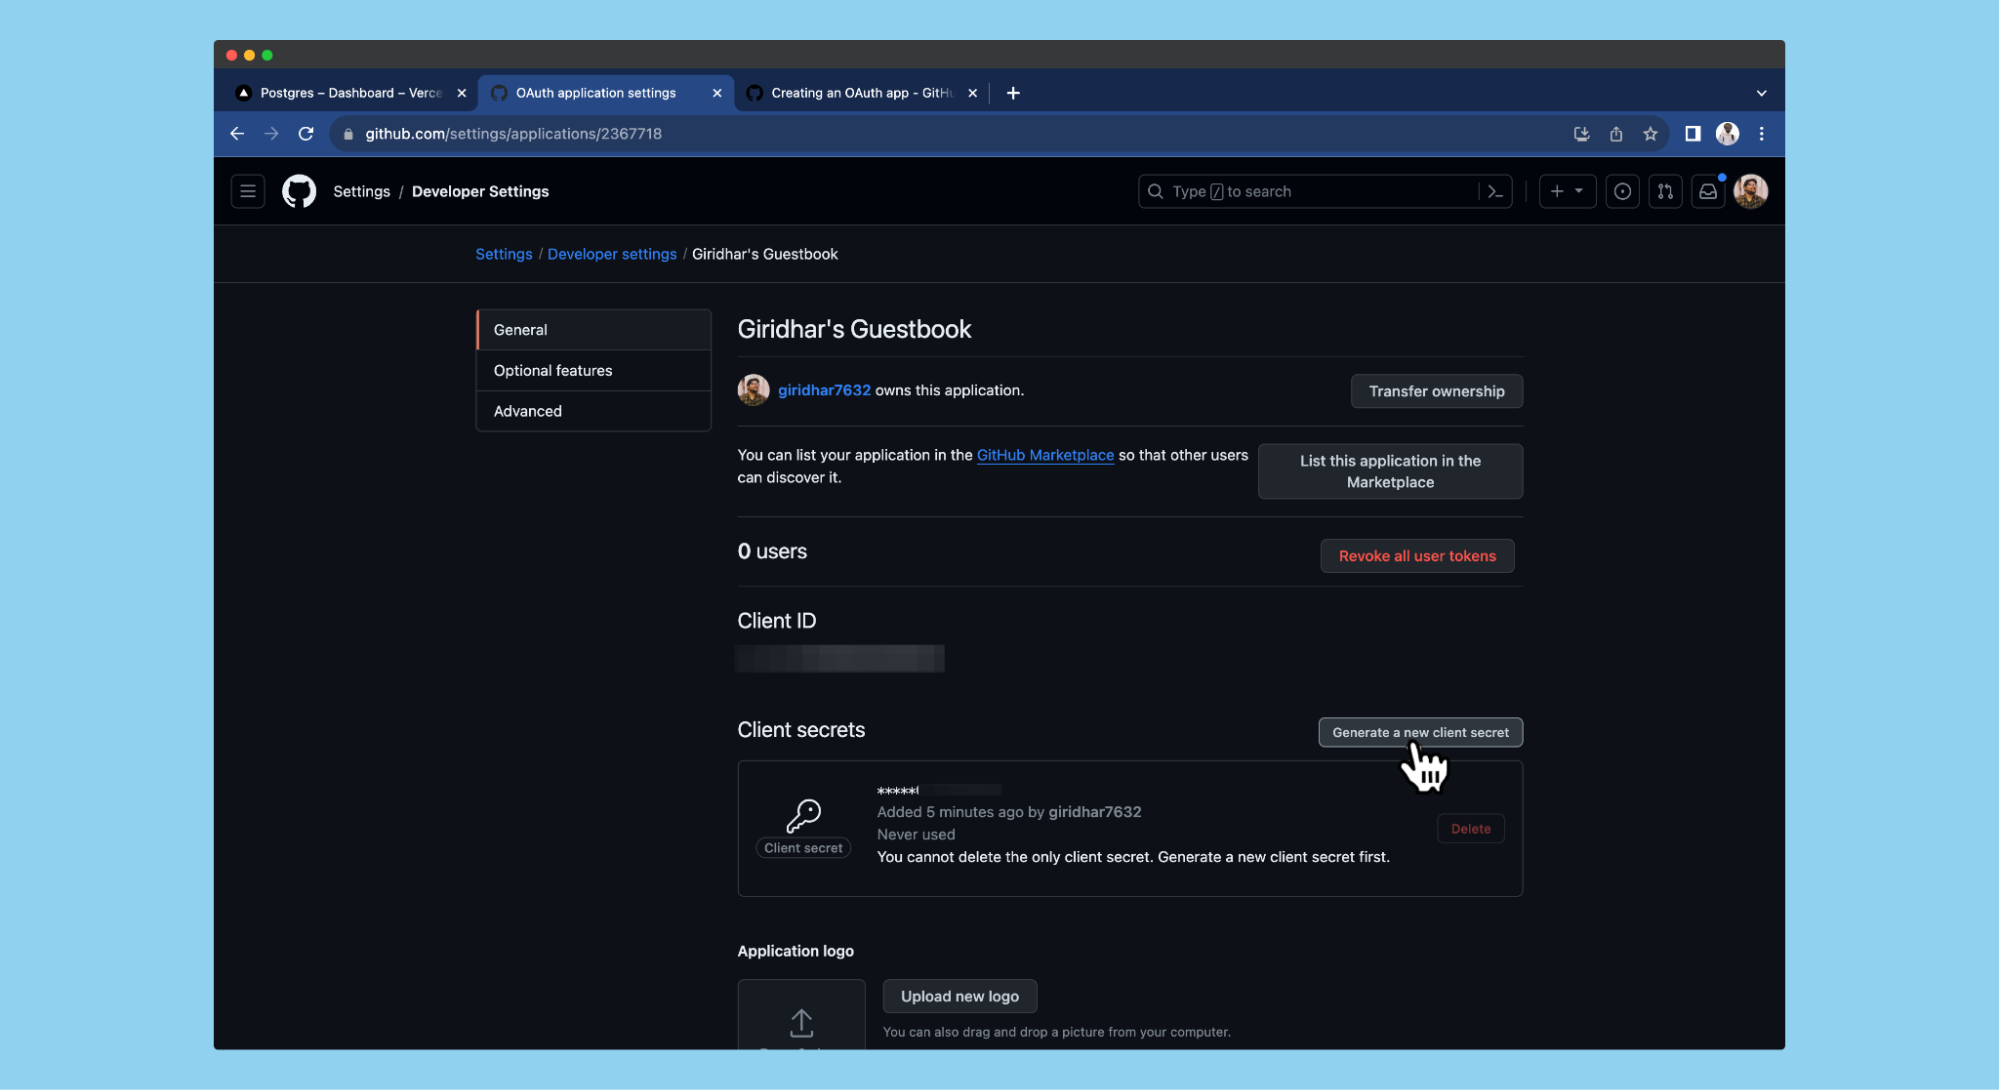
Now, make a new .env file and add these three things: "Client id", "Client secret" and "Auth secret". Next-auth uses these details to connect to your OAuth app and let users log in securely.
Inside the /lib folder, create a file named auth.ts. Let's define a helpful function called auth that allows components to easily access session details.
The authOptions will contain the configuration of your app. You need to set the providers you want to use in this object. In the auth function, we're using Next-auth's getServerSession() method to grab and return the details of the logged-in user.
Next-auth automatically creates routes for handling login and logout using a dynamic API route. You can create an API route using a folder, you need to use route.ts, not page.ts like in page routes. Inside the /api/auth, create a dynamic route [...nextauth] to handle authentication.
To add Signin and Signout buttons, let's use the auth method. Create a new file called buttons.js inside the /app directory and add the below code.
In this code, we are using the built-in signIn and signOut methods to implement "login" and "logout" functionality with on-button click. You should pass the provider inside the signIn() method and Next-auth uses that to authenticate the user.
Rendering the input form
To keep our guestbook safe and secure, we only want people who are logged in to leave messages. So, before anyone can see the form to sign the book, we need to check if they're already logged in.
Here, we check for the session first. If the user has not signed in yet, we'll display the SignIn button, else, we'll render the Form component.
Connecting to the postgres database
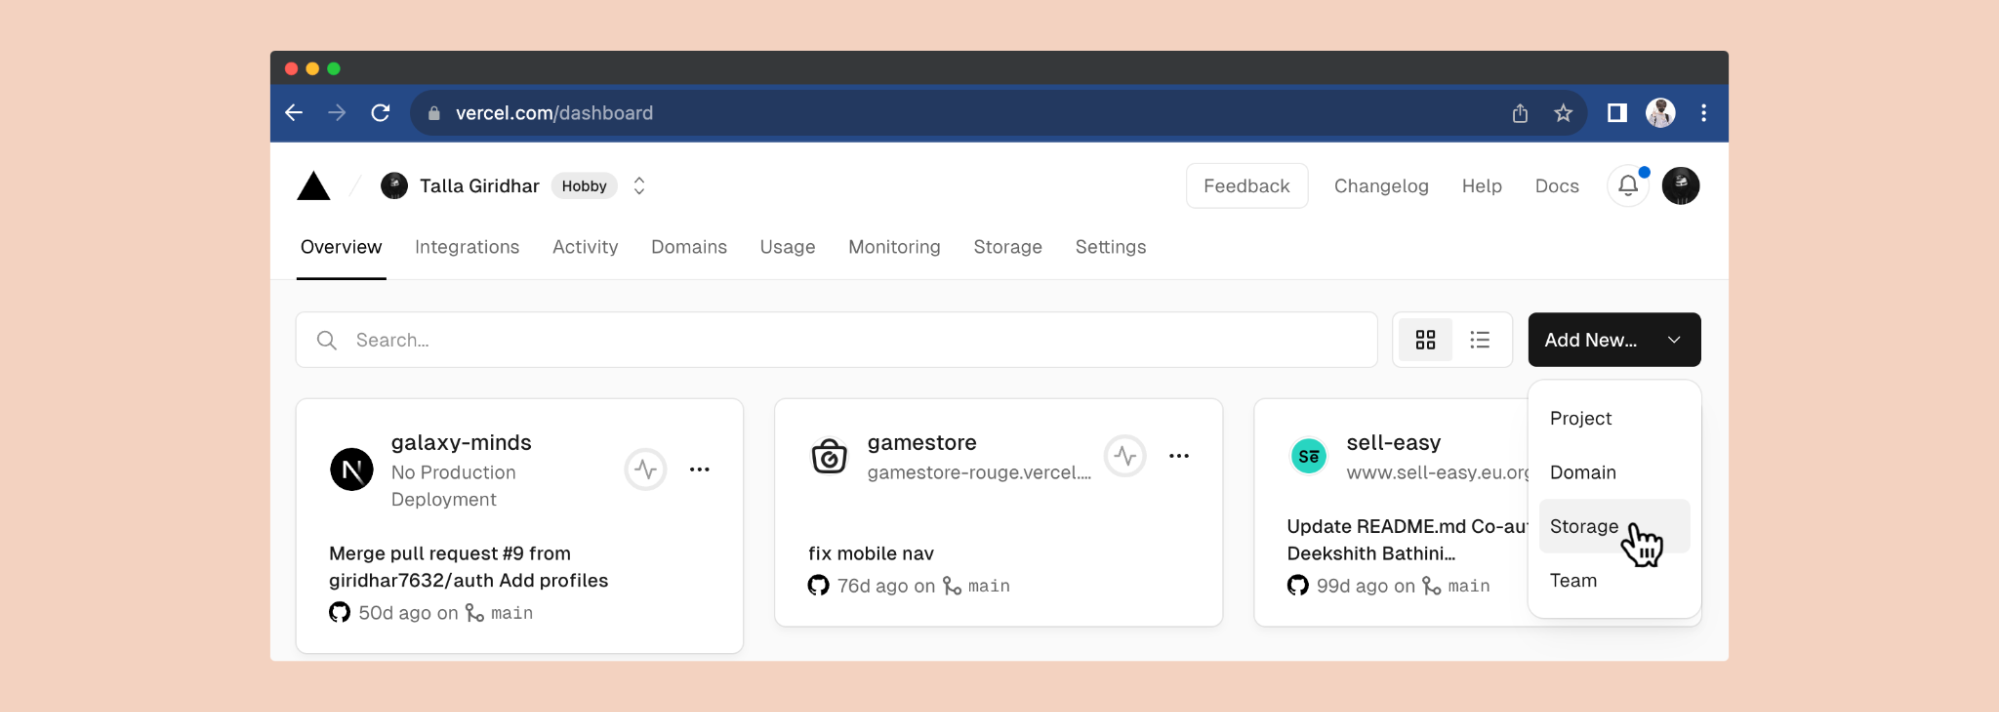
We'll store our messages in a serverless PostgreSQL database provided by Vercel. Go to the Vercel dashboard and log in to your account (I recommend logging-in using GitHub). Once you're in, click "Add new" and choose "Storage."
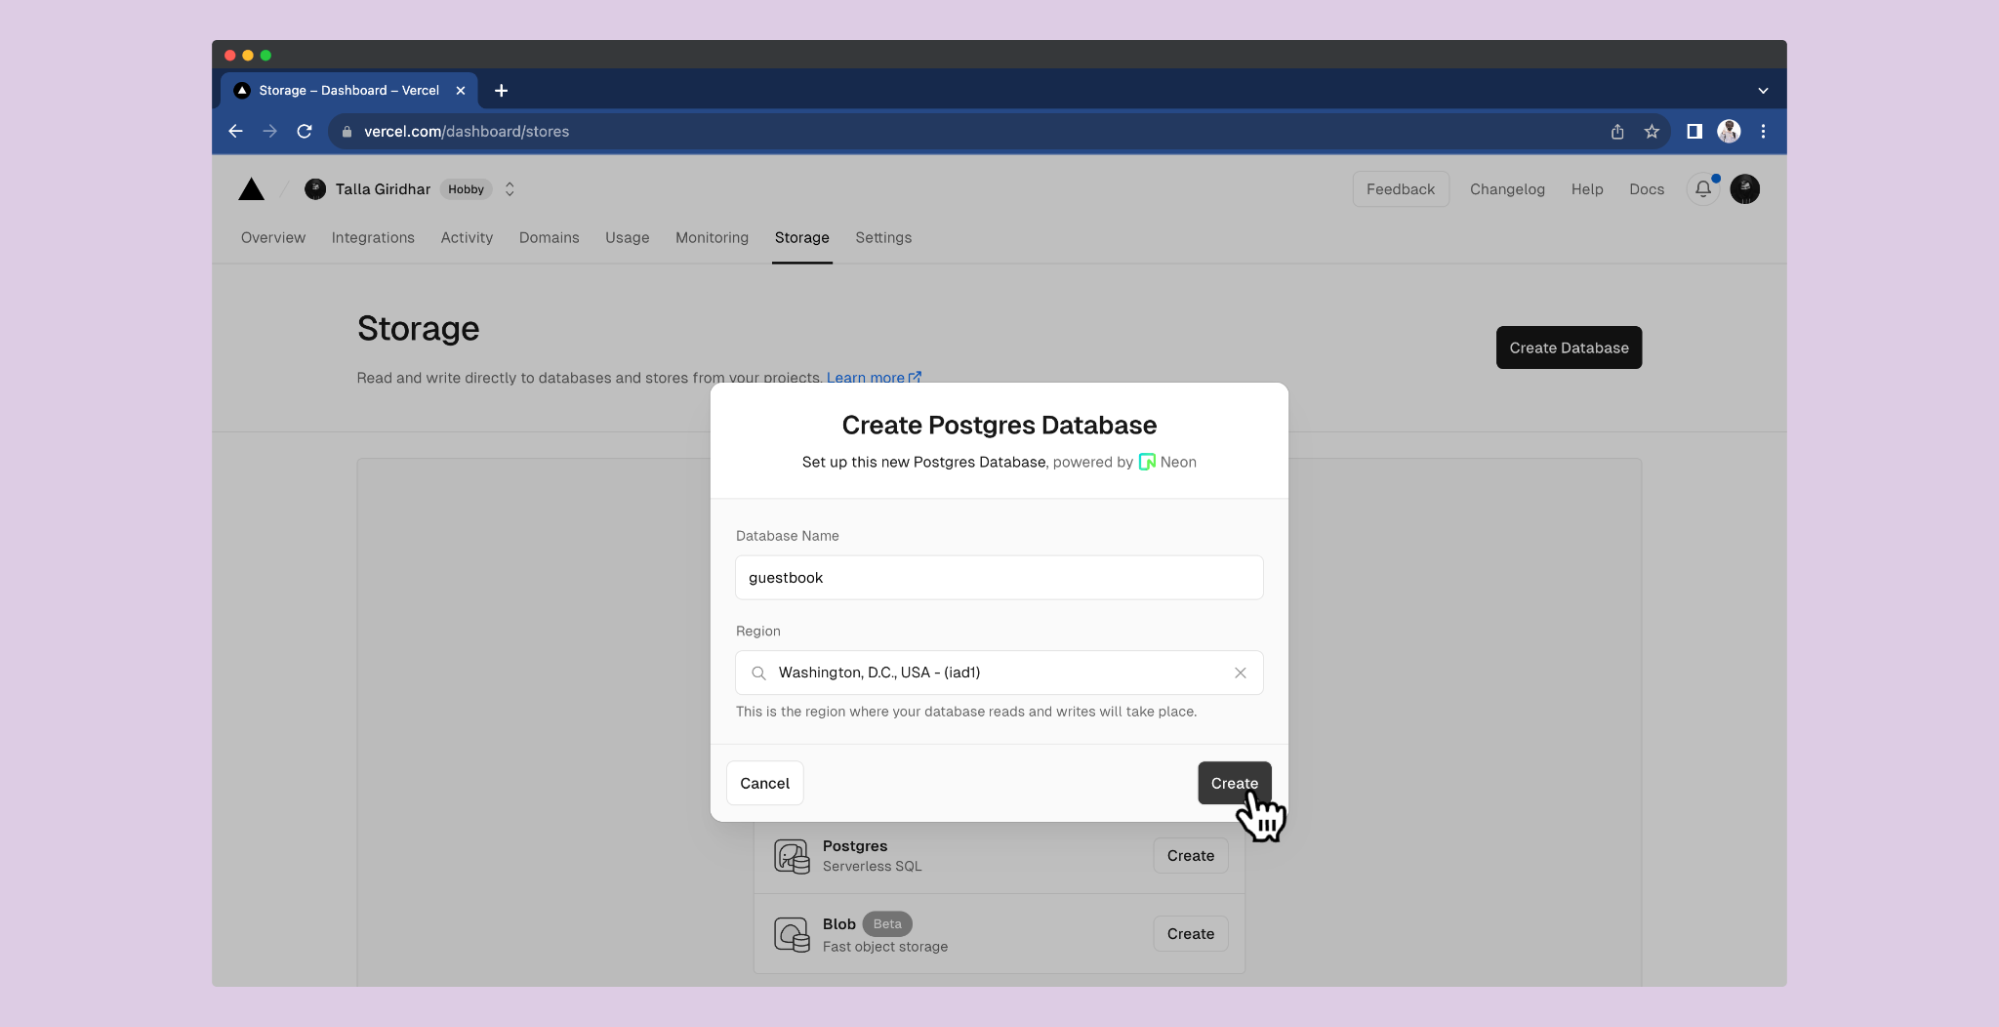
Click the "Create" button next to the "Postgres - serverless SQL" option. Fill in the details and choose a region near your users. This helps a little in reducing latency.
Vercel makes it easy to connect to your database with their @vercel/postgres package. Grab the database info from .env.local tab and add it in the .env file. Then, import the sql method to run your SQL statements within the Next.js app.

Storing guest entries in the database
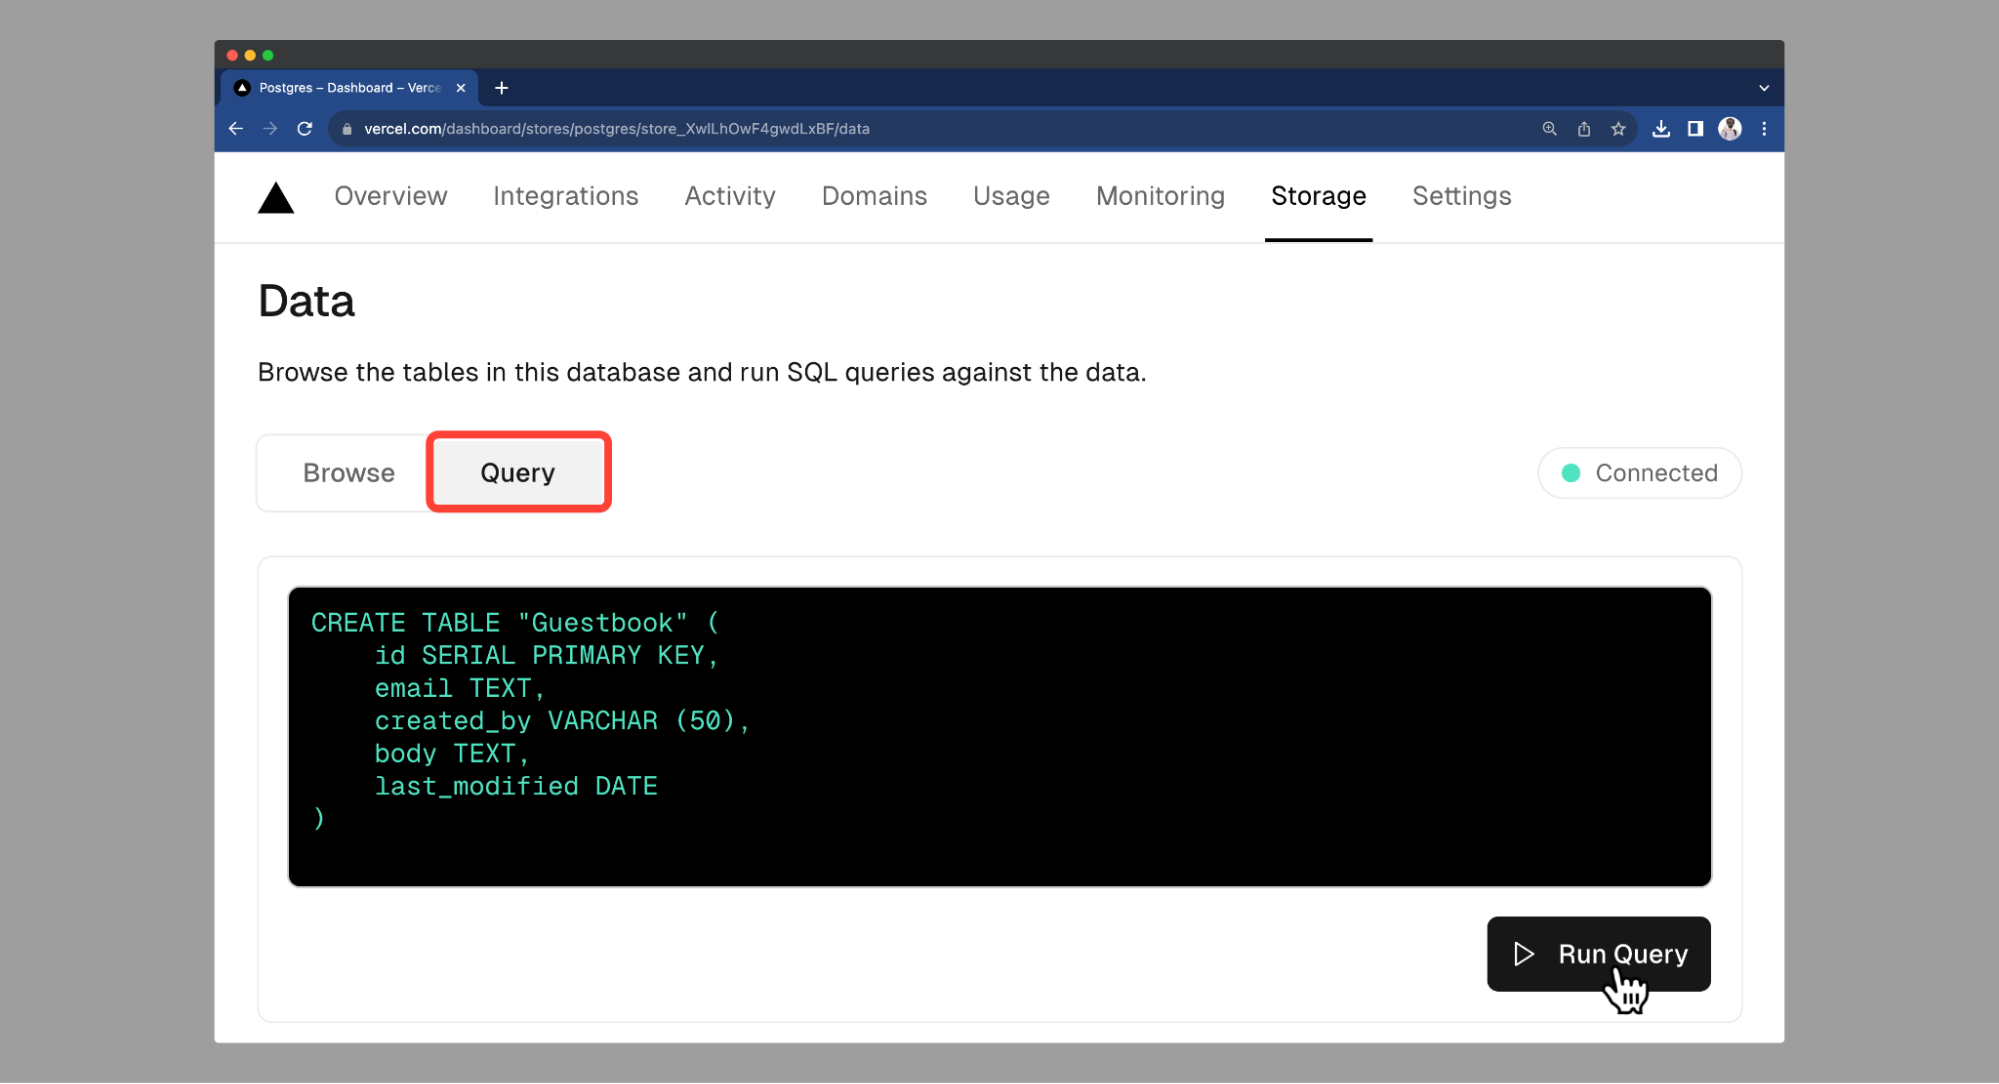
Once we have our database up and running, let's build a table for keeping track of all the guest entries. You can run the SQL statements right here in the "Query" section under "Data". To keep things simple, we'll use a few essential fields. Type the SQL statement below into the editor and click "Run Query" to make the table.
You can now write serverless functions right inside your components with Next.js "server actions". These server actions are integrated with the caching and revalidation architecture of Next.js, making data mutations very easy to implement. For more information, refer to the documentation.
There are two ways to use server actions:
- Directly in a server component: use the "use server" directive inside a javascript function to make it server action.
- In a separate file: for using them in client components, add your server actions in a separate file and add the "use server" directive at the top. All the functions in this file will be considered as server actions.
The saveGuestbookEntry function takes the information you enter in the form (formData) and creates a new entry in the "Guestbook" table. It uses the name of each input field to grab the specific value. The sql directive of @vercel/postgres runs the SQL query on the database.
Then, we are going to use the revalidatePath method of Next cache architecture to refresh the path smoothly. You can now import this method into the Form component and use it in the form action.
Passing the server action in the action prop of the <form> element makes it easier to submit the form even when the client-side JavaScript is not completely loaded. For more information, refer to the React documentation.
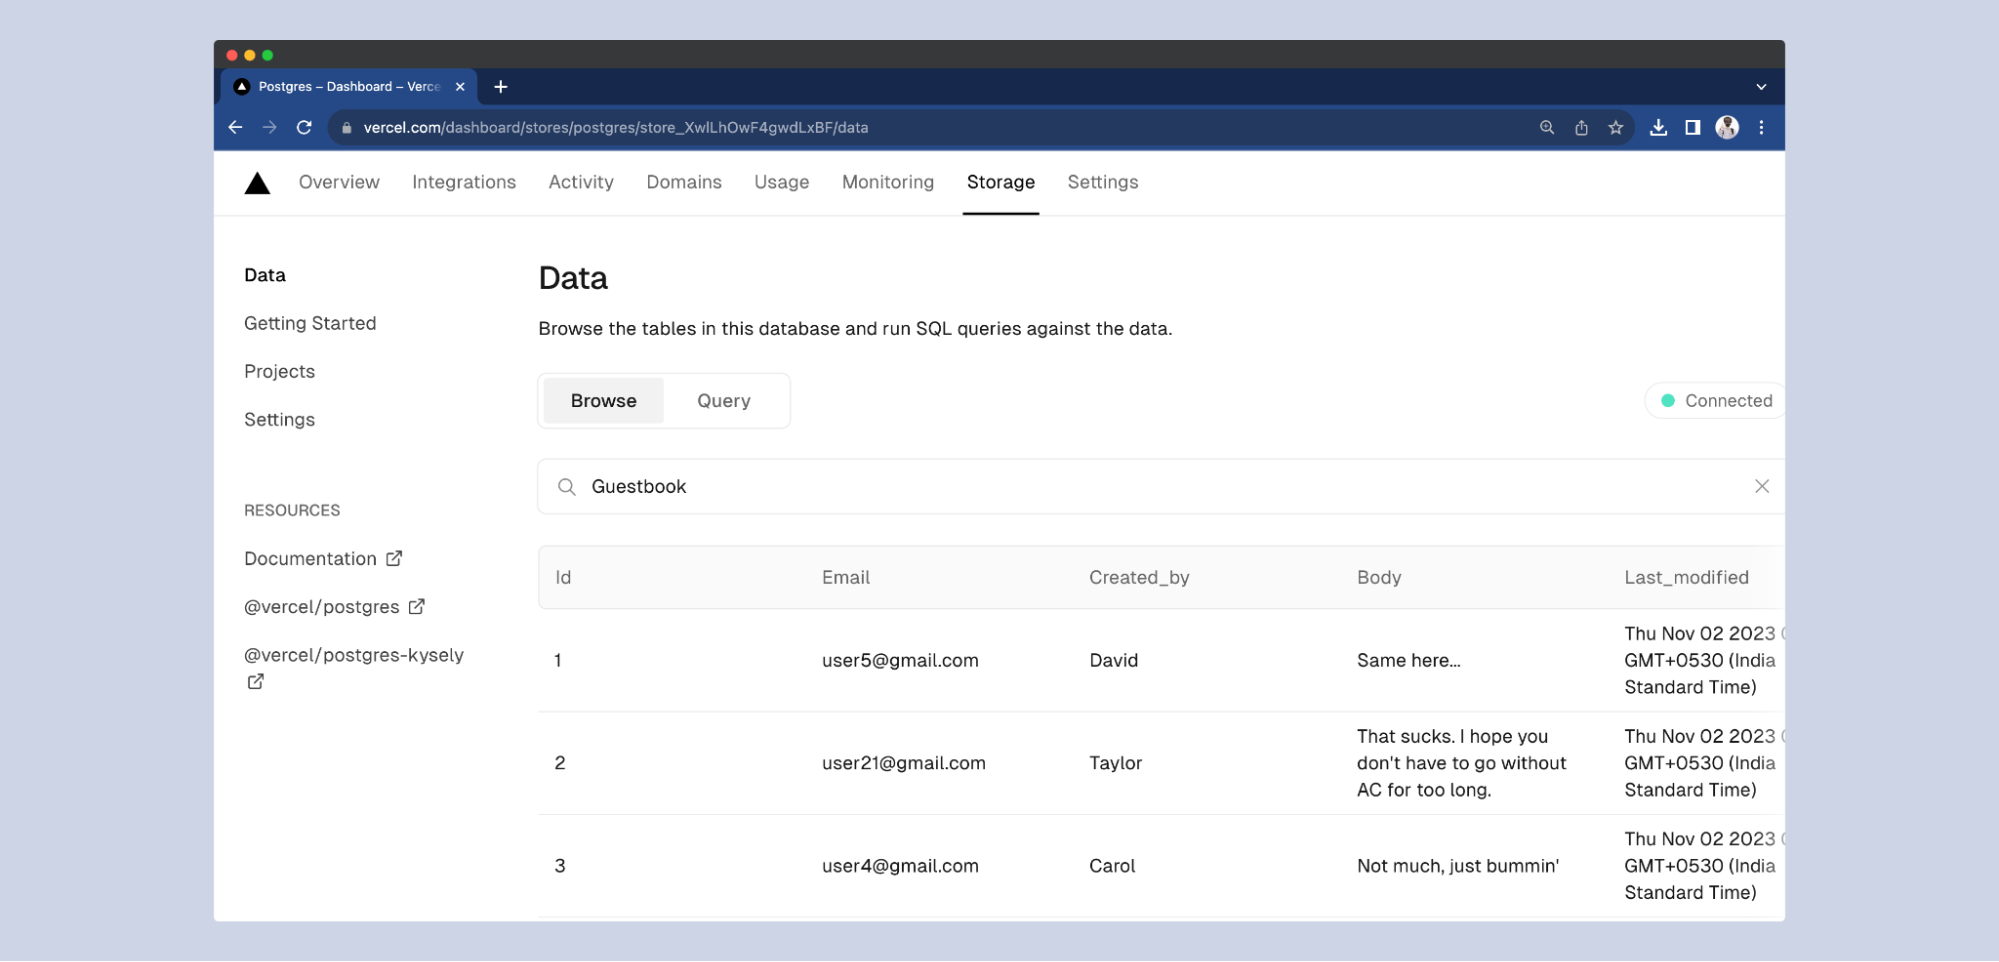
Run npm run dev to start the server and log in with your GitHub. Then, add some entries using the form. You'll find them in the "Browse" tab under the "Data" section in the Vercel dashboard.
Displaying guestbook entries
You can run the SQL command from the Next.js app and display all the data in the page. Uncomment the <GuestbookEntries /> in page.tsx and create this component down after the existing components in the file.
In the GuestbookEntries component, we first fetch all the entries from the database. The <Suspense> component will first display the fallback (loading) UI while the entries are loading. Once the entries are ready, we instantly display them on the page along with the form for adding new entries.
Fill out the form and add your entries. You'll see them appear right away, no need to refresh. If anything goes wrong, check out the source code or use Google to troubleshoot.
Deployment
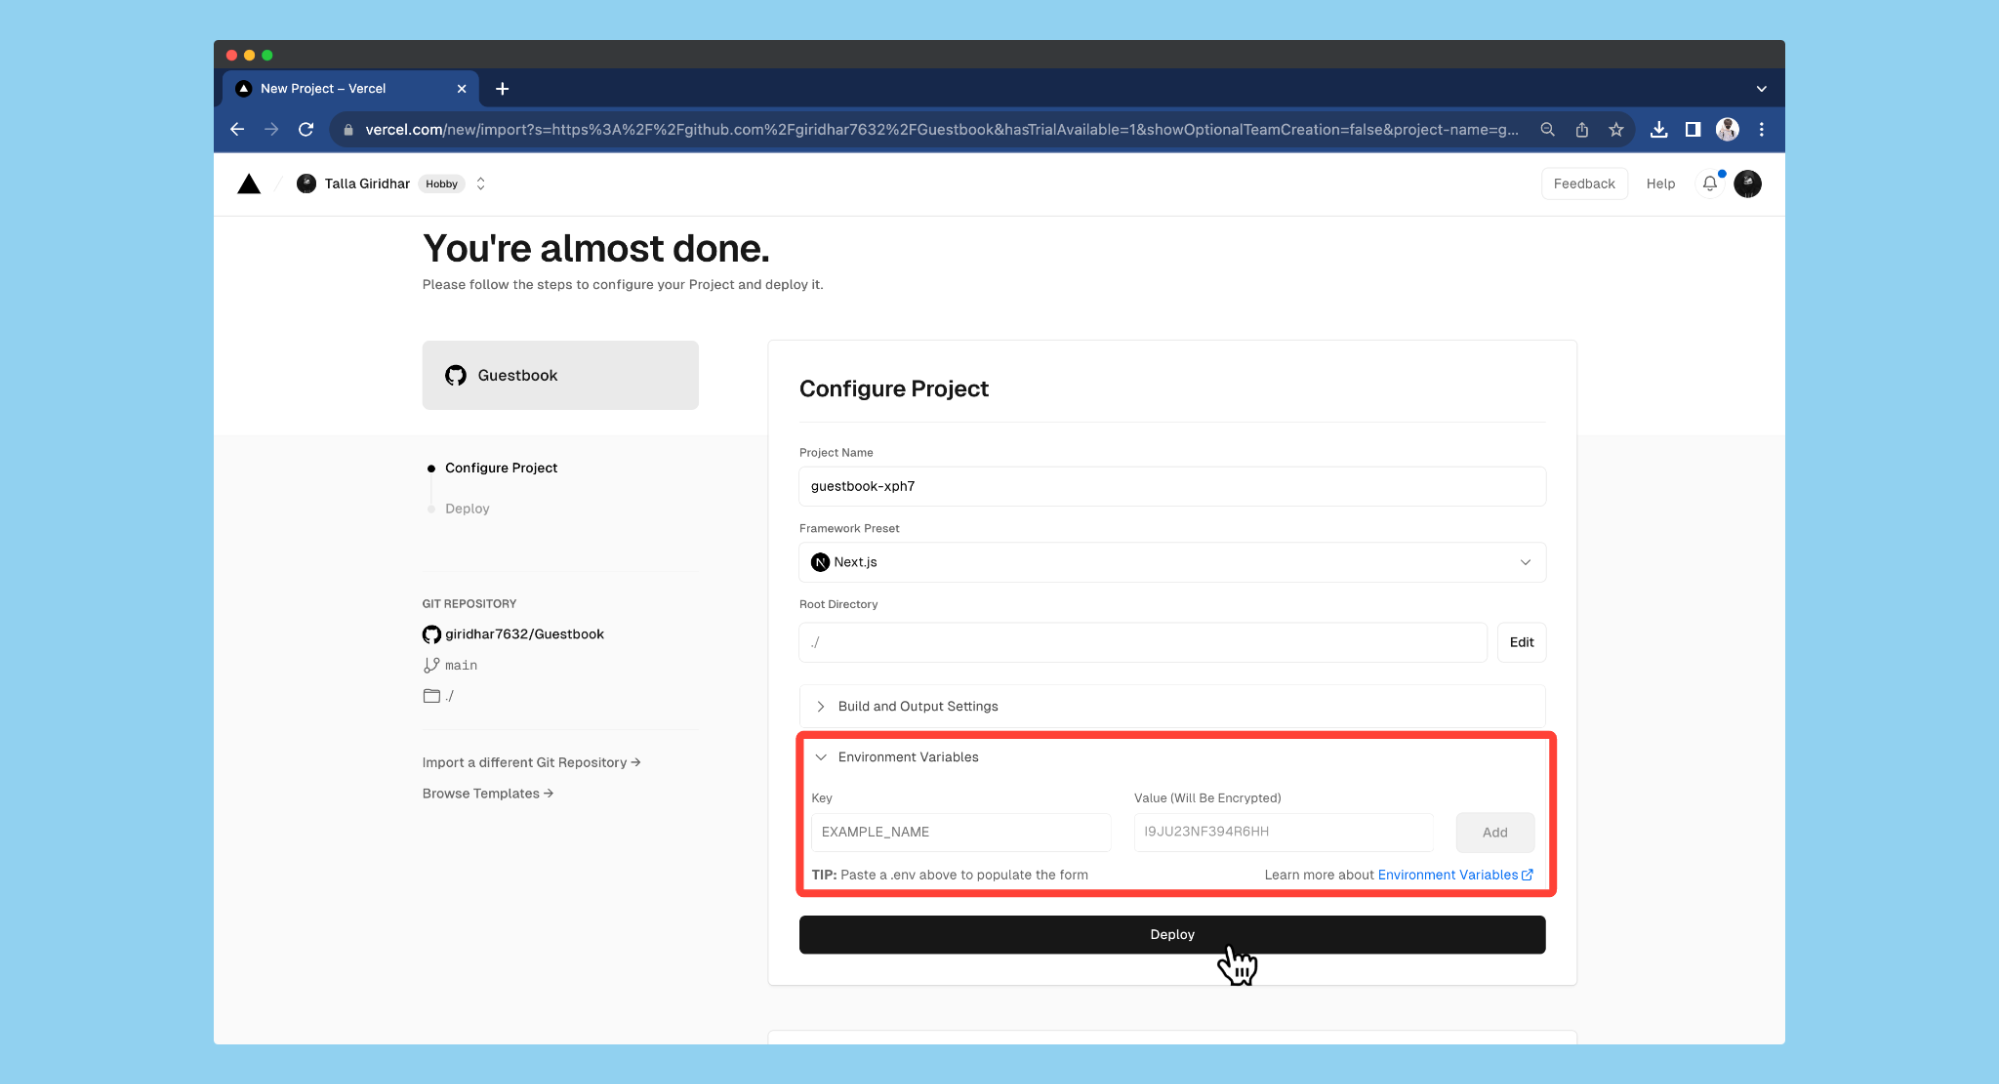
Once you're happy with your code, commit and push it to a GitHub repository. Then, let's deploy it to the world. Vercel offers a free 'Hobby' plan for deploying Next.js apps. Go to the link: vercel.com/new. If you've already connected your GitHub account, you'll see your code ready to be deployed.

"Import" the project from the list and paste the contents of your .env file in the "Environment variables" tab. Finally, click on "Deploy" to see your app live in a few minutes.
This app can be your wedding guestbook, a feedback hub for your business, or just a fun way to connect with friends. Try mine here and share your thoughts.
Conclusion
In conclusion, the full-"Vercel" stack provides a developer-friendly way to easily create full-stack web applications. It provides a full set of tools you need - Next.js for frontend, Serverless functions and Storage for backend, and easy cloud hosting for deployment. Next.js, with its new features like 'app router' and 'server actions,' simplifies the implementation of server rendering using React server components.
The Vercel serverless functions and PostgreSQL database provide a simple way to build a scalable backend for your apps. You can also deploy your app to the internet using Vercel's free hobby plan. Finally, Vercel takes the complexity out of full-stack development, letting you focus on what matters - creating amazing apps!