Knowledge Hub
Choosing the best rendering strategy for your Next.js app
Next.js is a powerful framework that allows you to create modern and scalable web applications using React. One of the key features of Next.js is that it supports multiple rendering strategies, which are Client Side Rendering (CSR), Server Side Rendering (SSR), and Static Site Generation (SSG). These strategies determine how and when your web pages are rendered, which can affect the performance, SEO, and user experience of your application. In this tutorial, you will learn about each rendering strategy’s differences, benefits, and trade-offs, and how to choose the best one for your Next.js pages. You will also see some practical examples of implementing each strategy in your Next.js project. By the end of this tutorial, you will have a solid understanding of the rendering options available in Next.js, and how to use them in your web applications.
What we are building
This tutorial will show you how to use different rendering strategies in Next.js 14 by creating a website that fetches and displays GitHub repositories. Each repository will have a card with some basic details, and you can click on it to see more information on a separate page. You can check out the final result here: next-js-rendering-strategies.vercel.app. The website has five navigation menus: CSR, CSR-SWR, SSR, SSG, and Suspense. Each navigation item illustrates a different rendering strategy in next.js.
You can find the source code for this project on GitHub: github.com/bejamas/next.js-rendering-strategies. Feel free to clone it and use it as a reference for this tutorial.
Prerequisites
You will learn how to create a Next.js app with TypeScript and the App Router. The App Router is a new feature in Next.js 13 that enables you to use React Server Components, which are faster and more flexible than traditional React components. Next.js recommends using the App Router instead of Page Router for new projects to leverage React’s latest features.
To follow this tutorial, you should have some basic knowledge of TypeScript, React, HTML, and CSS, as well as familiarity with Node.js and npm.
Setting up Next.js with an app router
To get started, you need to install Next.js using the following command:
npx create-next-app@latestNext, you will be prompted a series of questions on your CLI. Use the answers below to respond to these prompts:
√ What is your project named? ... nextjs-rendering-stratetgies
√ Would you like to use TypeScript? ...  Yes
√ Would you like to use ESLint? ... Yes
√ Would you like to use Tailwind CSS? ... No
√ Would you like to use `src/` directory? ... Yes
√ Would you like to use App Router? (recommended) ... Yes
√ Would you like to customize the default import alias (@/*)? ... No
Creating the Card and Details components
The Card and Details components are reusable components that will be used to render the csr, csr-swr, ssr, suspense and ssg examples in the tutorial.
Before we proceed, you can use the styles I wrote for this demo and add them to your src/app/global.css.
In your src directory, create a new folder called components. Open up the folder and create a new file called Card.tsx. The Card.tsx file will contain the Card component that will be used to render each repository. Open up the Card.tsx file and add the following code to it:
import Link from "next/link";
interface CardProps {
name: string;
key: string;
id: string;
avatarURL: string;
description: string;
language: string;
size: number;
openIssues: number;
starGazersCount: number;
owner: string;
directory: "csr" | "ssr" | "ssg" | "csr-swr" | "suspense";
}
const Card = ({
name,
id,
avatarURL,
description,
language,
size,
openIssues,
starGazersCount,
owner,
directory,
key,
}: CardProps) => {
return (
<Link href={`/${directory}/details/${owner}/${name}`}>
<section className="card" id={id} key={id}>
<div className="card-header">
<img src={avatarURL} alt={name} />
</div>
<div className="card-body">
<div className="labels-container">
{language ? <h6 className="label">{language}</h6> : null}
<h6 className="label">{Math.round(size / 1000)}kb</h6>
</div>
<h4 className="title">{name.split("-").join(" ")}</h4>
<p>{description}</p>
</div>
<div className="card-footer">
<div className="icon-container">
<span className="icon">★</span>: <p> {starGazersCount}</p>
</div>
<div className="icon-container">
<span className="icon"> ☉</span>:<p> {openIssues}</p>
</div>
</div>
</section>
</Link>
);
};
export default Card;The Card component takes a set of properties (CardProps) to customize the content displayed on the card. Here’s a summary:
name: the name of the repositoryid: unique identifier for the repositoryavatarURL: URL for the repository owner’s avatar imagedescription: description of the repositorylanguage: programming language used in the repositorysize: size of the repository in kilobytesopenIssues: number of open issues in the repositorystarGazersCount: number of users who have starred the repositoryowner: owner or author of the repositorydirectory: a string literal with values ‘csr’ or ‘ssr’ or ‘ssg’ or ‘csr-swr’ or ‘suspense’. Since theCardcomponent is intended for reuse in different directories, thedirectoryprop helps customize the URL structure based on where thedetailscomponent is placed. For example, if thedirectoryis ‘csr’, the URL will be/csr/details/${owner}/${name}. More on this later.
Next, you will create another reusable component called Details that will be used to fetch and render the details of a repository. Go to the src/components directory and create a new file called Details.tsx. This component will be used to render the details of a repository. Open it up and add the following code to it:
import React from "react";

interface DetailsProps {
  createdAt: string;
  topics: string[];
  name: string;
  avatarUrl: string;
  description: string;
  homepage: string;
  stargazersCount: number;
  language: string;
  watchersCount: number;
  visibility: string;
  forks: number;
  openIssues: number;
  defaultBranch: string;
}

const Details: React.FC<DetailsProps> = ({
  createdAt,
  topics,
  name,
  avatarUrl,
  description,
  homepage,
  stargazersCount,
  language,
  watchersCount,
  visibility,
  forks,
  openIssues,
  defaultBranch,
}) => {
  let dateString = createdAt;

  let originalDate = new Date(dateString);

  let formattedDate = `${originalDate.getDate().toString().padStart(2, "0")}-${(
    originalDate.getMonth() + 1
  )
    .toString()
    .padStart(2, "0")}-${originalDate.getFullYear()}`;

  return (
    <>
      <section className="details-container">
        <h1 className="details-title">{name.split("-").join(" ")}</h1>
        <p className="date">{formattedDate}</p>

        <img src={avatarUrl} alt={name.split("-").join(" ")} />

        <div className="table-container">
          <table>
            <tbody>
              <tr>
                <td>
                  <h4>Description:</h4>
                </td>
                <td>
                  <p>{description}</p>
                </td>
              </tr>
              <tr>
                <td>
                  <h4>Homepage:</h4>
                </td>
                <td>
                  <p>{homepage}</p>
                </td>
              </tr>
              <tr>
                <td>
                  <h4>Stargazers Count:</h4>
                </td>
                <td>
                  <p>{stargazersCount}</p>
                </td>
              </tr>
              <tr>
                <td>
                  <h4>Language:</h4>
                </td>
                <td>
                  <p>{language}</p>
                </td>
              </tr>
              <tr>
                <td>
                  <h4>Watchers Count:</h4>
                </td>
                <td>
                  <p>{watchersCount}</p>
                </td>
              </tr>
              <tr>
                <td>
                  <h4>Open Issues Count:</h4>
                </td>
                <td>
                  <p>{openIssues}</p>
                </td>
              </tr>
              <tr>
                <td>
                  <h4>Visibility</h4>
                </td>
                <td>
                  <p>{visibility}</p>
                </td>
              </tr>
              <tr>
                <td>
                  <h4>Forks</h4>
                </td>
                <td>
                  <p>{forks}</p>
                </td>
              </tr>
              <tr>
                <td>
                  <h4>Open Issues</h4>
                </td>
                <td>
                  <p>{openIssues}</p>
                </td>
              </tr>
              <tr>
                <td>
                  <h4>Default Branch</h4>
                </td>
                <td>
                  <p>{defaultBranch}</p>
                </td>
              </tr>
              <tr>
                <td>
                  <h4>Topics:</h4>
                </td>
                <td>
                  <div className="topics-container">
                    {topics.map((topic, index) => (
                      <p key={index} className="topic">
                        {topic}
                      </p>
                    ))}
                  </div>
                </td>
              </tr>
            </tbody>
          </table>
        </div>
      </section>
    </>
  );
};

export default Details;
The code above defines a React component named “Details” intended for rendering repository information. The Details component takes in a set of props through the DetailsProps interface. These props include various data about a repository, such as creation date, topics, name, avatar URL, description, homepage, stargazers count, language, watchers count, visibility, forks, open issues count, and default branch. The component uses tables to display the contents.
After that, you will create a component that will be rendered whenever a component is loading. Inside the src/components directory, create a new file called Loading.tsx, and add the following code to it:
const Loading = () => {
  return (
    <>
      <section className="loading-container">
        <h2 className="">Loading...</h2>
      </section>
    </>
  );
};
export default Loading;
Client-side rendering in Next.js
Client-side rendering (CSR) in Next.js refers to the approach where the initial rendering of a web page is done on the client side (in the user’s browser) using JavaScript. In a CSR setup, the server sends a minimal HTML document to the client, and the client-side JavaScript then takes over, fetching data and rendering the page content dynamically. Instead of waiting for the server to send the full HTML document, the client (your browser) receives a lightweight HTML skeleton and then fills the rest of the page with data and content fetched by JavaScript. Once the initial page has been loaded, moving to other pages on the same website is usually faster.
Client components in Next.js
In Next.js, you can use CSR by creating Client Components, which are React components that have the “use client” directive at the top of the file. They can access browser APIs, state, and effects, and are pre-rendered on the server for faster initial loading.
Open the src/app directory, and create a new folder called csr. Inside the csr directory, create a new file called page.tsx and add the following code to it:
"use client";

import { useEffect, useState } from "react";
import Card from "@/components/Card";
import Loading from "@/components/Loading";
export interface Repo {
  owner: {
    avatar_url: string;
    login: string;
  };
  name: string;
  description: string;
  language: string;
  size: number;
  open_issues: number;
  id: string;
  stargazers_count: number;
}


const CSRuseEffect = () => {
    const [repos, setRepos] = useState<Repo[]>([]);
    const [loading, setLoading] = useState(true);
  useEffect(() => {
    const fetchRepos = async () => {
        try {
            const response = await fetch(
                "https://api.github.com/search/repositories?q=stars:>1&sort=stars&order=desc&per_page=12"
            );
            const data = await response.json();
            setRepos(data.items);
        } catch (error) {
            console.error("Error fetching GitHub repositories:", error);
        }
        finally {
            setLoading(false)
        }
    };
    fetchRepos();
  }, []);
    if (loading) {
        return <Loading />
    }
  return (
    <>
      <section className="main-section">
        {repos.map((repo) => (
            <Card
            key={repo.id}
            avatarURL={repo.owner.avatar_url}
            name={repo.name}
            description={repo.description}
            language={repo.language}
            size={repo.size}
            openIssues={repo.open_issues}
            id={repo.id}
            starGazersCount={repo.stargazers_count}
            owner={repo.owner.login}
            directory="csr"
          />
        ))}
      </section>
    </>
  );
};

export default CSRuseEffect;
In the code above, the CSR component fetches and displays the 12 most popular GitHub repositories using the Card component that was created earlier. It starts by rendering the Loading component. Then, once the data is fetched, it re-renders and displays the data. The use client directive at the top of the file tells Next.js to render this component on the client, where it can use React state, effects, and browser APIs. In the Repo interface, we define the type of repository object. It has the following properties: owner, name, description, language, size, open_issues, id, and stargazers_count.
Next, you will create a page that will be used to display the details of each repository once a user clicks on them and use dynamic routing to generate a route for each one of them.
Dynamic routing in Next.js
Dynamic routing in Next.js is a way of creating flexible and dynamic web pages that can change depending on the data or parameters that are passed to them. For example, if you have a blog site, you might want to have a different page for each blog post, with a unique URL that contains the post title or slug. To achieve this, you can use Dynamic Routes, which are routes that have a dynamic segment in their file or folder name, such as [slug] or [id]. These segments can be params prop or the useRouter hook, depending on whether you are using the Client Side Rendering or Server Side Render.
In this tutorial, you will learn how to use Dynamic Routes to create a details page for each GitHub repository that you fetch from the API. When a user clicks on a repository card, they are taken to a page that has a URL like /csr/details/owner/name or /ssr/details/owner/name, where owner and name are the dynamic segments that represent the repository owner and name. These segments are used to fetch the specific data for that repository and render it on the page. This way, you can have a customized and interactive page for each repository, without having to create a separate file for each one.
In the csr directory, create the following folders: details/[owner]/[repo].
The directory structure has three parts:
details: this is a folder that represents a route segment. It means that the URL path will start with/details.[owner]: this is a folder that represents a dynamic route segment. It means that the URL path will have a variable part that corresponds to the owner of the repository.[repo]: this is another folder that represents a dynamic route segment. It means that the URL path will have another variable part that corresponds to the name of the repository.
Inside the [repo] directory, create a new file named route.tsx. Any URL that matches the pattern /details/[owner]/[repo] will be handled in the route.tsx file.
Open up the route.tsx file and add the following code to it:
"use client";

import { useParams } from "next/navigation";
import { useEffect, useState } from "react";

import Details from "@/components/Details";

export interface RepoDetailsData {
  created_at: string;
  topics: string[];
  name: string;
  owner: {
    avatar_url: string;
  };
  description: string;
  homepage: string;
  stargazers_count: number;
  language: string;
  watchers_count: number;
  private: boolean;
  forks_count: number;
  open_issues_count: number;
  default_branch: string;
}

const RepoDetails = () => {
  const params = useParams();
  const owner = params.owner;
  const repo = params.repo;

  const apiUrl = `https://api.github.com/repos/${owner}/${repo}`;
  const [repoData, setRepoData] = useState<RepoDetailsData | null>(null);
  const [loading, setLoading] = useState(true);

  useEffect(() => {
    const fetchRepo = async () => {
      try {
        const response = await fetch(apiUrl);
        if (response.ok) {
          const data: RepoDetailsData = await response.json();
          setRepoData(data);
        } else {
          console.error(
            "Error fetching GitHub repository:",
            response.statusText
          );
        }
      } catch (error) {
        console.error("Error fetching GitHub repository:", error);
      } finally {
        setLoading(false);
      }
    };

    if (owner && repo) {
      setLoading(true);
      fetchRepo();
    }
  }, [owner, repo]);

  return (
    <>
      {loading && <h4>Loading...</h4>}
      {!loading && repoData && (
        <Details
          createdAt={repoData.created_at}
          topics={repoData.topics}
          name={repoData.name}
          avatarUrl={repoData.owner.avatar_url}
          description={repoData.description}
          homepage={repoData.homepage}
          stargazersCount={repoData.stargazers_count}
          language={repoData.language}
          watchersCount={repoData.watchers_count}
          visibility={repoData.private ? "private" : "public"}
          forks={repoData.forks_count}
          openIssues={repoData.open_issues_count}
          defaultBranch={repoData.default_branch}
        />
      )}
    </>
  );
};

export default RepoDetails;
The code above defines a Client Component called RepoDetails that shows the details of a GitHub repository selected by a user. It uses the useParams hook to get the owner and the repo name from the URL. It then fetches the data for the repository from the GitHub API and sets it to the repoData state. The first line, “use client”, is a special directive that tells Next.js that this file is a Client Component. This means that it will be rendered on the browser, not on the server. The useEffect hook triggers the fetching of repository details when the component mounts or when route parameters change. The Details component is conditionally rendered based on the loading state and the availability of repository data. The fetched repository details are passed as props to the Details component for rendering.
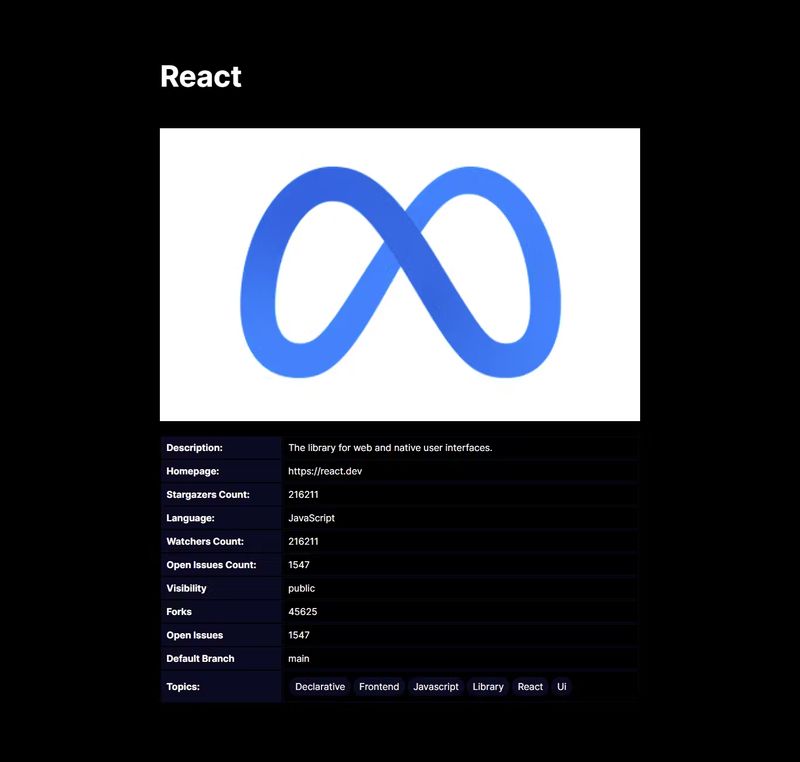
When I clicked on the react repo on the homepage, this is how the URL looks like: http://localhost:3000/csr/details/facebook/reactand here’s how the page is rendered to the screen:
Drawbacks of using useEffect hook for data fetching in CSR
Using useEffect for data fetching can have some drawbacks, such as:
- It may lead to unnecessary re-rendering and performance issues when dependencies are not accurately specified or optimized with other hooks like
useCallbackoruseMemo. - Race conditions or stale data may arise if multiple requests are made without a guaranteed response order or proper handling.
- Memory leaks can occur if the cleanup function is not properly defined or used to cancel requests or unsubscribe from events.
- The possibility of code duplication or increased complexity arises when employing the same data-fetching logic across multiple components or customizing it for different scenarios.
The need for efficient data fetching in CSR by using data fetching libraries like SWR
Data fetching can be challenging because it involves dealing with network latency, errors, caching, synchronization, and updates. Data fetching libraries like SWR can help make data fetching easier and more efficient by providing a set of features and benefits, such as:
- Caching: SWR caches the data that is fetched from the API and reuses it for subsequent requests. It reduces the number of network requests and improves the performance and user experience of the web page.
- Revalidation: SWR automatically revalidates the cached data when there are changes in the data source, such as mutations or updates. It ensures that the data on the web page is always fresh and consistent with the data source.
- Stale-while-revalidate: SWR uses a strategy called stale-while-revalidate, which means that it returns the cached data first, and then revalidates it in the background. It avoids blocking the UI and provides a fast and smooth data-fetching experience.
- Error retries: SWR automatically retries the data fetching when there are errors, such as network failures or server errors. It increases the reliability and resilience of the data-fetching process.
- Real-time updates: SWR supports real-time updates by using WebSocket or other methods to subscribe to the data source and receive updates. It enables the web page to display the latest data without refreshing or polling.
- Hooks-based API: SWR provides a simple and intuitive hooks-based API that makes data fetching easy and declarative. You can use the useSWR hook to fetch data from any API and get the data, error, and loading states as return values. You can also customize the data fetching behavior with various options and parameters.
Updating the CSR code to use SWR instead of useEffect for data fetching
Create a new folder in the src/app directory named csr-swr. Create a new file called page.tsx inside the csr-swr folder and add the following code to it:
"use client";

import useSWR from "swr";
import Card from "@/components/Card";
import { Repo } from "../csr/page";

const fetcher = async (url: string) => {
  const response = await fetch(url);
  const data = await response.json();
  return data;
};

const CSRuseSWR = () => {
  const { data, error } = useSWR(
    "https://api.github.com/search/repositories?q=stars:>1&sort=stars&order=desc&per_page=12",
    fetcher
  );

  if (error) return <div>Failed to load</div>;
  if (!data) return <div>Loading...</div>;

  const repos: Repo[] = data.items;

  return (
    <>
      <section className="main-section">
        {repos.map((repo) => (
          <Card
            avatarURL={repo.owner.avatar_url}
            name={repo.name}
            description={repo.description}
            language={repo.language}
            size={repo.size}
            openIssues={repo.open_issues}
            id={repo.id}
            starGazersCount={repo.stargazers_count}
            owner={repo.owner.login}
            directory="csr-swr"
          />
        ))}
      </section>
    </>
  );
};

export default CSRuseSWR;
The useSWR hook returns an object with two properties: data and error. The data property holds the fetched data or undefined if the data is not ready. The error property holds the error object or undefined if there is no error. The useSWR hook also handles caching, revalidation, and refetching of the data according to the stale-while-revalidate strategy.
Now inside the csr-swr folder, create the following directories: details/[owner]/[repo]. Open the [repo] folder, then create a new file called page.tsx and add the following code to it:
"use client";

import { useParams } from "next/navigation";
import useSWR from "swr";

import Details from "@/components/Details";

export interface RepoDetailsData {
  created_at: string;
  topics: string[];
  name: string;
  owner: {
    avatar_url: string;
  };
  description: string;
  homepage: string;
  stargazers_count: number;
  language: string;
  watchers_count: number;
  private: boolean;
  forks_count: number;
  open_issues_count: number;
  default_branch: string;
}

const fetcher = async (url: string) => {
  const response = await fetch(url);
  if (response.ok) {
    const data: RepoDetailsData = await response.json();
    return data;
  } else {
    throw new Error(response.statusText);
  }
};

const RepoDetails = () => {
  const params = useParams();
  const owner = params.owner;
  const repo = params.repo;

  const apiUrl = `https://api.github.com/repos/${owner}/${repo}`;
  const { data, error } = useSWR(apiUrl, fetcher);

  return (
    <>
      {error && <h4>Failed to load</h4>}
      {!error && !data && <h4>Loading...</h4>}
      {!error && data && (
        <Details
          createdAt={data.created_at}
          topics={data.topics}
          name={data.name}
          avatarUrl={data.owner.avatar_url}
          description={data.description}
          homepage={data.homepage}
          stargazersCount={data.stargazers_count}
          language={data.language}
          watchersCount={data.watchers_count}
          visibility={data.private ? "private" : "public"}
          forks={data.forks_count}
          openIssues={data.open_issues_count}
          defaultBranch={data.default_branch}
        />
      )}
    </>
  );
};

export default RepoDetails;
The code defines a React component called RepoDetails that retrieves details about a GitHub repository using the SWR library for data fetching. The component uses the useParams hook from the “next/navigation” module to extract owner and repository parameters from the URL. It constructs the GitHub API URL based on these parameters and then employs the useSWR hook to fetch data asynchronously.
The fetched data is then conditionally rendered:
- if there is an error during the fetch, an error message is displayed
- if the data is still being fetched, a loading message is displayed
- if there is no error and the data is available, it renders another component called
Detailswith various details extracted from the GitHub API response.
The code also includes a fetcher function to handle the fetching process, and it defines an interface RepoDetailsData specifying the expected structure of the GitHub repository details.
When to use client-side rendering
Client-side rendering (CSR) is particularly well-suited for web pages that demand dynamic, interactive, and real-time updates without the need for frequent full-page reloads. Some examples of web pages that can use client-side rendering are:
Dashboards: One prominent use case for CSR is in dashboards, where users expect a responsive and fluid experience while interacting with various data visualizations and widgets. By rendering content on the client side, dashboards can update specific components dynamically, providing a seamless user experience. For instance, financial dashboards displaying real-time stock prices, analytics dashboards presenting live data trends, or project management dashboards featuring instant progress updates can leverage CSR to enhance user interaction.
Single-Page Applications (SPAs): SPAs are web applications that use client-side rendering as their core design principle. They only load one HTML page and change the content on the fly as users interact with them. Many Social media sites, like Twitter and Facebook, use SPAs to provide a smooth and seamless user experience.
Games: A game web page is a web page that allows users to play games online. Client-side rendering can make the game web page more responsive, interactive, and immersive and support features like sound, graphics, and animations.
Real-time collaboration tools: Another example where client-side rendering shines is in real-time collaboration tools. Applications like collaborative document editors, chat applications, or collaborative project management tools benefit from the ability to update content instantly without disrupting the user’s workflow. Client-side rendering enables these applications to synchronize changes across multiple users in real time, providing a smooth and collaborative user experience.
E-commerce shopping cart: Another compelling use case for client-side rendering is in the context of e-commerce shopping carts. eCommerce platforms benefit significantly from CSR when managing product listings and user carts. As users browse through products, add items to their carts, or update quantities, the application dynamically updates the cart in real time without requiring a server round-trip. This ensures a smooth and engaging shopping experience, allowing users to see changes instantly and make informed purchase decisions.
Pros and cons of client-side rendering
Here are the pros and cons of client-side rendering.
Pros
- Client-side rendering can offer a smooth and seamless user experience, as it does not need to refresh the whole page when switching between different views. It can also add animations, transitions, and interactivity to the user interface. It can make the web application more engaging and appealing to the users.
- Client-side rendering can reduce the server load and processing requirements, as it delegates the rendering task to the client. It can result in lower server costs and improved scalability. The server can focus on providing the data and logic, while the client can handle the presentation and interaction.
- Client-side rendering is ideal for single-page applications, where only the relevant components are changed without refreshing the whole page. It can improve the speed and performance of the application. Single-page applications can also provide a consistent and intuitive user experience, as they mimic the behavior of native applications.
- Developers can concentrate on creating a client-side application separately from the server. This separation of concerns can lead to more organized code and simpler development processes. Developers can also use various JavaScript frameworks, such as React, Angular, Vue, or Ember, to create modular and maintainable code bases for client-side rendering.
- Client-side rendering can use the browser’s caching and offline capabilities, to improve the performance and reliability of the web application. It can also use service workers and progressive web app (PWA) techniques to enable offline access and native-like features. These features can enhance user satisfaction and retention, as well as the accessibility and reach of the web application.
- Client-side rendering provides the advantage of enabling client components to leverage browser APIs such as geolocation or localStorage. This capability allows for the creation of specialized UIs tailored to specific use cases.
Cons
Initial page load time: One of the main drawbacks of CSR is the increased initial page load time. Since the browser has to download the entire JavaScript application before rendering the content, users may experience slower page loads, especially on slower networks or less powerful devices.
SEO challenges: Search Engine Optimization (SEO) can be more challenging with CSR. Search engines may have difficulty crawling and indexing content generated dynamically on the client side, potentially impacting the discoverability of the website’s content.
Accessibility concerns: Users with disabilities may face challenges with client-side rendered applications. Screen readers and other assistive technologies may struggle to interpret dynamically generated content, potentially leading to accessibility issues.
Increased complexity: CSR often involves complex client-side code, which can be harder to develop, test, and maintain. As the complexity of the client-side code increases, so does the likelihood of introducing bugs and performance issues.
Security risks: Client-side rendering introduces security concerns, particularly with the handling of sensitive data on the client side. Developers need to take extra precautions to secure the client-side code and ensure that sensitive information is properly protected.
Limited performance on low-end devices: Devices with limited processing power and memory may struggle to handle the client-side rendering of complex web applications. This can result in a poor user experience for users on low-end devices.
Single page application (SPA) pitfalls: If not implemented carefully, SPAs (which often use client-side rendering) can suffer from issues like slower navigation between pages, memory leaks, and difficulties in handling deep linking.
Server-side rendering in Next.js
Server-side rendering (SSR) is a technique used in web development where the server generates the HTML for a page at the request time and sends it to the client. This is in contrast to client-side rendering (CSR), where the browser is responsible for rendering the page using JavaScript after receiving minimal HTML markup.
When you use SSR with Next.js, the following process typically occurs:
- User makes a request: When a user requests a page from your Next.js application, the server receives the request.
- Server generates HTML: Instead of sending a minimal HTML file with a JavaScript bundle as in traditional React apps, the server executes the React components and generates the HTML for the requested page. It includes any data-fetching logic required for that page.
- HTML is sent to the client: The server sends the fully-rendered HTML to the client as the initial response. It means that users will see content sooner because the HTML is generated on the server, reducing the time before the initial page is displayed.
- JavaScript is loaded: Along with the HTML, the server also sends the JavaScript bundle required for the page. Once the JavaScript is loaded and executed on the client side, it takes over the page, allowing for a seamless, interactive experience.
Before Next.js 13, the primary method for defining routes was through the Pages Router. To use server-side rendering for a page in the Pages Router, you need to export an async function called getServerSideProps. This function can be used to fetch data and render the contents of a page at request time. It is important to note that getServerSideProps does not work inside the App Router. Given that this tutorial is using the latest version of Next.js and App Router, you will be using fetch instead.
React server components (RSC)
React server components (RSC) is a new feature in Next.js 13 that allows you to write UI components that can be rendered and optionally cached on the server. By default, Next.js uses server components which is why you have to add a “use client” directive at the top of a file above your imports to use a client component.
With RSC, you can write UI components that run on the server instead of the browser. This gives you some benefits, such as:
- Making your web app faster and lighter by moving code and data from the browser to the server.
- Getting data from your database or API is faster and easier by running your code on the same machine or network.
- Protecting your data and code from hackers or malicious users by keeping them on the server, where they are harder to access.
RSC is different from the normal React components, which run on the browser. RSC has some restrictions, such as:
- They cannot use browser features, such as
windowordocument. - They cannot use React features that are only for browser components, such as
useStateoruseEffect. - They cannot communicate directly with client components, such as passing props or calling callbacks.
To see SSR in action, open the src/app directory and create another folder called ssr. Inside the ssr folder, create a new file called page.tsx and add the following code to it:
import Card from "../../components/Card";
import { Repo } from "../csr/page";

async function getData() {
  const response = await fetch(
    "https://api.github.com/search/repositories?q=stars:>1&sort=stars&order=desc&per_page=12",
    { cache: "no-store" }
  );

  if (!response.ok) {
    // This will activate the closest `error.js` Error Boundary
    throw new Error("Failed to fetch data");
  }
  const data = await response.json();
  return data.items;
}

const SSRPage = async () => {
  const repos = (await getData()) as Repo[];

  return (
    <>
      <section className="main-section">
        {repos.map((repo) => (
          <Card
            avatarURL={repo.owner.avatar_url}
            name={repo.name}
            description={repo.description}
            language={repo.language}
            size={repo.size}
            openIssues={repo.open_issues}
            id={repo.id}
            starGazersCount={repo.stargazers_count}
            owner={repo.owner.login}
            directory="ssr"
          />
        ))}
      </section>
    </>
  );
};

export default SSRPage;
In this code, the SSRPage component uses SSR to fetch data from the GitHub API and render a list of cards with the repository information.
The code above consists of two parts: a getData function that fetches the data from the GitHub API, and an SSRPage component that renders a list of cards with the repository data.
The getData method fetches the data from the GitHub API at the time of the request, just like the getServerSideProps method in the Pages Router. The inclusion of { cache: "no-store" } as an option in the request signifies that this particular request should be refetched on every request. This option is very important and particularly useful when dealing with data that undergoes dynamic changes or relies on real-time updates. For example, an e-commerce website featuring product listings that undergo regular updates or overseeing an online news portal with articles that change frequently. We will explore the other option (which is also the default option), cache: 'force-cache', when we discuss static site generation (SSG) later in this tutorial.
Server-side rendering and React server components
Server-side rendering and React server components are two ways of rendering web pages using server-side rendering. While SSR renders the whole web page on the server and then sends it to the client, RSC renders only parts of the web page on the server and then sends them to the client. The client then puts the parts together to form the web page. This makes RSC faster, more efficient, and more interactive than SSR. RSC also has some features that SSR does not have, such as rendering parts of the web page as they are ready, choosing which parts of the web page need to be updated, and keeping some data on the server. You will gain a deeper understanding of this concept later in the tutorial, specifically in the section on Streaming with Suspense.
When to use server-side rendering
Here are situations where you might consider using server-side rendering:
Content-heavy websites: These websites have a lot of content to show, such as blogs, news websites, or publishing platforms. SSR can make them faster and smoother by rendering the content on the server before the client sees it.
E-commerce websites: Speed and SEO are vital for e-commerce websites, especially for product listing and detail pages. SSR can help them load faster and rank better by rendering the pages on the server before the client gets them.
Documentation websites: These websites provide information and guidance, such as API documentation and technical documentation. They need to be clear, comprehensive, and accessible. SSR can help improve initial load times and SEO for these websites, making them easier to find and use.
Some pages in Single Page Applications (SPAs): SPAs are web applications that load a single HTML page and update it dynamically as the user interacts with it. Some pages need to be fast and SEO-friendly, such as login and authentication pages and landing pages. SSR can help enhance these pages by rendering them on the server before sending them to the client.
Pros and cons of server-side rendering
Here are the pros and cons of server-side rendering.
Pros
- Boosting your SEO: Search engines can easily index your content if it is already in the HTML response. It can improve your ranking and visibility on the web. On the other hand, if your content is generated by JavaScript on the client side, search engines may miss it or have trouble crawling it.
- Enhancing your performance: SSR can speed up your initial page load time, which is crucial for user satisfaction and retention. Users with slow internet connections or low-end devices will appreciate the faster delivery of your content. SSR reduces the amount of work that the browser has to do, as the server already does the heavy lifting.
- Improving your social media sharing: When you share a link on social media platforms, they often use web crawlers to fetch and display information about the link. SSR ensures that these crawlers get the relevant content, such as the title, description, and images of your page. It can increase the chances of your link being clicked and shared by others.
- Supporting progressive enhancement: SSR can be combined with client-side JavaScript to create a progressive enhancement strategy. It means that you provide the basic content and functionality through SSR, and then add more features and interactivity through JavaScript. This way, you can cater to different users and browsers, and ensure that everyone gets a functional experience, even if JavaScript is disabled or not fully supported.
- Reducing the time to first byte (TTFB): TTFB is the time it takes for the browser to receive the first byte of data from the server. A lower TTFB can improve the perceived loading time for users, as they see something happening on the screen sooner. SSR can help lower the TTFB, as the server sends the pre-rendered HTML as soon as possible.
- Increasing your security: SSR can help protect your website from certain security threats by keeping sensitive logic and data on the server side. This way, you can limit the exposure of critical information to the client, and prevent malicious attacks or data breaches.
Cons
Server-side rendering (SSR) has its advantages, but like any technology, it also has its drawbacks. Here are some cons of server-side rendering.
Limited client-side interactivity: SSR is better suited for static or semi-dynamic content. If your application requires extensive client-side interactivity and frequent updates, a full client-side rendering (CSR) approach may be more appropriate. SSR might not be as efficient in handling complex client-side interactions because it involves round-trips to the server for each user interaction.
Elevated server load and costs: As the server takes on the responsibility of rendering pages, it must manage a greater number of requests, resulting in an augmented server load. This heightened demand may necessitate more powerful servers or additional server instances, leading to increased infrastructure costs.
Delayed initial page load time: While SSR can enhance perceived performance and SEO, the initial page load time may be slower compared to an application solely rendered on the client side. This delay is attributed to the server’s need to generate HTML for each request, which consumes more time than delivering a pre-compiled JavaScript bundle.
Increased development complexity: SSR introduces added complexity to the development process, particularly concerning state management, routing, and data fetching. Developers must navigate both server-side and client-side considerations, resulting in a more intricate and sophisticated codebase.
Static site generation (SSG) in Next.js
In Next.js, static site generation (SSG) is a powerful rendering feature that allows you to generate static HTML pages at build time. It can improve the performance and loading speed of your website. This HTML will then be reused on each request. It can be cached by a CDN.
In Next.js, you can use static generation to create static pages, with or without fetching any data. You will see how it works in both cases.
Static site generation (SSG) without data
By default, Next.js pre-renders pages using static generation without fetching data. Here’s an example of an About Us page:
const AboutUs = () => {
  return (
    <div>
      <h2>About Us</h2>
      <p>
        Welcome to our website! We are a team of passionate individuals
        dedicated to providing valuable information and services.
      </p>
      <p>
        Lorem ipsum dolor sit amet, consectetur adipiscing elit. Quisque
        consequat nisl vitae lacus consequat, ac dictum tortor eleifend. Proin
        aliquet tincidunt quam, a feugiat justo cursus id.
      </p>
      <p>
        Nulla facilisi. Praesent at mauris eu odio consequat consectetur. Ut
        dapibus felis ac augue ultrices, ac facilisis nibh condimentum.
      </p>
    </div>
  );
};

export default AboutUs;
The component above does not involve fetching any data and will be statically generated on the server by Next.js.
Static site generation (SSG) with data
If you are using the Page Router and your page content relies on external data, use the [getStaticProps](<https://nextjs.org/docs/pages/building-your-application/data-fetching/get-static-props>) function. This function runs at build time, allowing you to retrieve external data and pass it as props to the page during pre-rendering. In the App Router, which is being used in this tutorial, the getStaticProps is ineffective. Instead, you will use the fetch API to retrieve the data, with the { cache: 'force-cache' }option. The { cache: 'force-cache' } is the default option and can be omitted. By using the { cache: 'force-cache' }option, the browser checks its HTTP cache for a corresponding request. If a match is found, whether it’s fresh or stale, the cached data is returned. In the absence of a match, the browser will make a normal request and update the cache with the downloaded resource.
Open the src/app directory and create a new folder called ssg. Inside the new folder, create a new file called page.tsx and add the following:
import Card from "../../components/Card";
import { Repo } from "../csr/page";

async function getData() {
  const response = await fetch(
    "https://api.github.com/search/repositories?q=stars:>1&sort=stars&order=desc&per_page=12",
    { cache: "force-cache" } // The { cache: 'force-cache' } is the default option and can be omitted.
  );

  if (!response.ok) {
    // This will activate the closest `error.js` Error Boundary
    throw new Error("Failed to fetch data");
  }
  const data = await response.json();
  return data.items;
}

const SSGPage = async () => {
  const repos = (await getData()) as Repo[];

  return (
    <>
      <section className="main-section">
        {repos.map((repo) => (
          <Card
            avatarURL={repo.owner.avatar_url}
            name={repo.name}
            description={repo.description}
            language={repo.language}
            size={repo.size}
            openIssues={repo.open_issues}
            id={repo.id}
            starGazersCount={repo.stargazers_count}
            owner={repo.owner.login}
            directory="ssg"
          />
        ))}
      </section>
    </>
  );
};

export default SSGPage;
The only thing that sets this code apart from the SSR code is the { cache: “force-cache” } option, which you can leave out because it is the default. This small difference has a big impact. The browser will keep this request in the cache until you invalidate it. This can speed up your app by reducing the network traffic and the loading time. But this also means that the data may be outdated if the server changes its response. That’s why you should use SSG for data that doesn’t change much like blog posts, product details, website landing pages, etc.
Use cases for static site generators
Portfolio sites: Artists, photographers, writers, or other creatives can use SSGs to build their individual or portfolio websites. This makes it easy to update and maintain their websites without complex server setups.
Landing pages: Marketing landing pages that have one or more pages and do not need dynamic content updates can be efficiently built using static site generators. They load faster and are easy to deploy.
Event websites: Websites for conferences, meetups, or events that provide static information about schedules, speakers, and other details are well-suited for SSGs. They can take advantage of the simplicity and speed of static site generation.
Company websites: Small to medium-sized businesses that mainly need a website with static information about their services, team, and contact details can use an SSG. It reduces maintenance and hosting costs.
Portfolio websites for developers: Developers can use SSGs to create their websites or portfolios. They can display their projects, skills, and experiences without a dynamic back end.
News and magazine sites: Websites that serve static articles and news content can use SSGs. Content can be written in Markdown or a similar markup language, and the site can be regenerated whenever new articles are added.
Knowledge bases: Websites that serve as knowledge bases or wikis, providing static information on various topics, can use SSGs. The content is easy to maintain, and version control can be used for collaborative editing.
E-commerce product catalogs: Online stores with a relatively static product catalog (where products don’t change frequently) can use an SSG. It simplifies the development and hosting process.
Documentation sites: Software projects, APIs, or other products often have websites that serve as documentation. These websites are usually static and can be created using tools like MkDocs or Docusaurus.
Blogs: SSGs are useful for personal or company blogs that mainly publish and update content.
Pros and cons of static site generation
Static site generation has its advantages and disadvantages, which vary depending on what you want and need. Here are some examples.
Pros
Speed: Static sites are usually faster because they don’t need server-side processing for each user request. The content is ready-made and can be sent directly from a content delivery network (CDN), which lowers the delay.
Security: Static sites are more secure from hacking attacks because they have no database or backend that can be breached. They also do not need to store sensitive data or user credentials.
Cost: Hosting static sites is often cheaper than hosting dynamic sites, especially when using services like CDNs for global content delivery.
SEO-friendly: Static sites are more SEO-friendly because search engines can easily find and index the content. Fast loading times also help with search engine rankings.
Simplicity: Static sites are simpler to develop, deploy, and maintain. There is no need for server-side databases or complex server configurations.
Cons
Not ideal for real-time applications: SSGs are not well-suited for applications requiring real-time data updates or live collaboration features. Dynamic server-side rendering or client-side frameworks may be more appropriate in such cases.
Increased complexity for e-commerce: Managing dynamic content like inventory, pricing, and real-time order updates in e-commerce scenarios may pose challenges with SSGs.
Dependency on build process: Content updates require regeneration of the entire site, which might be cumbersome for large sites. This process could impact the ability to make quick, incremental changes.
Streaming data with Suspense in Next.js
Streaming in Next.js
Streaming is a technique that allows you to send parts of a page from the server to the client as they are ready, without waiting for all the data to load before any UI can be shown.
To understand how streaming works, let’s imagine a dashboard with various components, such as a navigation bar, graphs, charts, tables, and other components. Each component might need data from different API sources to render, which means all the components might not load at the same time. For example, the navigation bar might need data from the user’s profile, the graphs might need data from the analytics service, the charts might need data from the sales service, and so on.
Without streaming, the user would have to wait for all the data to load before seeing any UI. This could result in a long loading time and a poor user experience. The user might get frustrated and leave the page, or lose interest in the content.
With streaming, the user can see and interact with the components that are ready instead of waiting for everything to load together. For example, the navigation bar might load first, then the graphs, then the charts, and so on. The user can see the progress of the page loading and interact with the available components. This could result in a faster loading time and a better user experience. The user might feel more engaged and interested in the content.
Suspense in React
Suspense in React is a feature that lets you create a fallback UI for components that are waiting for some data or code to load. It helps you improve the user experience by showing and enabling interaction with parts of the page sooner. Suspense works with React’s concurrent rendering mode, allowing React to render multiple components simultaneously without blocking the main thread.
You can use Suspense in two ways in Next.js:
- Page-level usage: You can use suspense at the page level, with the
loading.tsxfile, which automatically creates a Suspense boundary for the whole page and shows the fallback UI while the page content loads. You will use this method when fetching the details of a Repo in this tutorial. - Component-level usage: You can also use Suspense for specific components, with the
<Suspense>component, which lets you create custom Suspense boundaries for parts of your UI that depend on dynamic data or code. You will use this method when fetching different repositories with different sortings in this tutorial.
Installing a loading skeleton library
A loading skeleton is a version of the user interface that does not include the actual content. Instead, it mimics the page layout by displaying its elements similar to the actual content as it loads and becomes available.
In the next part, you will create a skeleton that will be used to mimic the Card.tsx component. Before then, run the following command to install react-loading-skeleton package:
npm install react-loading-skeletonInside the components directory, create a new file called CardSkeleton.tsx and add the following code to it:
import Skeleton from "react-loading-skeleton";
import "react-loading-skeleton/dist/skeleton.css";
const CardSkeleton = () => {
  return (
    <>
      <section className="card">
        <div className="card-header">
          <Skeleton height={"100%"} baseColor="#202020" highlightColor="#444" />
        </div>
        <div className="labels-container" style={{ marginTop: 12 }}>
          <Skeleton
            className="label"
            width={"90px"}
            baseColor="#202020"
            highlightColor="#444"
          />
          <Skeleton
            className="label"
            width={"90px"}
            baseColor="#202020"
            highlightColor="#444"
          />
        </div>
        <Skeleton
          style={{ marginTop: 6, marginBottom: 6 }}
          count={1}
          width={"100%"}
          height={"20px"}
          baseColor="#202020"
          highlightColor="#444"
        />
        <Skeleton
          count={4}
          width={"100%"}
          baseColor="#202020"
          highlightColor="#444"
        />
        <div className="labels-container">
          <Skeleton
            className="label"
            width={"90px"}
            baseColor="#202020"
            highlightColor="#444"
          />
          <Skeleton
            className="label"
            width={"90px"}
            baseColor="#202020"
            highlightColor="#444"
          />
        </div>
      </section>
    </>
  );
};
export default CardSkeleton;
This code will use the react-loading-skeleton library to create a skeleton UI that resembles the Card component. The skeleton UI will have the same layout and dimensions as the Card component, but with a dark background and a lighter highlight color. The skeleton UI will show the user that the data is loading and provide a better user experience. After creating the skeleton UI, you will proceed to build different components that will fetch and display different repositories from GitHub API, each with a different sorting option.
Create a new folder called suspense in src/app directory and add a new TS file named SortByForks.tsx to it, then add the following code to the file:
import Card from "@/components/Card";
import { Repo } from "../csr/page";

const delay = (ms: number) => new Promise((resolve) => setTimeout(resolve, ms));
async function getData() {
    await delay(2000);
  const response = await fetch(
    "https://api.github.com/search/repositories?q=sort=forks&order=desc&per_page=3",
    { cache: "no-store" }
  );

  const data = await response.json();
  return data.items;
}

const SortByForks = async () => {
  const repos = (await getData()) as Repo[];

  return (
    <>
      <section className="main-section">
        {repos.map((repo) => (
          <Card
            avatarURL={repo.owner.avatar_url}
            name={repo.name}
            description={repo.description}
            language={repo.language}
            size={repo.size}
            openIssues={repo.open_issues}
            id={repo.id}
            starGazersCount={repo.stargazers_count}
            owner={repo.owner.login}
            directory="suspense"
          />
        ))}
      </section>
    </>
  );
};

export default SortByForks;
Notice the delay function that was created here:
const delay = (ms: number) => new Promise((resolve) => setTimeout(resolve, ms));This function was deliberately added to delay the fetch so that you can see the loading skeleton before the SortByForks component renders. Otherwise, the API fetch and the Card rendering might be too quick for the skeleton component to show.
This Query Parameter: per_page=3 in the API URL:
const response = await fetch(
    "https://api.github.com/search/repositories?q=sort=forks&order=desc&per_page=3",
    { cache: "no-store" }
  );
indicates that the result will include only 3 repositories and the Query Parameter: q=sort=forks part indicates that the search results should be sorted based on the number of forks each repository has. You are going to create four more components like this.
Next, you will create another component that will be used to render 3 repos sorted by the number of open issues in the repository. Within the suspense directory, create another file named SortByIssues.tsx and add the following code to it:
import Card from "@/components/Card";
import { Repo } from "../csr/page";

const delay = (ms: number) => new Promise((resolve) => setTimeout(resolve, ms));
async function getData() {
    await delay(4000);
  const response = await fetch(
    "https://api.github.com/search/repositories?q=sort=issues&order=desc&per_page=3",
    { cache: "no-store" }
  );

  const data = await response.json();
  return data.items;
}

const SortByIssues = async () => {
  const repos = (await getData()) as Repo[];

  return (
    <>
      <section className="main-section">
        {repos.map((repo) => (
          <Card
            avatarURL={repo.owner.avatar_url}
            name={repo.name}
            description={repo.description}
            language={repo.language}
            size={repo.size}
            openIssues={repo.open_issues}
            id={repo.id}
            starGazersCount={repo.stargazers_count}
            owner={repo.owner.login}
            directory="suspense"
          />
        ))}
      </section>
    </>
  );
};

export default SortByIssues;
After that, you will create a new component that shows 3 repos sorted by pull requests.
In the suspense directory, make a file named SortByPullRequests.tsx and put the following code inside it:
import Card from "@/components/Card";
import { Repo } from "../csr/page";

const delay = (ms: number) => new Promise((resolve) => setTimeout(resolve, ms));
async function getData() {
    await delay(10000);
  const response = await fetch(
    "https://api.github.com/search/repositories?q=stars:>1&sort=pr&order=desc&per_page=3",
    { cache: "no-store" }
  );

  const data = await response.json();
  return data.items;
}

const SortByPullRequests = async () => {
  const repos = (await getData()) as Repo[];

  return (
    <>
      <section className="main-section">
        {repos.map((repo) => (
          <Card
            avatarURL={repo.owner.avatar_url}
            name={repo.name}
            description={repo.description}
            language={repo.language}
            size={repo.size}
            openIssues={repo.open_issues}
            id={repo.id}
            starGazersCount={repo.stargazers_count}
            owner={repo.owner.login}
            directory="suspense"
          />
        ))}
      </section>
    </>
  );
};

export default SortByPullRequests;
After that, you will create another component named SortBySize inside the suspense folder. This component will be used to retrieve three different repositories from GitHub, sorted based on size:
import Card from "@/components/Card";
import { Repo } from "../csr/page";

const delay = (ms: number) => new Promise((resolve) => setTimeout(resolve, ms));
async function getData() {
    await delay(2000);
  const response = await fetch(
    "https://api.github.com/search/repositories?q=stars:>1&sort=size&order=desc&per_page=3",
    { cache: "no-store" }
  );

  const data = await response.json();
  return data.items;
}

const SortBySize = async () => {
  const repos = (await getData()) as Repo[];

  return (
    <>
      <section className="main-section">
        {repos.map((repo) => (
          <Card
            avatarURL={repo.owner.avatar_url}
            name={repo.name}
            description={repo.description}
            language={repo.language}
            size={repo.size}
            openIssues={repo.open_issues}
            id={repo.id}
            starGazersCount={repo.stargazers_count}
            owner={repo.owner.login}
            directory="suspense"
          />
        ))}
      </section>
    </>
  );
};

export default SortBySize;
Finally, create another component named SortByStars in the suspense directory. This component will serve the purpose of fetching three repositories from GitHub, sorted by the star rating:
import Card from "@/components/Card";
import { Repo } from "../csr/page";

const delay = (ms: number) => new Promise((resolve) => setTimeout(resolve, ms));
async function getData() {
    await delay(10000);
  const response = await fetch(
    "https://api.github.com/search/repositories?q=stars:>1&sort=stars&order=desc&per_page=3",
    { cache: "no-store" }
  );

  const data = await response.json();
  return data.items;
}

const SortByStars = async () => {
  const repos = (await getData()) as Repo[];

  return (
    <>
      <section className="main-section">
        {repos.map((repo) => (
          <Card
            avatarURL={repo.owner.avatar_url}
            name={repo.name}
            description={repo.description}
            language={repo.language}
            size={repo.size}
            openIssues={repo.open_issues}
            id={repo.id}
            starGazersCount={repo.stargazers_count}
            owner={repo.owner.login}
            directory="suspense"
          />
        ))}
      </section>
    </>
  );
};

export default SortByStars;
Next, you will create a new component called CardSkeletonLoader. This component will display three card skeletons to replicate the layout of the three cards that will be rendered by the components we have just created.
Inside the components directory, create a new file named CardSkeletonLoader.tsx and add the following code to it:
import CardSkeleton from "@/components/CardSkeleton";
const CardSkeletonLoader = () => {
  return (
    <>
      <section className="main-section">
        <CardSkeleton />
        <CardSkeleton />
        <CardSkeleton />
      </section>
    </>
  );
};
export default CardSkeletonLoader;
It is time to render the five components that were created earlier and use Suspense to handle asynchronous loading states for each one. In the suspense directory, create a new file named page.tsx and add the following code to it:
import { Suspense } from "react";
import CardSkeletonLoader from "../../components/CardSkeletonLoader";
import SortByForks from "./SortByForks";
import SortBySize from "./SortBySize";
import SortByStars from "./SortByStars";
import SortByIssues from "./SortByIssues";
import SortByPullRequests from "./SortByPullRequests";

const StreamingWithSuspense = () => {
  return (
      <>
      <h3 style={{ textAlign: "center", margin: "15px 0 0", fontSize: 30 }}>
        Order by Size
      </h3>
      <Suspense fallback={<CardSkeletonLoader />}>
        <SortBySize />
      </Suspense>
      <h3 style={{ textAlign: "center", margin: "15px 0 0", fontSize: 30 }}>
        Order by Star Ratings
      </h3>
      <Suspense fallback={<CardSkeletonLoader />}>
        <SortByStars />
      </Suspense>
      <h3 style={{ textAlign: "center", margin: "15px 0 0", fontSize: 30 }}>
        Order by Number of Issues
      </h3>
      <Suspense fallback={<CardSkeletonLoader />}>
        <SortByIssues />
      </Suspense>
      <h3 style={{ textAlign: "center", margin: "15px 0 0", fontSize: 30 }}>
        Order by Number of Pull Requests
      </h3>
      <Suspense fallback={<CardSkeletonLoader />}>
        <SortByPullRequests />
          </Suspense>
          <h3 style={{ textAlign: "center", margin: "15px 0 0", fontSize: 30 }}>
        Order by Fork Count
      </h3>
      <Suspense fallback={<CardSkeletonLoader />}>
        <SortByForks />
      </Suspense>
    </>
  );
};

export default StreamingWithSuspense;
The code above imports the five components we created previously: SortBySize, SortByStars, SortByIssues, SortByPullRequests, and SortByForks. Each of these components is wrapped inside a Suspense component. Suspense also allows the application to render different components at different times, depending on their data dependencies, rather than waiting for all the data to be fetched before rendering anything. The fallback prop specifies what to show while the sorting component is loading. In this case, it shows a CardSkeletonLoader component, which is a placeholder that simulates the appearance of the Card component.
If you check your browser now or visit this page: https://next-js-rendering-strategies.vercel.app/suspense you will see that the components will load one by one as their data is ready.
Streaming the details page with loading.tsx file
In the previous sections, you learned how to use React Suspense to stream individual components on your web page. Now, you will see how to apply Suspense to the whole page, using a special file called loading.tsx.
In the components directory, create a new file called DetailsSkelton.tsx and add the following code to it:
import React from "react";
import Skeleton from "react-loading-skeleton";
import "react-loading-skeleton/dist/skeleton.css";
const DetailsSkeleton = ({
}) => {
  return (
    <>
      <section className="details-container">
        <h1 className="details-title">
          <p className="topic">
            <Skeleton
              width={"100px"}
              baseColor="#202020"
              highlightColor="#444"
            />
          </p>
        </h1>
        <p className="date">
          <p className="topic">
            <Skeleton
              width={"20px"}
              baseColor="#202020"
              highlightColor="#444"
            />
          </p>
        </p>
        <Skeleton height={'500px'} width={"100%"} baseColor="#202020" highlightColor="#444" />
        <div className="table-container">
          <table>
            <tbody>
              <tr>
                <td>
                  <h4>Description:</h4>
                </td>
                <td>
                  <p>
                    <Skeleton
                      width={"100%"}
                      baseColor="#202020"
                      highlightColor="#444"
                    />
                  </p>
                </td>
              </tr>
              <tr>
                <td>
                  <h4>Homepage:</h4>
                </td>
                <td>
                  <p>
                    <Skeleton
                      width={"100%"}
                      baseColor="#202020"
                      highlightColor="#444"
                    />
                  </p>
                </td>
              </tr>
              <tr>
                <td>
                  <h4>Stargazers Count:</h4>
                </td>
                <td>
                  <p>
                    <Skeleton
                      width={"100%"}
                      baseColor="#202020"
                      highlightColor="#444"
                    />
                  </p>
                </td>
              </tr>
              <tr>
                <td>
                  <h4>Language:</h4>
                </td>
                <td>
                  <p>
                    <Skeleton
                      width={"100%"}
                      baseColor="#202020"
                      highlightColor="#444"
                    />
                  </p>
                </td>
              </tr>
              <tr>
                <td>
                  <h4>Watchers Count:</h4>
                </td>
                <td>
                  <p>
                    <Skeleton
                      width={"100%"}
                      baseColor="#202020"
                      highlightColor="#444"
                    />
                  </p>
                </td>
              </tr>
              <tr>
                <td>
                  <h4>Open Issues Count:</h4>
                </td>
                <td>
                  <p>
                    <Skeleton
                      width={"100%"}
                      baseColor="#202020"
                      highlightColor="#444"
                    />
                  </p>
                </td>
              </tr>
              <tr>
                <td>
                  <h4>Visibility</h4>
                </td>
                <td>
                  <p>
                    <Skeleton
                      width={"100%"}
                      baseColor="#202020"
                      highlightColor="#444"
                    />
                  </p>
                </td>
              </tr>
              <tr>
                <td>
                  <h4>Forks</h4>
                </td>
                <td>
                  <p>
                    <Skeleton
                      width={"100%"}
                      baseColor="#202020"
                      highlightColor="#444"
                    />
                  </p>
                </td>
              </tr>
              <tr>
                <td>
                  <h4>Open Issues</h4>
                </td>
                <td>
                  <p>
                    <Skeleton
                      width={"100%"}
                      baseColor="#202020"
                      highlightColor="#444"
                    />
                  </p>
                </td>
              </tr>
              <tr>
                <td>
                  <h4>Default Branch</h4>
                </td>
                <td>
                  <p>
                    <Skeleton
                      width={"100%"}
                      baseColor="#202020"
                      highlightColor="#444"
                    />
                  </p>
                </td>
              </tr>
              <tr>
                <td>
                  <h4>Topics:</h4>
                </td>
                <td>
                  <div className="topics-container">
                    <p className="topic">
                      <Skeleton
                        width={"20px"}
                        baseColor="#202020"
                        highlightColor="#444"
                      />
                    </p>
                    <p className="topic">
                      <Skeleton
                        width={"20px"}
                        baseColor="#202020"
                        highlightColor="#444"
                      />
                    </p>
                    <p className="topic">
                      <Skeleton
                        width={"20px"}
                        baseColor="#202020"
                        highlightColor="#444"
                      />
                    </p>
                    <p className="topic">
                      <Skeleton
                        width={"20px"}
                        baseColor="#202020"
                        highlightColor="#444"
                      />
                    </p>
                    <p className="topic">
                      <Skeleton
                        width={"20px"}
                        baseColor="#202020"
                        highlightColor="#444"
                      />
                    </p>
                  </div>
                </td>
              </tr>
            </tbody>
          </table>
        </div>
      </section>
    </>
  );
};

export default DetailsSkeleton;
Inside the suspense directory, create a new folder named: details\\[owner]\\[repo]. Open the [repo] folder and create a new file named page.tsx, then add the following code to it:
import { RepoDetailsData } from "@/app/csr/details/[owner]/[repo]/page";
import Details from "@/components/Details";
const delay = (ms: number) => new Promise((resolve) => setTimeout(resolve, ms));

async function getData(url: string) {

  const response = await fetch(url);
  if (!response.ok) {
    // This will activate the closest `error.js` Error Boundary
    throw new Error("Failed to fetch data");
  }
  const data = await response.json();
  return data;
}

const RepoDetails = async ({
  params,
}: {
  params: { owner: string; repo: string };
}) => {
  const owner = params.owner;
  const repo = params.repo;
  console.log({ owner });
    const apiUrl = `https://api.github.com/repos/${owner}/${repo}`;
    await delay(10000);
  const repoData: RepoDetailsData = await getData(apiUrl);
  console.log({ repoData });
  return (
    <>
      <Details
        createdAt={repoData.created_at}
        topics={repoData.topics}
        name={repoData.name}
        avatarUrl={repoData.owner.avatar_url}
        description={repoData.description}
        homepage={repoData.homepage}
        stargazersCount={repoData.stargazers_count}
        language={repoData.language}
        watchersCount={repoData.watchers_count}
        visibility={repoData.private ? "private" : "public"}
        forks={repoData.forks_count}
        openIssues={repoData.open_issues_count}
        defaultBranch={repoData.default_branch}
      />
    </>
  );
};

export default RepoDetails;
The RepoDetails component fetches details of a GitHub repository, simulates a delay, and renders a Details component with the relevant information. In the [repo] directory, create a new file called: loading.tsx. The loading.tsx is a special file that you can create inside a folder in the app directory. It allows you to define a fallback UI that will be shown while the page or layout content is loading. The fallback UI can be anything you want, such as a skeleton, a spinner, or a placeholder. In our case, it is the DetailsSkeleton component that was created earlier.
Open the loading.tsx and add the following code to it:
import DetailsSkeleton from "@/components/DetailsSkeleton";

const Loading = () => {
  return <DetailsSkeleton />;
};
export default Loading;
Here, the Loading component renders the DetailsSkeleton that was created previously.
In the suspense/details/[owner]/[repo] directory, create a new file named page.tsx and add the following code to it:
import { RepoDetailsData } from "@/app/csr/details/[owner]/[repo]/page";
import Details from "@/components/Details";
const delay = (ms: number) => new Promise((resolve) => setTimeout(resolve, ms));


async function getData(url: string) {

  const response = await fetch(url);
  if (!response.ok) {
    // This will activate the closest `error.js` Error Boundary
    throw new Error("Failed to fetch data");
  }
  const data = await response.json();
  return data;
}

const RepoDetails = async ({
  params,
}: {
  params: { owner: string; repo: string };
}) => {
  const owner = params.owner;
  const repo = params.repo;
  console.log({ owner });
    const apiUrl = `https://api.github.com/repos/${owner}/${repo}`;
    await delay(5000);
  const repoData: RepoDetailsData = await getData(apiUrl);
  console.log({ repoData });
  return (
    <>
      <Details
        createdAt={repoData.created_at}
        topics={repoData.topics}
        name={repoData.name}
        avatarUrl={repoData.owner.avatar_url}
        description={repoData.description}
        homepage={repoData.homepage}
        stargazersCount={repoData.stargazers_count}
        language={repoData.language}
        watchersCount={repoData.watchers_count}
        visibility={repoData.private ? "private" : "public"}
        forks={repoData.forks_count}
        openIssues={repoData.open_issues_count}
        defaultBranch={repoData.default_branch}
      />
    </>
  );
};

export default RepoDetails;
The code above defines the RepoDetails component that takes an object with a params property as an argument. The params property contains the owner and the repo names of the GitHub repository. The owner and the repo names are used to construct the apiUrl, which is the URL for the GitHub API endpoint for the repository details. Notice how the component uses the delay function to wait 5 seconds before fetching the data. This is done to demonstrate the suspense effect. The component uses React Suspense to show a fallback UI while the data is being fetched. The fallback UI is defined in the loading.tsx file, which is in the same folder as the component.
Next.js automatically wraps the RepoDetails component inside a Suspense component with the Loading component as the fallback prop. The Suspense component will show the Loading component until the RepoDetails component is ready to render.
Summary and conclusion
In this tutorial, you learned about the different rendering strategies in Next.js and how to use them for your web app. You covered the following topics:
- Client-side rendering: You learned how to render components on the client side using React hooks and state. You also learned how to use client components in Next.js to optimize the performance of your app.
- Dynamic routing: You learned how to create dynamic routes in Next.js.
- Data fetching: You learned how to fetch data on the client side using the useEffect hook and the fetch API. You also learned the drawbacks of using useEffect for data fetching, such as stale data, race conditions, and unnecessary re-rendering. You learned how to use data fetching libraries like SWR to overcome these drawbacks and improve the efficiency of your data fetching. You learned how SWR provides features like caching, revalidation, error handling, and suspense integration.
- Server-side rendering and static site Generation: You learned how to render components on the server side using the fetch API. You also learned the differences between SSR and SSG and when to use them.
- Streaming and Suspense: You learned how to stream components from the server to the client as they are ready using React Suspense.
By completing this tutorial, you gained a solid understanding of the rendering strategies in Next.js and how to use them for your web app. You built a web app that fetches different GitHub repositories and shows some of their details. You created different components that fetch and display repositories sorted by different criteria. You used the delay function to simulate a slow network request and demonstrate streaming with Suspense in Next.js.
I hope you enjoyed this tutorial and learned something new. If you have any questions or feedback, please reach out to me. Thank you for reading and happy coding! 😊