- 25 min to read
Nuxt.js: a practical guide
Begin your Nuxt.js journey with this comprehensive guide. From installation to SEO and rendering strategies, we've got you covered!


Nuxt is an opinionated Vue framework that makes it easier to build high-performance full-stack applications. It handles most of the complex configuration involved in routing, handling asynchronous data, middleware, and others. An opinionated directory structure and TypeScript support make it an excellent developer experience for building simple or production-ready enterprise applications.
If you've visited our discovery section, you might recall our initial introduction to Nuxt and some of its key features. In this guide, we're taking a practical approach to delve deeper into Nuxt's functionality. We'll introduce you to the best features that you'll find helpful in your next project no matter whether you're new to Nuxt or you've used it for a while.
Getting started with Nuxt.js
In this section, we’re going to dive into the basics of Nuxt by creating a new Nuxt project. We'll cover the installation process, setting up a new project, and understanding the directory structure.
There are a few prerequisites stated on the website that include a recent Node.js version, VS Code as the text editor with the Volar extension, as well as some tips for optimal setup.
Installation and project setup
We can create a new Nuxt project and navigate to the newly created project by running the command:
In the newly created folder, we can run the following commands to install dependencies:
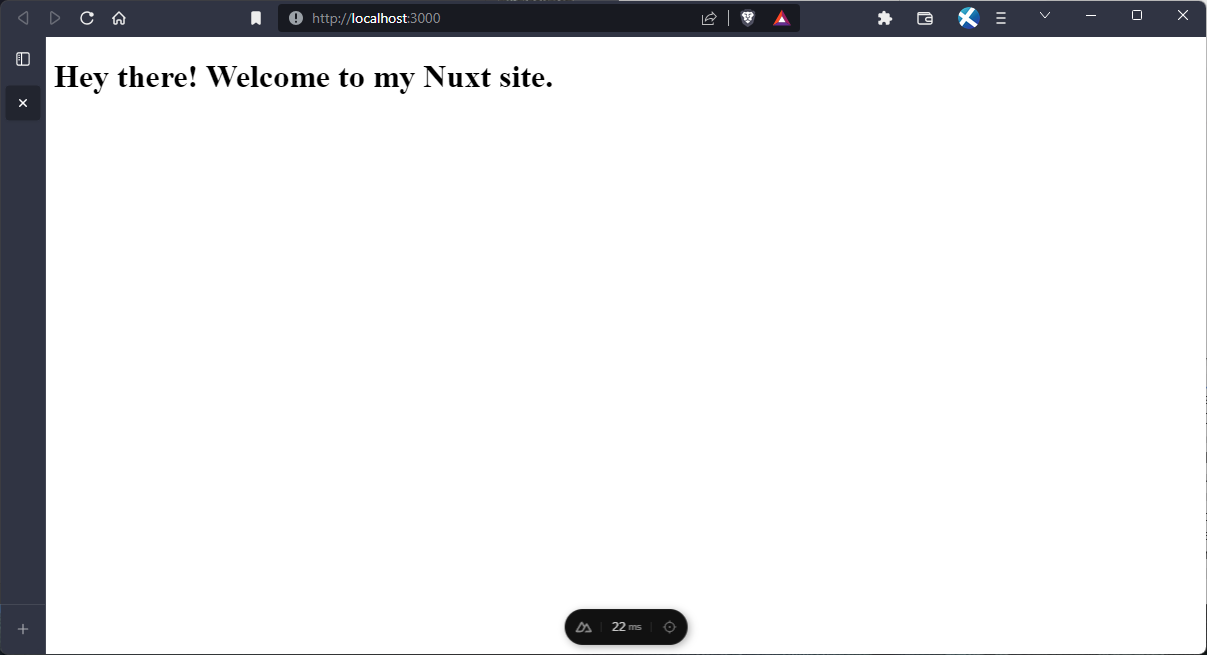
Once the installation is complete, we can start the server by running the command:
This will open a new browser window for http://localhost/3000 (or some other port if 3000 is not available) and we should have something like this:

Directory structure and file organization
Nuxt follows a well-defined directory structure to organize projects. This organized structure not only makes it easier to navigate the project's codebase but also helps in adopting best practices for building scalable applications.
Here’s our project’s directory structure right after installation:
We can add more folders and files according to the directory structure defined by Nuxt. You can find everything you need in the directory structure guide.
Creating pages and routes
By default, the ./app.vue file is rendered as the / route and it looks something like this on installation:
In Nuxt, the ./pages/ directory is optional and when not present, Nuxt does not include the vue-router dependency. It is useful for sites or applications that do not need routing like a landing page.
Nuxt comes with automatic routing so when we create the ./pages/ directory and a new ./pages/index.vue file, we can enable routing for our application:
We then have to use the <NuxtPage /> component in ./app.vue to render our pages:
With that, we can restart our server and we’ll have something like this:
Thanks to one of Nuxt’s core features, the file system router, to create more routes, all we have to do is add more components to the .pages/ directory and routes will be generated based on the file name and path. Let’s create a few more pages and see that in action.
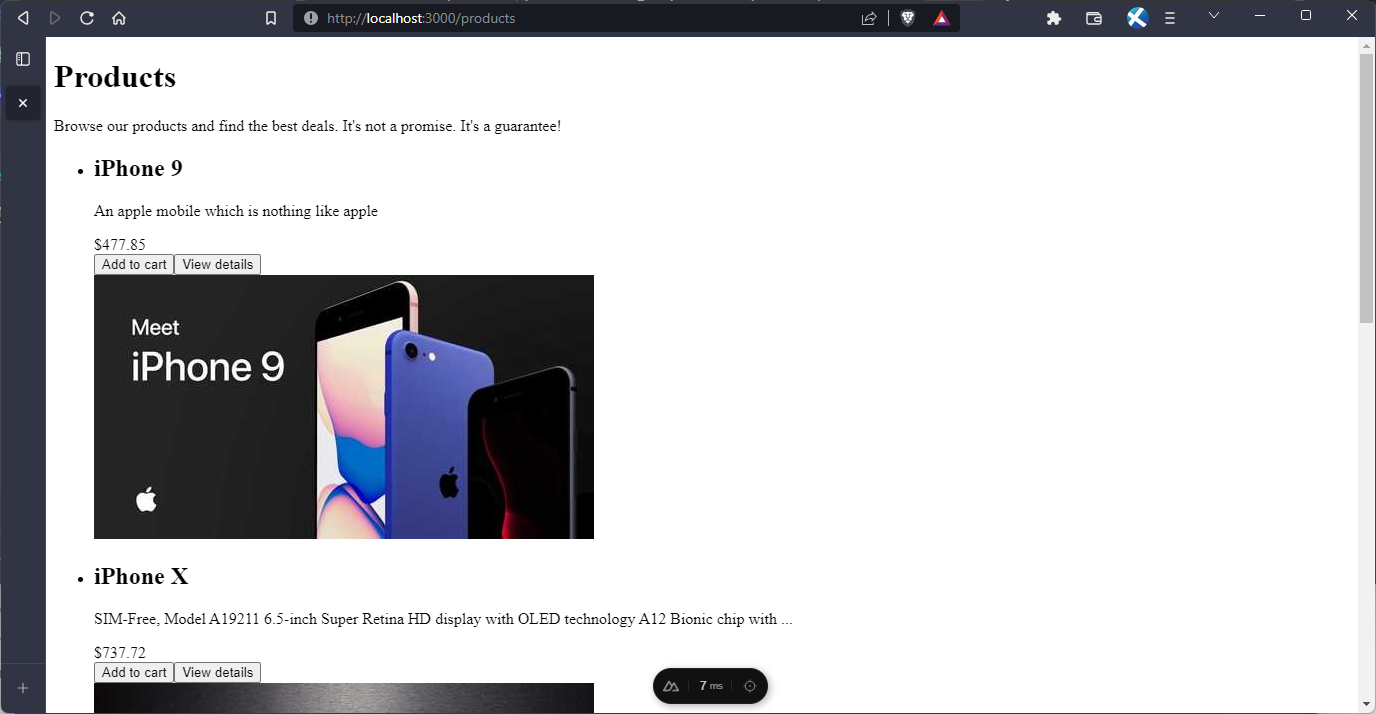
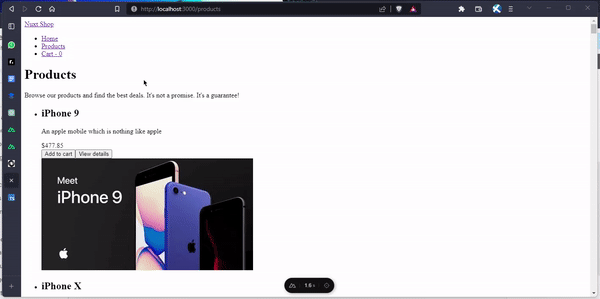
Create a new ./pages/products/index.vue file and enter the following code:
With that, we should have something like this when we navigate to http://localhost:3000/products:
Next, we’ll take a look at how we can create dynamic routes in Nuxt.
Dynamic routes
In order to create a dynamic route, the directory or file name must be enclosed in square brackets and Nuxt allows optional parameters and multiple parameters, you can find out more in the docs. For our example, we’ll create a dynamic route that would display a product by its id.
Create a new file - ./pages/products/[id].vue and enter the following:
Here, we're building a product details view that changes based on the id parameter in the URL. When we navigate to the URL http://localhost:3000/products/1, the id variable is extracted from the route parameters, and in this case, it will show 1. We're using the useRoute() function to access the current route object and retrieve the dynamic id.
Additionally, when you check your browser console, you will see the id parameter displayed as part of a console.log statement. The page renders product information such as title, description, price, and thumbnail image, utilizing reactive data and a function to format the price as USD currency. While the product data is currently hardcoded for demonstration, in real applications, you would fetch this data from a backend API based on the id parameter in the URL, which we’ll also demonstrate later on.
With that, when we navigate to http://localhost:3000/products/1 we should have something like this:
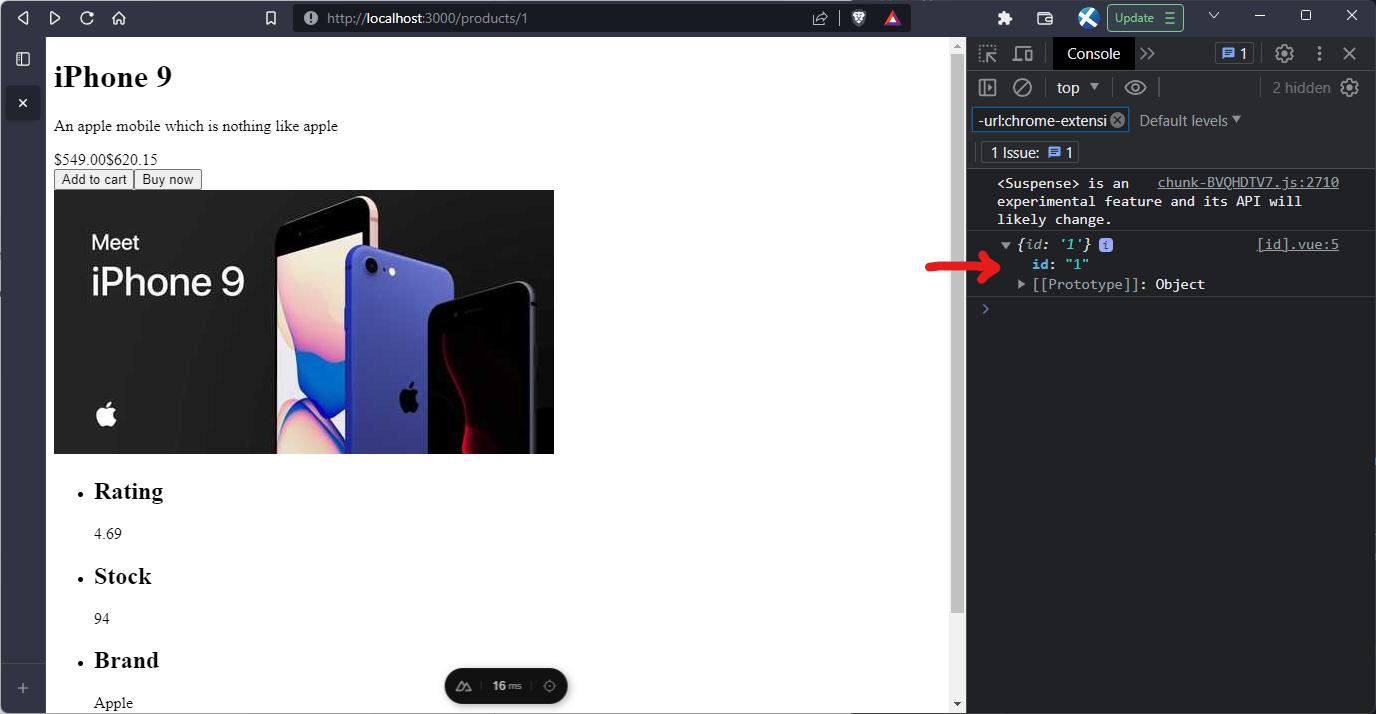
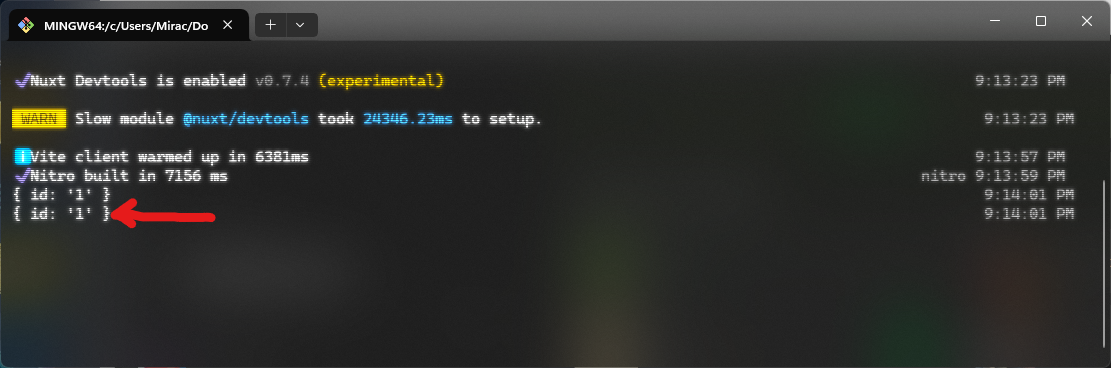
In the screenshot above, we can see that the console shows the id param and it has a value of 1. Remember that the page is rendered on the server side and then hydrated in the browser so, in the terminal, we’ll also see the id param with the value of 1:
Data fetching
We’ll see how we can use the data-fetching features of Nuxt to get product data from an API.
In the pages/products/index.vue file, we can replace the code in the <script> with this:
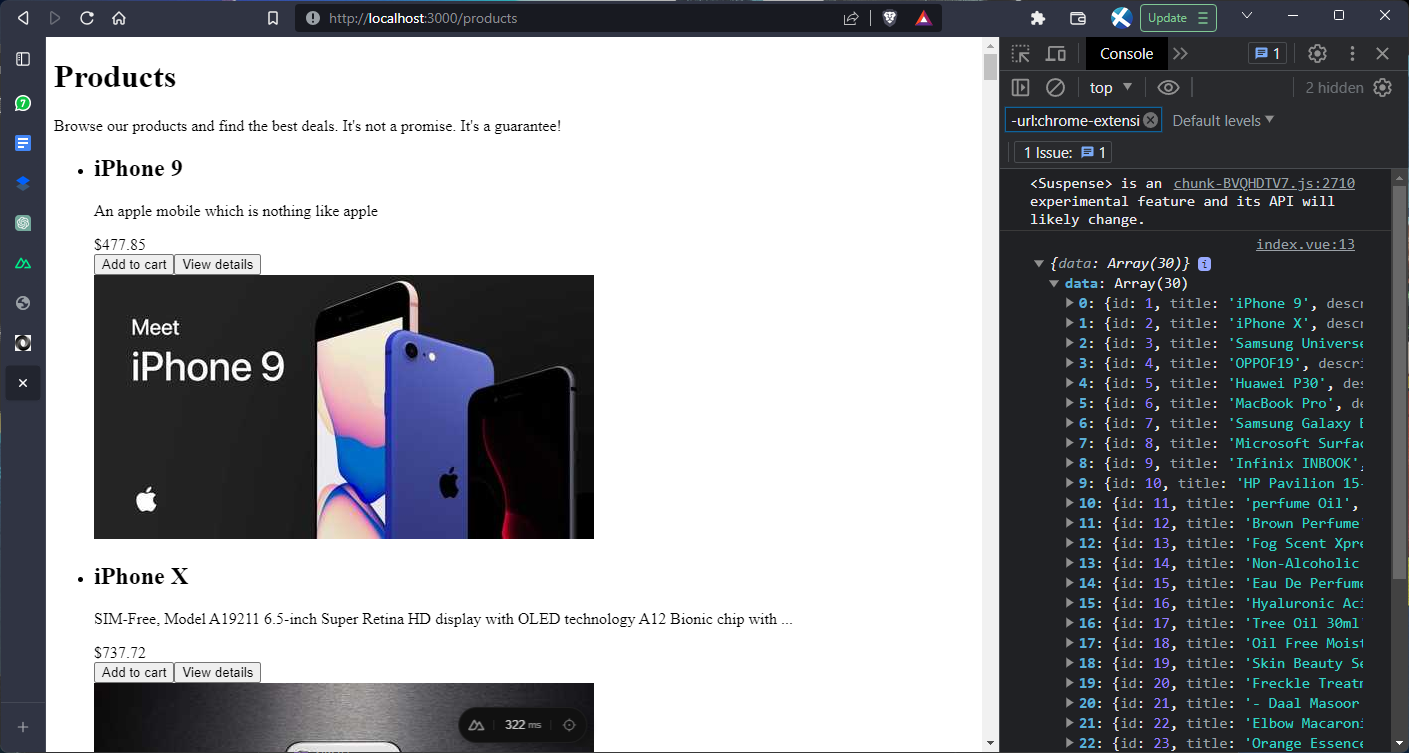
Here, we’re fetching the product data using $fetch.
Also, in the template we’re using <NuxtLink> to link to our dynamic product route by id.
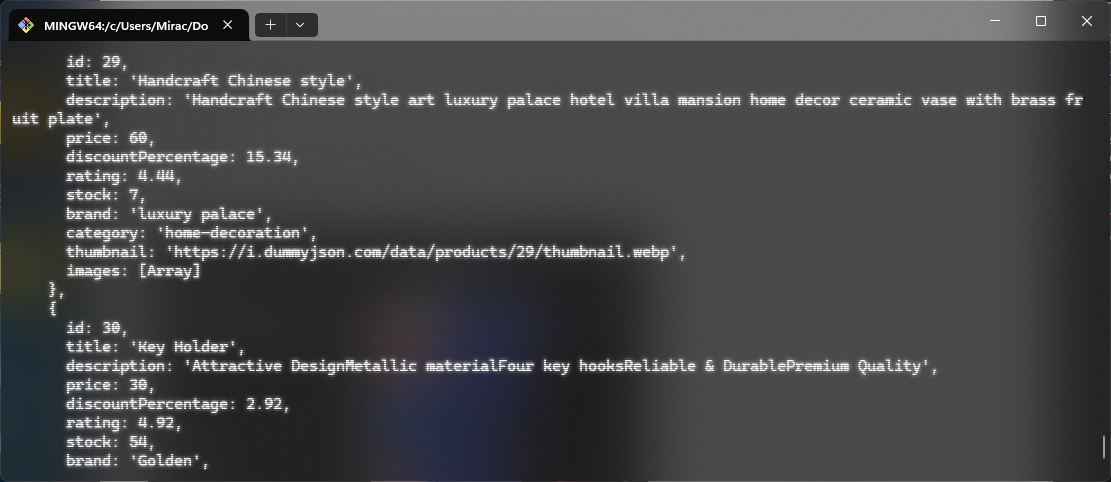
To set up the Product[] type that was used in the code, we can set up global types. Create a new file - ./types/index.d.ts and enter the following:
Now. when we visit http://localhost:3000/products we can see multiple products in the browser console:
Since the request was made on the server side, we can see the products in our terminal:
Next, we’ll fetch product data by id in our dynamic route. In the ./pages/products/[id].vue file, remove the hard coded product data and enter the following:
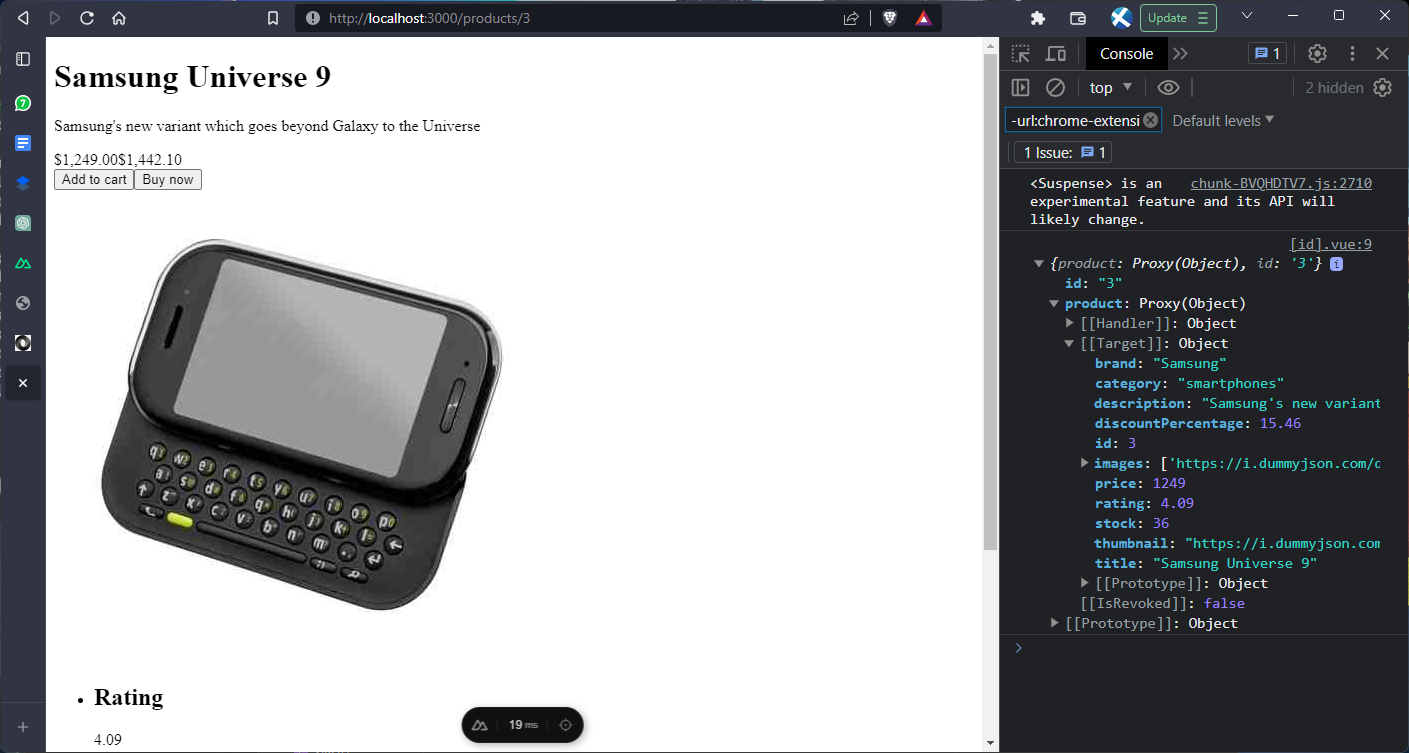
Here, we’re using the useFetch composable.
Now, when we visit any product route like http://localhost:3000/products/3 for example, we get this in the browser:
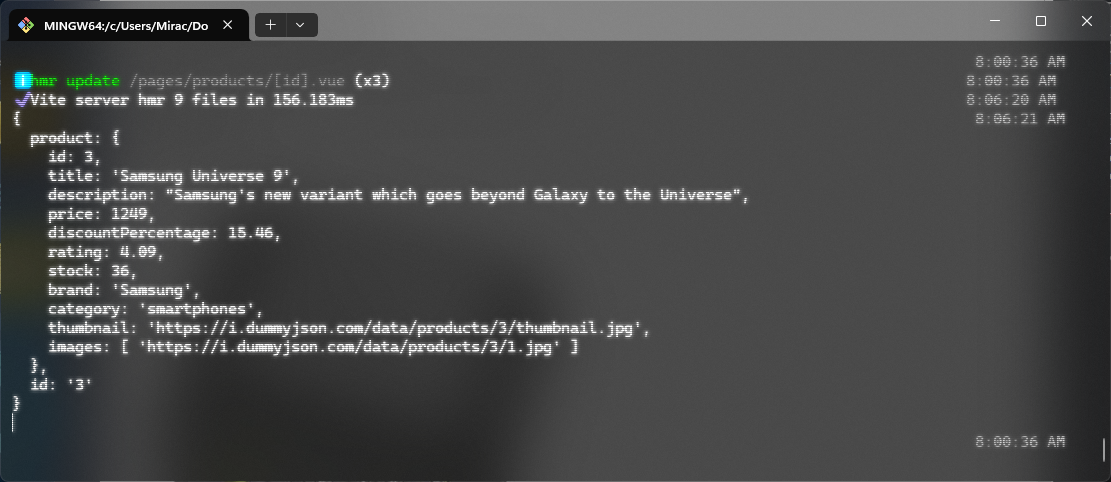
And of course, since the request was made server-side, the data shows on our terminal as well:
SEO and meta tags
Nuxt provides a number of composables like useHead, useSeoMeta and useServerSeoMeta, as well as a number of components - <Title>, <Base>, <NoScript>, <Style>, <Meta>, <Link>, <Body>, and <Head> that allow us to interact with our metadata within our component’s template. You can find more information in the docs.
Let’s quickly set up some meta tags. In the ./app.vue file, in the <script> section, add the following:
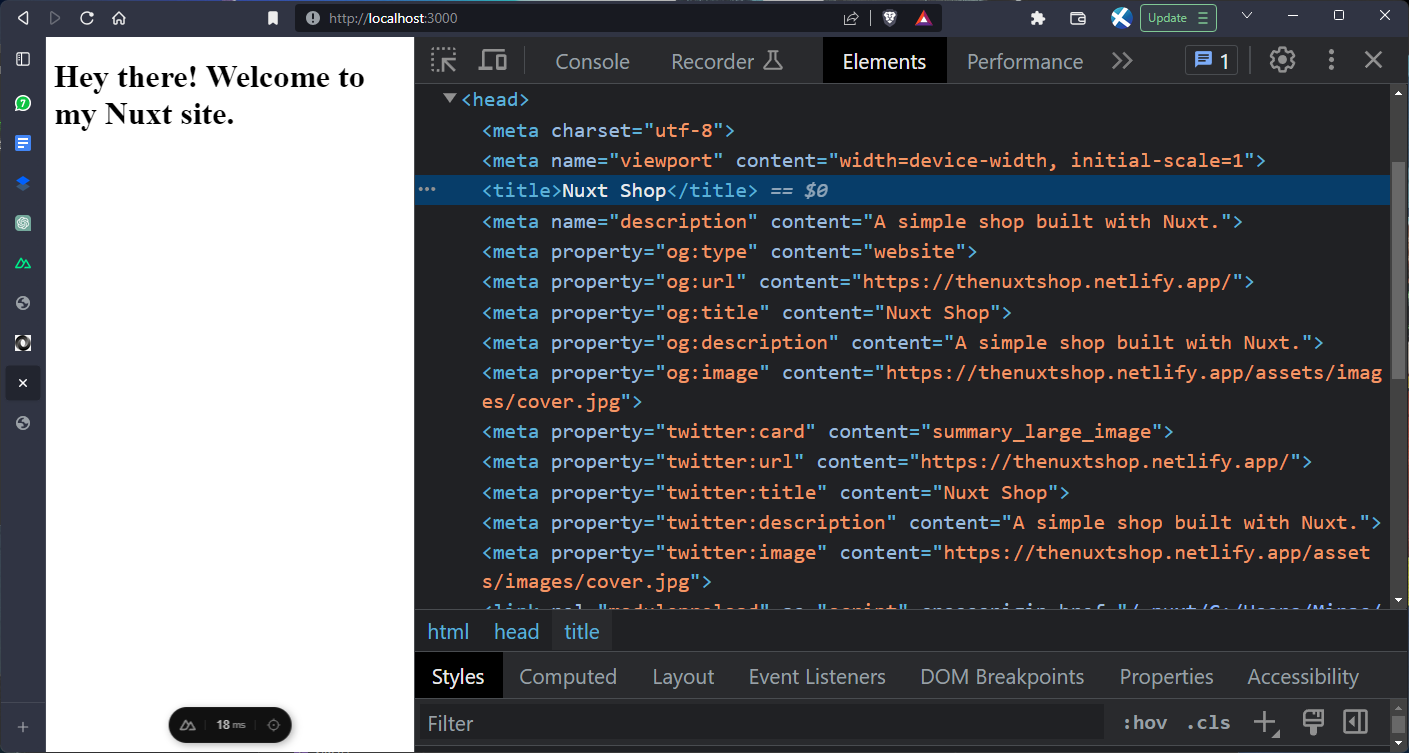
Here, we’re using useHead for SEO and meta tags that will pretty much be the same across each page in the website and useSeoMeta for those ones that would likely change per page. With that, we should have this:
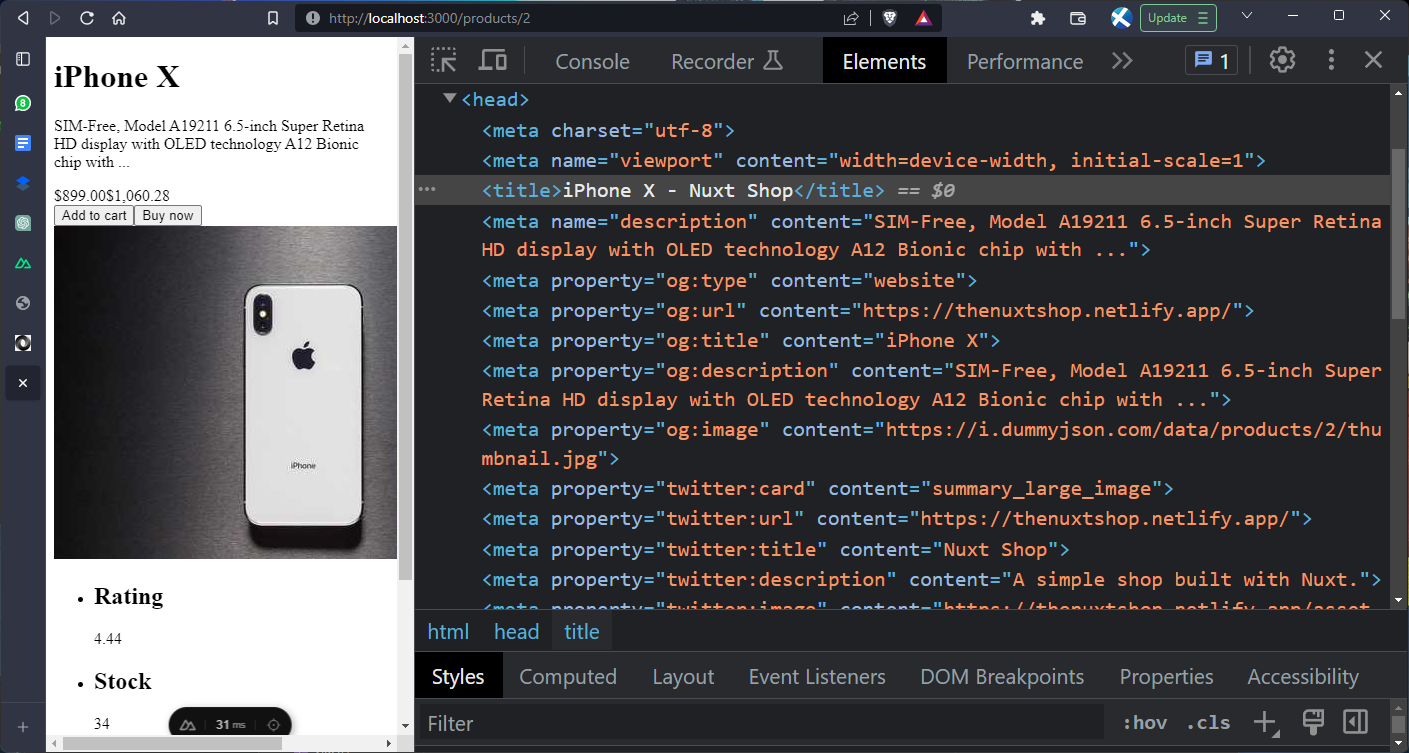
Next, we’ll set the meta for our dynamic route. In ./pages/products/[id].vue, we’ll use the useSeoMeta composable to define our meta tags:
With that, we should have something like this:
Defining layouts and shared components
Let’s create a <SiteHeader /> component which will be shared across all pages using layouts. Create a new file - ./components/SiteHeader.vue:
Next, create a new default layout file in ./layouts/default.vue:
Finally, we have to use the layout in ./app.vue:
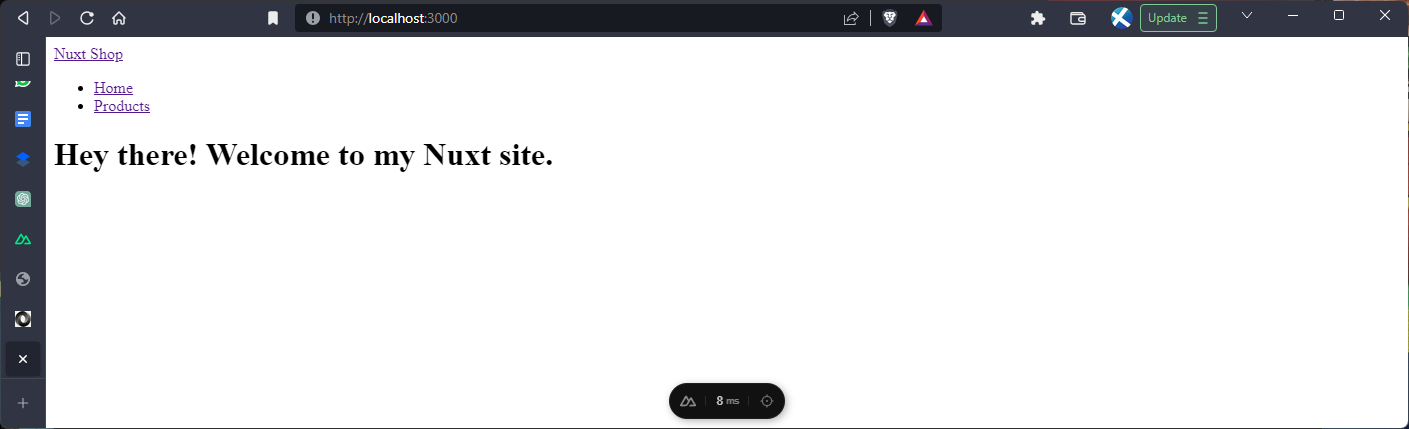
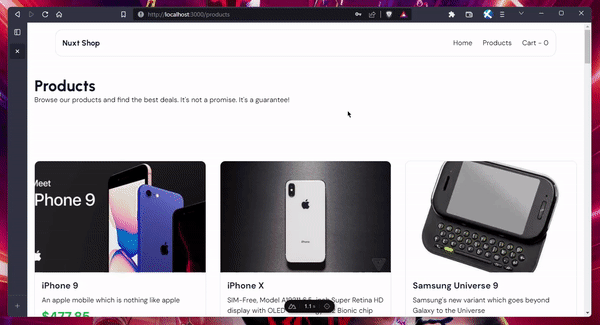
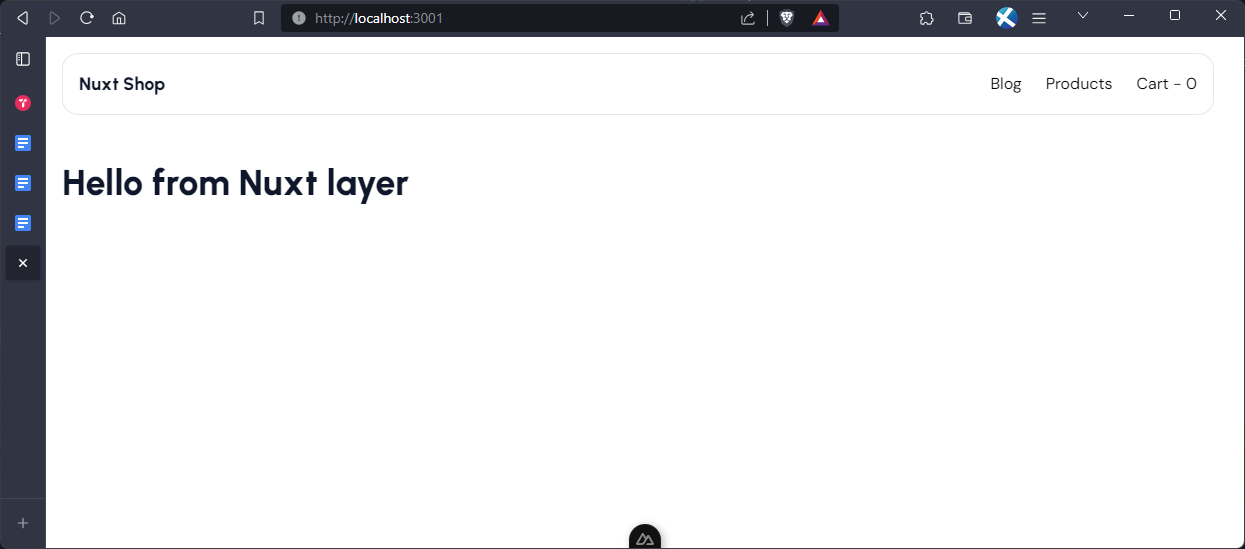
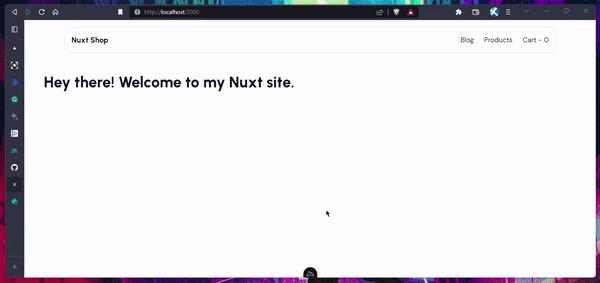
With that, we should have the site header component showing across all pages:
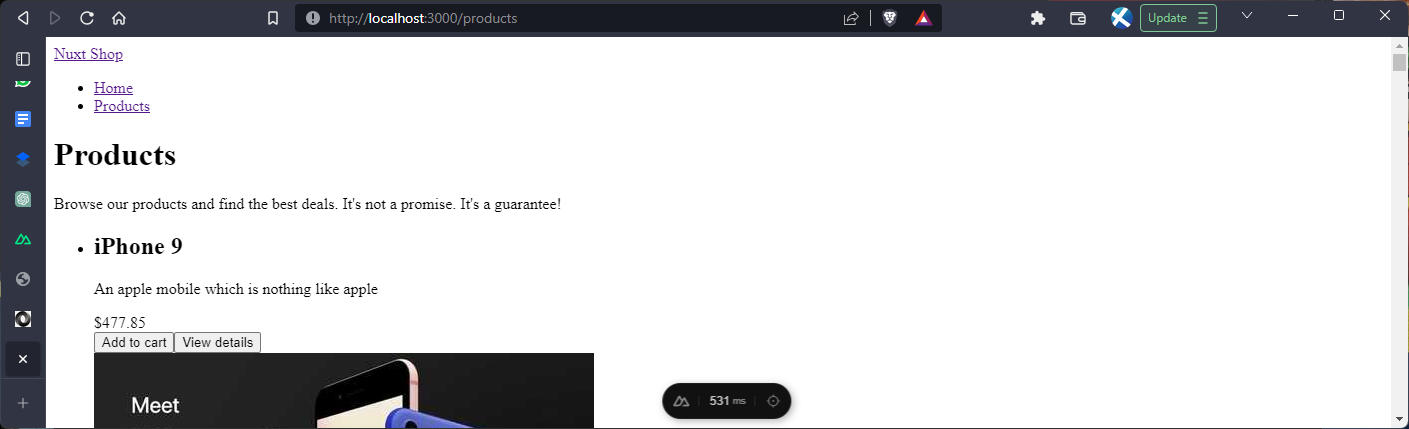
In the products page:
Nuxt also supports custom layouts, dynamic layouts, per-page layouts, etc. More on layouts can be found in the docs.
Creating composables and utilities
Composables in Nuxt are extremely useful as they allow us to share and use logic and state across our application. To demonstrate, we’ll be creating a useCart composable which will have the state of our cart and a few functions to modify that state, that is add and remove items from our cart.
Create a new file - composables/useCart.ts:
From the code above, we have a composable named useCart that is being created to manage the state of a shopping cart in a Nuxt application. The composable exports functions to interact with the cart state.
It uses the useState function from the Nuxt Composition API to initialize and manage the cart items state as an array of CartItem objects. The addToCart function allows products to be added to the cart, incrementing the quantity if the product already exists in the cart. The removeFromCart function handles product removal, adjusting the quantity or completely removing the item. Finally, the clearCart function empties the cart by resetting the items array.
This composable encapsulates the cart logic, making it easy to reuse and maintain across the application.
The CartItem type was declared in ./types/index.d.ts:
In addition to composables, Nuxt provides a utils/ directory which allows us to create helper functions that are also auto-imported just like composables.
Create a new file ./utils/formatPrice.ts:
Here, we’ve moved our formatPrice function to this file which can now be auto-imported in our application. It means that we can now remove the function code from the components where we’ve used it previously which include ./pages/products/index.vue and ./pages/products/[id].vue. Since the function is auto-imported, it still works in our template.
Now, we can use the composable and util across multiple components in our application. First in our components, in ./components/SiteHeader.vue, we can use it to show the current number of items in our cart:
Here, we’re using the items useState ref object returned from the useCart composable which is auto-imported.
Next, we’ll create a component file - ./components/ProductCard.vue for product items. Copy the markup from ./pages/products/index.vue file and paste into <template> of the newly created file:
Here, we also included the addToCart function from the useCart composable and defined props for the component.
Next, we’ll create a new ./components/CartItem.vue component to display each cart item:
Next, we can add the addToCart() function to the dynamic product page at ./pages/products/[id].vue:
Finally, create the cart page - ./pages/cart.vue:
With that, we should have something like this:
Awesome.
Leveraging the modules ecosystem
Nuxt's module system is a game-changer, extending the core and simplifying integrations.
It's the remedy when core features fall short, offering customizations without reinventing the wheel. Modules, asynchronous functions, enhance Nuxt's capabilities, handling tasks like template overrides, webpack config, and CSS library integration. Most importantly, these modules can be packaged and shared via npm, creating a repository of quality add-ons to boost efficiency across projects. In your nuxt.config.ts, simply list modules under the modules property for seamless integration and customization.
You can learn more about modules in the Nuxt docs and explore a wide range of modules.
For the sake of this guide, we’ll be using the Tailwind module to give our website a facelift. You can learn more about the module here.
First, we add the @nuxtjs/tailwindcss module to our project:
Then, we add @nuxtjs/tailwindcss and a global CSS file we’ll create later to the modules section of nuxt.config.ts:
We’ll also create a ./tailwind.config.ts file for tailwind configurations:
Finally, we can create our global CSS file at ./assets/css/main.css:
You can get the rest of the styles used in this project from the ./assets/main.css file in the GitHub repository of this project.
With that, this how our website looks:

Using middlewares
Nuxt introduces a powerful route middleware framework to streamline our application's navigation. Route middleware, distinct from server middleware, allows us to run code before navigating to specific routes. There are three types: Anonymous (inline), Named, and Global middleware.
Nuxt provides convenient helpers like navigateTo for redirects and abortNavigation for stopping navigation. Additionally, Nuxt supports dynamic middleware addition using the addRouteMiddleware() helper function, allowing us to enhance your app's behavior in plugins or dynamically named route middleware.
Let’s take a look at how we can create a very simple authentication setup using route middleware so that only logged-in users can proceed to checkout. First, we create a ./pages/auth/login.vue page:
Here, we are using reactive variables like username , password, isLoading, and loginError to manage user inputs, loading state, and error messages.
When the login form is submitted, we use the handleLogin function to send a POST request to an authentication endpoint using the useFetch composable. The response data is stored in the browser's local storage if successful, and the user is redirected to the home page using the useRouter().push("/") method.
Now, let’s create the ./middleware/checkout.ts file which will handle the route redirection when the user is not logged in:
Here, our route middleware checks if the destination route path is /checkout. If it is, the middleware retrieves the user data from the browser's local storage. If there's no user data or if the user does not have a valid token, the middleware uses the navigateTo helper function to redirect the user to the /auth/login page. This ensures that only authenticated users with valid tokens can access the /checkout route.
Now, when we try to navigate to /checkout we get redirected to the login page and when we login, we can then access the checkout page:
Sweet.
Adding plugins
In a Nuxt application, plugins play a crucial role in enhancing functionality and integrating third-party libraries seamlessly. Nuxt provides a dedicated ./plugins directory where you can organize and register your plugins. These plugins are automatically loaded during the creation of the application.
All plugins within the plugins directory are auto-registered, eliminating the need to manually add them to the nuxt.config.js file.
Imagine you've stumbled upon a fantastic library called Vue Toastification. To incorporate it into our application, we need to follow a few key steps.
Install the library
Let's start by installing Vue Toastification:
Create a plugin
We need to create a plugin file in the plugins directory. For instance, let's call it vue-toastification.client.ts. Inside this file, we'll register the Vue Toastification plugin:
Configure Nuxt config
To ensure that Vue Toastification's styles are applied, we add the build option and the relevant CSS to our Nuxt configuration's CSS array in, /nuxt.config.ts:
Use in the ProductCard component
In the ./components/ProductCard.vue file:
Then, in the template, we have to replace the function called by the button click:
Use in the dynamic product page
In the ./pages/products/[id].vue file:
Then, we have to use the new function in the template as well:
With that, we should have this:
For deeper insights into plugins and their integration in Nuxt applications, feel free to dive into the Nuxt documentation.
The Server Directory
In Nuxt 3, the Server Directory plays a pivotal role in handling various server-related functionalities. Here's a breakdown of the components within it:
Server routes: files within ~/server/routes can create server routes without the /api prefix. It allows you to structure your server routes according to your application's requirements.
Server middleware: middleware files in ~/server/middleware run on every request before other server routes. These handlers can be used to add or check headers, log requests, or extend the event's request object.
Server plugins: through ~/server/plugins, you can extend Nitro's runtime behavior and hook into lifecycle events. It opens doors for advanced integrations and customization.
Server utilities: by leveraging ~/server/utils, you can create custom handler utilities that enhance the original handler's capabilities. These utilities can perform additional operations before returning the final response.
Routes
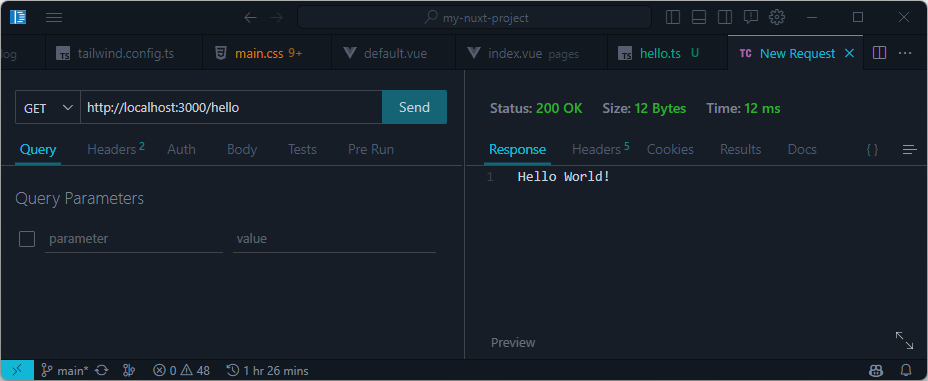
Server routes are files found in the ~/server/routes directory. These routes are automatically prefixed with '/api' unless placed in the ~/server/api directory. Server routes serve as endpoints, handling specific requests and generating responses. For instance, let’s create an example /hello route, create a new file - ./server/routes/hello.ts:
This would create an accessible /hello route at http://localhost:3000/hello and we should see this when we send a request:
Middleware
Middleware handlers, are defined in the ~/server/middleware directory, run on every request before other server routes. They are used for tasks like adding or checking headers, logging requests, or modifying the request context.
It’s important to note that middleware handlers should not return responses but rather inspect or extend the request context.
Let’s quickly create an example middleware that logs requests. Create a new file - ./server/middleware/log.ts:
Now, when we send a request to or visit a route, the middleware function is executed and the request path is logged to the console:

Plugins
Nuxt 3 automatically reads files in the ~/server/plugins directory and registers them as Nitro plugins. This facilitates the extension of Nitro's runtime behavior and the ability to hook into lifecycle events.
It can be particularly useful, as we’ll see later on in this guide, when we create our own custom plugin to calculate reading time for articles.
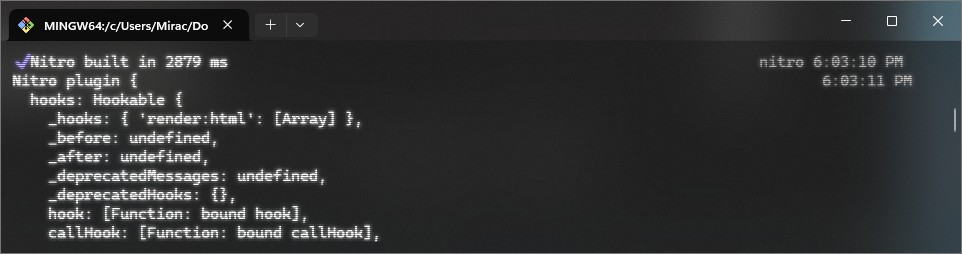
For now, here's a simple example where we log the nitroApp instance. Create a new file - ./server/plugins/nitroPlugin.ts file:
Now, when we run our app, we should see something like this:
Utilities
The ~/server/utils directory allows us to add custom helper functions for server routes. For instance, we can define a utility that wraps the original handler and performs additional operations before returning the final response by creating a new ./server/utils/handler.ts file:
We can use this in ./server/routes/hello.ts like so:
With that, we should see the logged text in the console when we make a request to /hello:

Incorporating these components into our Server Directory empowers us to manage routing, middleware, plugins, and utilities efficiently, enhancing our Nuxt 3 application's capabilities.
Next, we'll dive into API server routes in Nuxt.
API routes in Nuxt
In our journey of crafting dynamic and interactive web applications, we encounter situations where we need to interact with servers to fetch data or perform specific actions. Nuxt 3 simplifies this process through its powerful API routes and other features like server plugins and middlewares available in the ./server directory.
Introduction to API routes and their role in serverless functions
API routes are essential endpoints that connect our app's front-end and back-end, enabling tasks like data retrieval and form handling. They follow the serverless function model, enhancing scalability and efficiency. Nuxt 3's design allows them to run as serverless functions on platforms like Netlify and Vercel, optimizing performance and responsiveness.
API handling and registration
In Nuxt, handling APIs is made simple through the ~/server/api directory that automatically registers files as API handlers with hot module replacement (HMR) support. Here, our file can export a default function defined with defineEventHandler() or its alias `eventHandler()`. These handlers can return JSON data, a Promise, or use event.node.res.end() to send responses.
For instance, creating an API route - /api/hello involves creating a file -./server/api/hello.ts within the ./server/api directory. Inside this file, the exported function defines the logic for handling the API request and generating the response.
Creating and defining API routes in Nuxt.js
Let’s create a simple API route to get our products data instead of making the request directly in the frontend.
Create a new file - ./server/api/getProducts.ts:
Here, we've set up an API route using defineEventHandler. Inside the handler, we use $fetch to request data from an external API (https://dummyjson.com/products/). If the fetch is successful, the obtained data is returned. In case of an error, the handler logs the error and returns an object with an empty array named products.
Now, let’s create another route that accepts a query parameter to fetch products by id. Create a new file - ./server/api/getProduct.ts:
Here, within this route, we extract the id parameter from the query using getQuery(event). We then use this id to fetch data from the API.
Let’s create one more route for login. Create a new file - ./server/api/login.ts:
Here, we're handling a login request. We extract the username and password from the request body using readBody(event). We then use this data to send a POST request to the API.
If the response indicates success (HTTP status code 200), the JSON data from the response is returned. If the response indicates an error (non-OK status), we create and return an error object with the corresponding status code and message.
Now, let’s use it in our components and pages.
Usage in components and pages
First, in the products page - ./pages/products/index.vue:
Then in the dynamic product page - ./pages/products/[id].vue:
Finally, in the login page - ./pages/auth/login.vue:
Awesome.
Nuxt's API routes go beyond mere data fetching. Thanks to the Server Directory, they encompass a variety of functionalities, such as server routes, middleware, plugins, and utilities as we've covered previously.
Nuxt's API routes empower you to build versatile applications that seamlessly integrate with server-side logic. From fetching data to creating complex server routes, the server directory serves as a hub of power and innovation. Check out the Nuxt documentation for a comprehensive exploration of API handling, routing, middleware, plugins, and utilities.
Layers
Using the extends property in nuxt.config, we can have access to one of the core features of Nuxt - the Layers. This allows us to extend a default Nuxt application to reuse components, utils, and configuration in other Nuxt applications. This has a number of use cases:
- share reusable configuration presets via
nuxt.configandapp.config - develop a component library within the
components/directory - create utility and composable libraries within
composables/andutils/directories - craft Nuxt themes
- build Nuxt module presets
- share standardized setups across projects
Also, Layers support a number of sources - Local layers, NPM package and a Git repository, take a look at this snippet:
Create a new layer project
We can get started with Nuxt layers by authoring our own layer using the Authoring Nuxt Layers guide.
We can use the layer starter template to initialize our layer:
Now, we can follow the prompts to navigate to the layer directory and install dependencies:
Once the installation is complete, here’s the directory structure of our layer project:
We can start the development server by running the command:
And we should see something like this when we navigate to the port the server is running on:
This renders the ./base-layer/components/HelloWorld.vue component:
We can modify this component so we can use it later on in our main app. Replace the content of ./base-layer/components/HelloWorld.vue with:
Using a Layer
There are multiple ways we can use a Nuxt layer: locally, using NPM or GitHub.
Using Locally
Since we created the layer on our machine, we can start using the layer locally right away.
In our main app, we first have to extend the layer. We can do this by adding the relative path to the layer project in the nuxt.config.ts file:
Next, in the ./pages/index.vue file, we can add the <HelloWorld /> component which will be automatically imported:
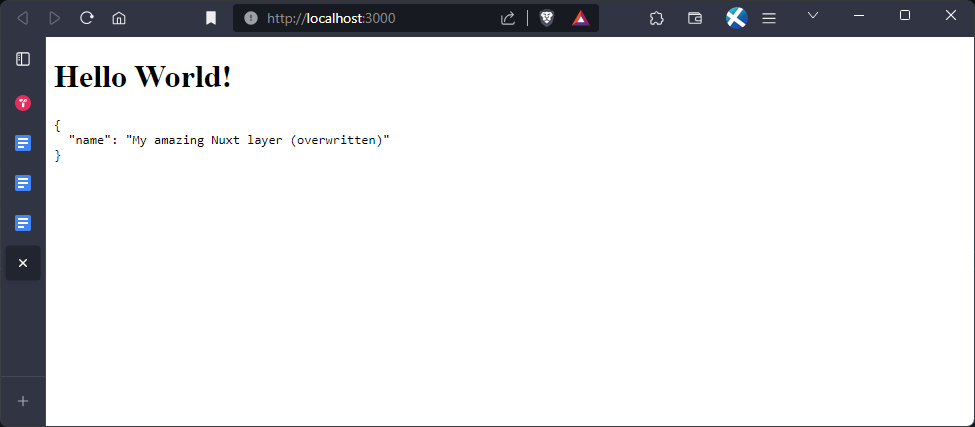
With that, we should see that it renders the <HelloWorld /> component from the base layer project:
This is not only limited to components as mentioned earlier, we can also extend configurations, composables, etc from the layer project.
Using with NPM
To use our layer with NPM, we can publish the layer as an NPM package by navigating to the base-layer/ directory and running the publish command.
Before we do that, we’ll have to give our layer project a unique name and remove the postinstall script in the ./package.json, here’s mine:
Now, we can run the command:
Once successfully published, we can add it to our Nuxt project by installing the package:
After the package has been installed, we can replace the extends property in ./nuxt.config.ts:
Once again, you can learn more about it from the Layers documentation.
Rendering with Nuxt
Nuxt offers a variety of rendering modes to suit different deployment scenarios. These modes define how your Nuxt application is rendered and delivered to users. Let's explore each rendering mode in detail and see how they can be implemented using Nuxt.
Universal rendering
Universal rendering, also known as server-side rendering (SSR), provides a powerful approach that blends server-side and client-side rendering. When a user requests a page, the server returns a fully rendered HTML page, providing quick access to content. At the same time, the client-side JavaScript takes over to enhance interactivity.
To enable universal rendering in your Nuxt application, we can set the ssr configuration option to true in our ./nuxt.config.ts:
With this configuration, Nuxt uses universal rendering by default, delivering fast page loads and optimal search engine indexing.
Static Site Generation (SSG)
Static site generation (SSG) is a fantastic option for websites that have content that doesn't change frequently. It generates HTML pages at build time and serves them as static assets. Nuxt offers two ways to achieve SSG:
Automatic SSG
To enable automatic SSG, leave the ssr configuration option at its default value (true) and use the nuxi generate command:
This generates static HTML files for our pages, offering improved performance and SEO benefits.
Manual SSG
We can also manually configure SSG for specific routes by setting the ssr property to true in the nuxt.config.js and specifying routes to prerender file:
It allows us to selectively prerender routes, ensuring optimal performance for the chosen pages.
Hybrid rendering
Hybrid rendering combines the advantages of both SSR and client-side rendering (CSR). With hybrid rendering, we can specify routes that are pre-rendered using SSR and others that utilize CSR. For instance, let's pre-render the /products route and use CSR for the /checkout route in our example application:
This approach offers flexibility in rendering modes based on route requirements.
Client-Side Rendering (CSR)
Client-Side Rendering is ideal for dynamic and interactive pages. In CSR, the page's content is generated by the client's browser using JavaScript. To enable CSR, we can set the ssr configuration option to false:
This is particularly useful for web applications where interactivity and dynamic content are the main focus.
Edge-Side Rendering (ESR)
Edge-Side Rendering (ESR) takes rendering to the edge by utilizing Content Delivery Network (CDN) edge servers. This improves performance and reduces latency by rendering the application closer to users. ESR is not a standalone rendering mode; rather, it's a deployment target that works alongside other rendering modes.
To utilize ESR, we can configure the nitro preset in our nuxt.config.js for compatible platforms such as Vercel Edge Functions:
This leverages edge servers to enhance your application's speed and user experience.
Supported Hosting Providers
Nuxt 3 offers seamless deployment to various cloud providers with minimal configuration. You can choose from providers like AWS, Azure, Netlify, Vercel, and more. Each provider has its own preset configuration, making deployment easier than ever.
By selecting the appropriate preset in your nuxt.config.js, you can tailor your deployment strategy to your hosting provider:
This allows you to optimize your Nuxt application's performance based on your chosen hosting environment.
Next, let’s quickly explore a few tools available in the Nuxt ecosystem: a file-based CMS provided by Nuxt Content v2, user-friendly content editing capabilities of Nuxt Studio, and insightful debugging insights offered by Nuxt DevTools.
File-based CMS with Nuxt Content v2
Nuxt Content v2 is a powerful file-based CMS that makes it easy to manage content for blogs, documentation, and other content-based sites. It supports Markdown, YML, CSV, and JSON formats, and it integrates seamlessly with Nuxt applications.
Let's illustrate the seamless integration of Nuxt Content v2 by adding it to our Nuxt shop.
We start by installing it by running the command:
Additionally, we’ll be installing Tailwind typography for beautiful typographic defaults:
Then add the plugin to our tailwind.config.js file:
Add @nuxt/content to the modules section of nuxt.config.ts as well:
Let's assume we want to add a blog post titled "10 Tips for e-Commerce Success." We can create a new Markdown file ./content/blog/10-tips-for-e-commerce-success.md and populate it with our content:
Now, to render content pages, add a catch-all route using the ContentDoc component. We can do this by creating a new file - ./pages/[...slug].vue:
Now, when we navigate to http://localhost:3000/blog/10-tips-for-e-commerce-success, we should see our article:

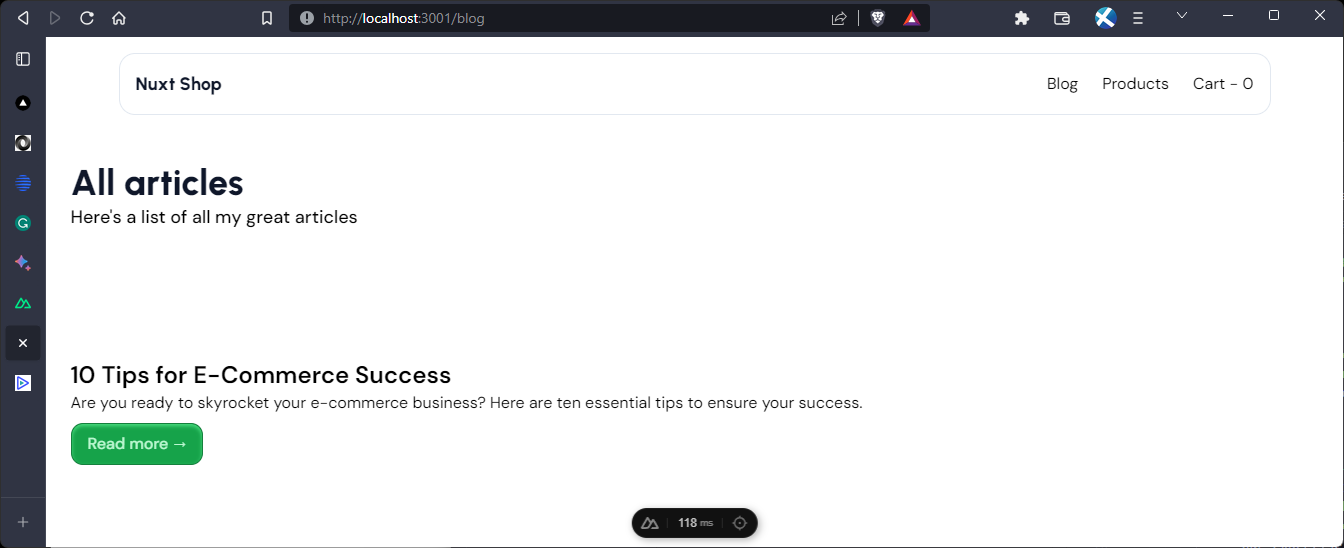
Nice. Next, let’s take a look at how we can list all articles. Create a new file ./pages/blog/index.vue. We’ll be using the <ContentList /> component provided by Nuxt Content to list all the documents in the ./content/blog path:
With that, we can also add the blog link to our site header in ./components/SiteHeader.vue:
Now, when we navigate to http://localhost:3001/blog we should have this:
Awesome.
Use server plugins to add reading time to articles
As promised, here’s how we can use server plugins to add reading time information to our articles. First, we’ll install the reading time npm package.
Next, we’ll create a new server plugin file - ./server/plugins/content.ts:
In this code, we define a server plugin for our application. The plugin adds functionality to calculate and store reading time statistics for content files.
We start by importing the reading-time library, which provides a function to calculate reading time. We also define a custom interface called ReadingTimeStat that extends the ReadTimeResults interface from the reading-time library and includes an additional file property to store the file ID.
Next, we create an array called readingTimeStats to store the reading time statistics for each file.
Inside the defineNitroPlugin function, we define two hooks. The first hook, "content:file:beforeParse", runs before parsing a file. It receives a file object with properties such as readingTime, _id (file ID), and body (file content). If the file has a .md extension, we calculate the reading time using the reading-time library and add the reading time statistics to the readingTimeStats array.
The second hook, "content:file:afterParse", runs after parsing a file. It receives a file object with properties such as readingTime (which is of ReadingTimeStat or undefined type) and _id. We find the corresponding reading time statistics for the current file from the readingTimeStats array and assign it to the readingTime property of the file object.
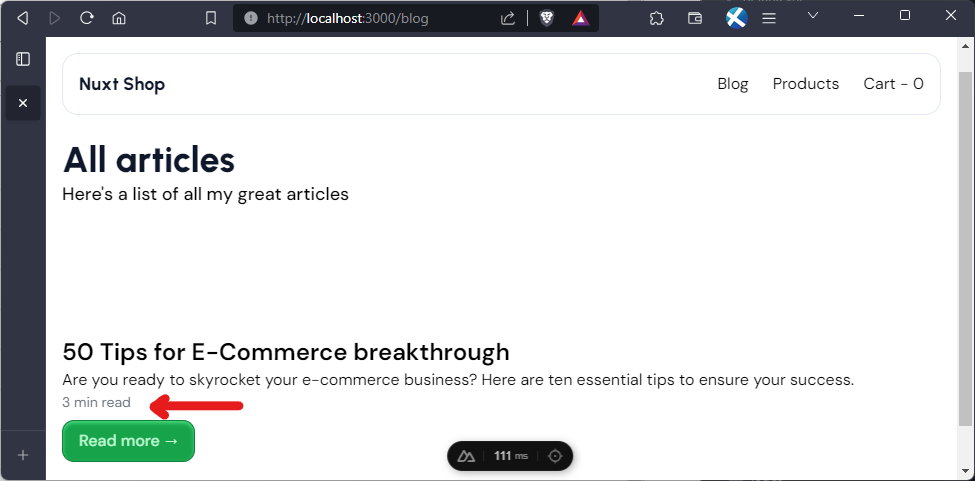
Overall, this code adds hooks to calculate and store reading time statistics for our content documents, allowing us to track and display the estimated reading time for each article.
To display this information in the blog page in ./pages/blog/index.vue, we have to add it to the <ContentList /> component query parameters and render it:
With that we should have something like this:
Awesome.
Content editing made easy with Nuxt Studio
As if the Content module wasn’t great enough on its own already, creating and managing content for your Nuxt applications is further streamlined with the introduction of Nuxt Studio. This visual tool offers a user-friendly interface for content editing, making collaboration and real-time previews hassle-free.
The platform provides a variety of views, each tailored to a specific aspect of your project:
Overview: get a comprehensive snapshot of your project, including its structure, themes, and configuration.
MDC Editor: the Markdown Components Editor (MDC) turbocharges your content creation process. Seamlessly switch between Vue components and Markdown shortcuts using the / command.
Content File System: experience content management akin to development. Observe changes before committing and enjoy a familiar environment for creating, editing, and organizing files and folders.
Real-time previews and GitHub integration
Furthermore, one of Nuxt Studio's standout features is its ability to generate real-time preview URLs for each branch or pull request. This means that you can instantly view changes without the need for repetitive re-deployments.
Let’s briefly walk through how we can set up a project in Nuxt studio. First, we’ll have to sign up for an account at https://nuxt.studio/.
Once we have our account set up, we can go ahead to create a new project:
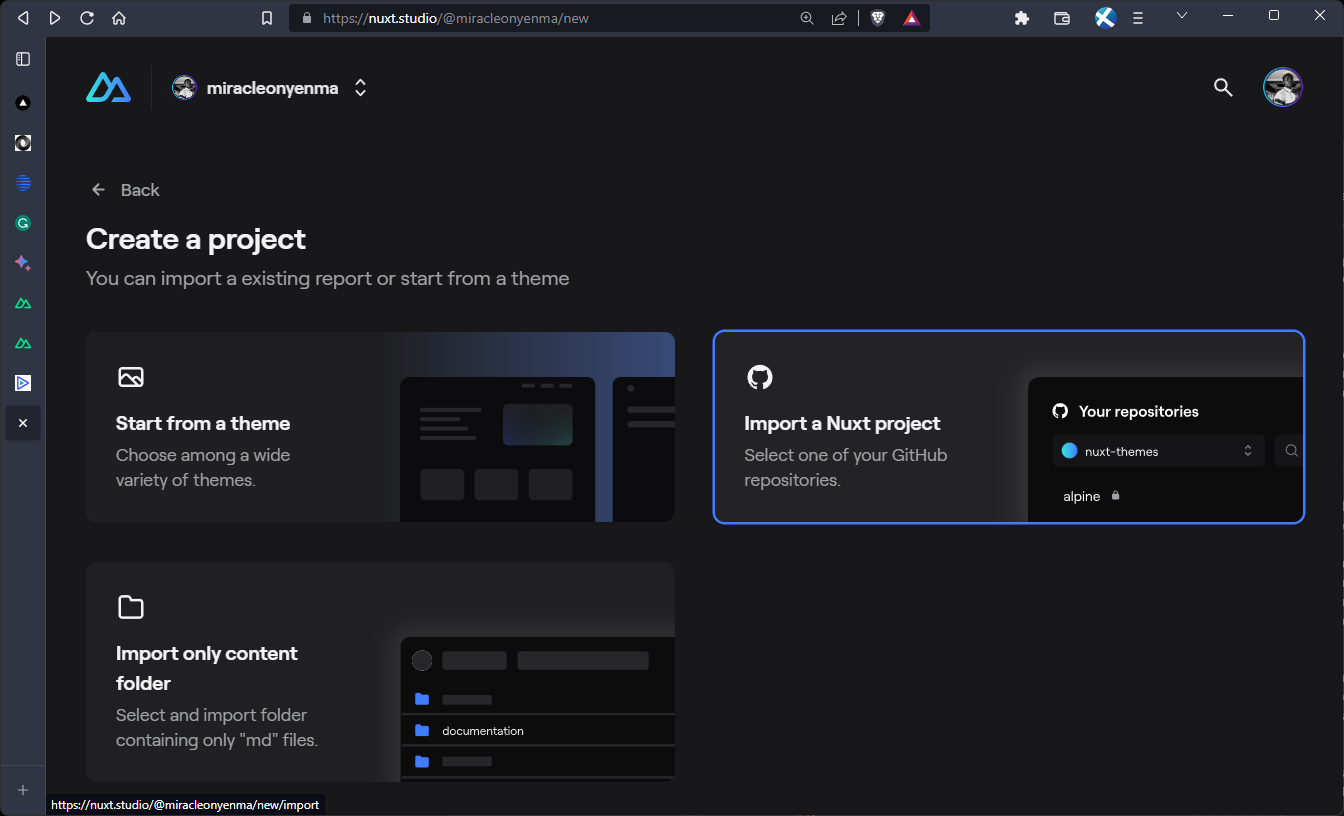
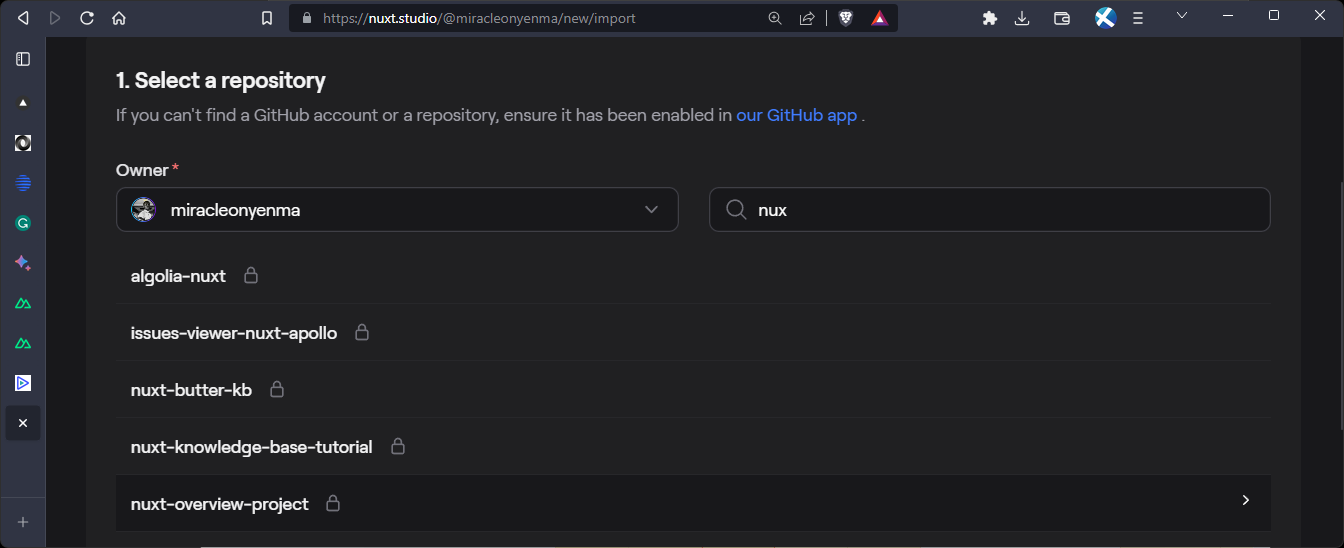
Next, select the project from GitHub:
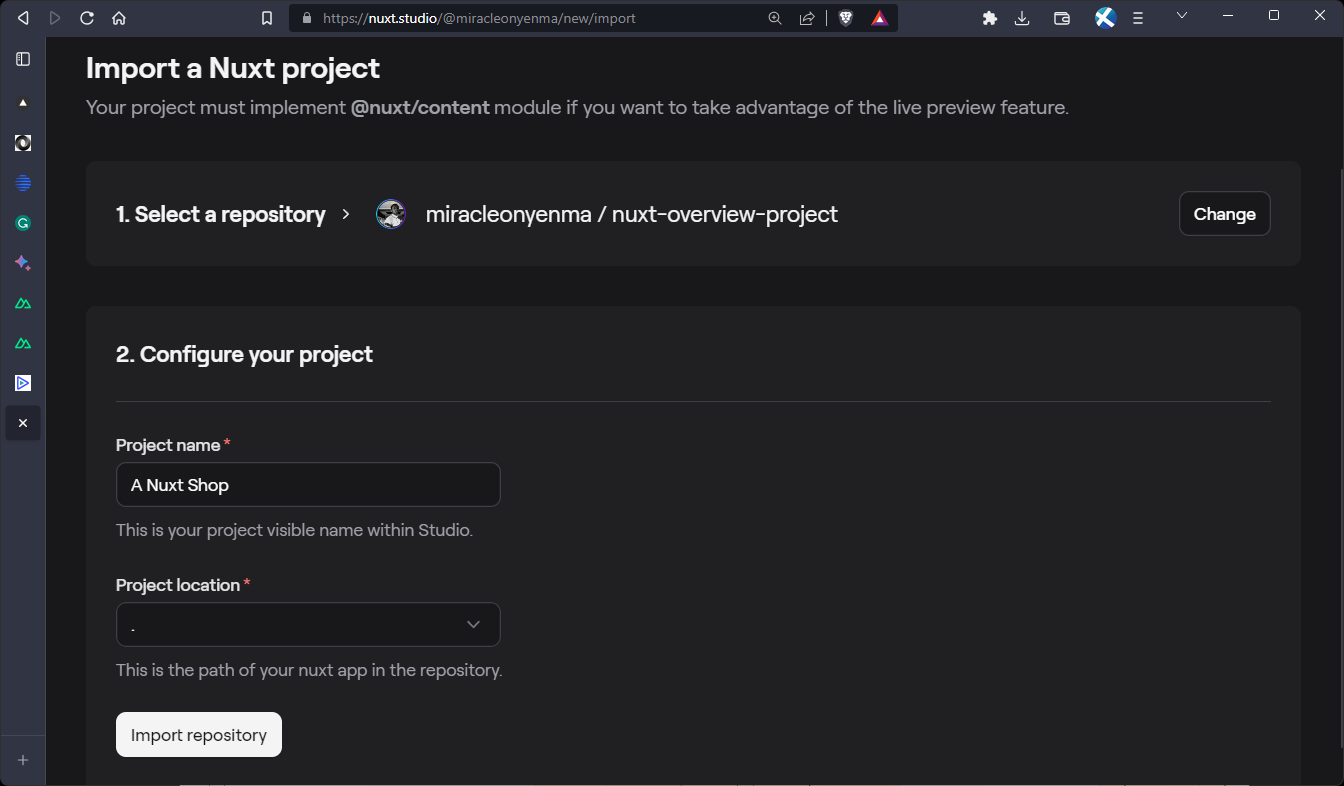
We can now specify the project name and project location:
Now, Nuxt Studio will set up the project for us:
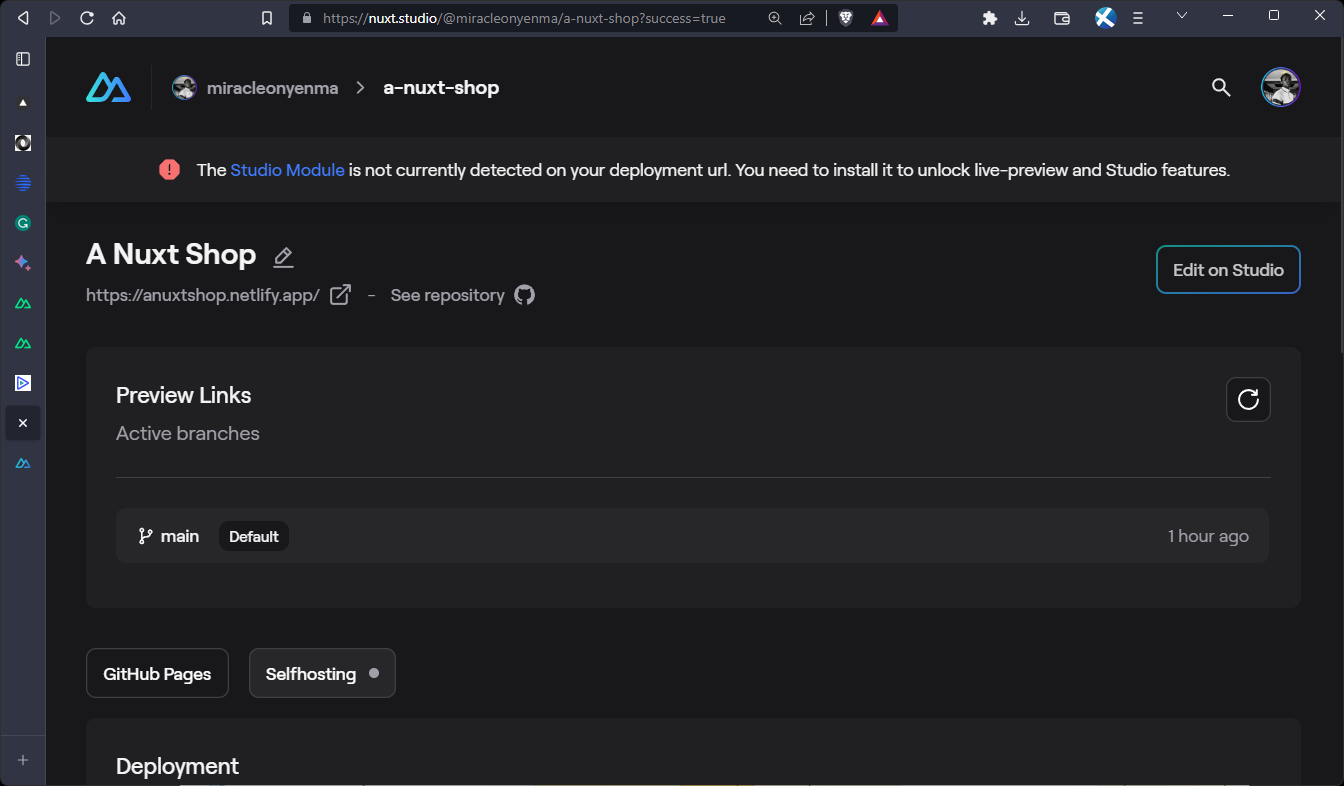
We can see that the Studio Module is not currently detected on our deployment URL. We’ll need to install it to unlock live-preview and Studio features.
In our terminal, execute the following command:
Once installed, we can add the module to our nuxt.config.ts file:
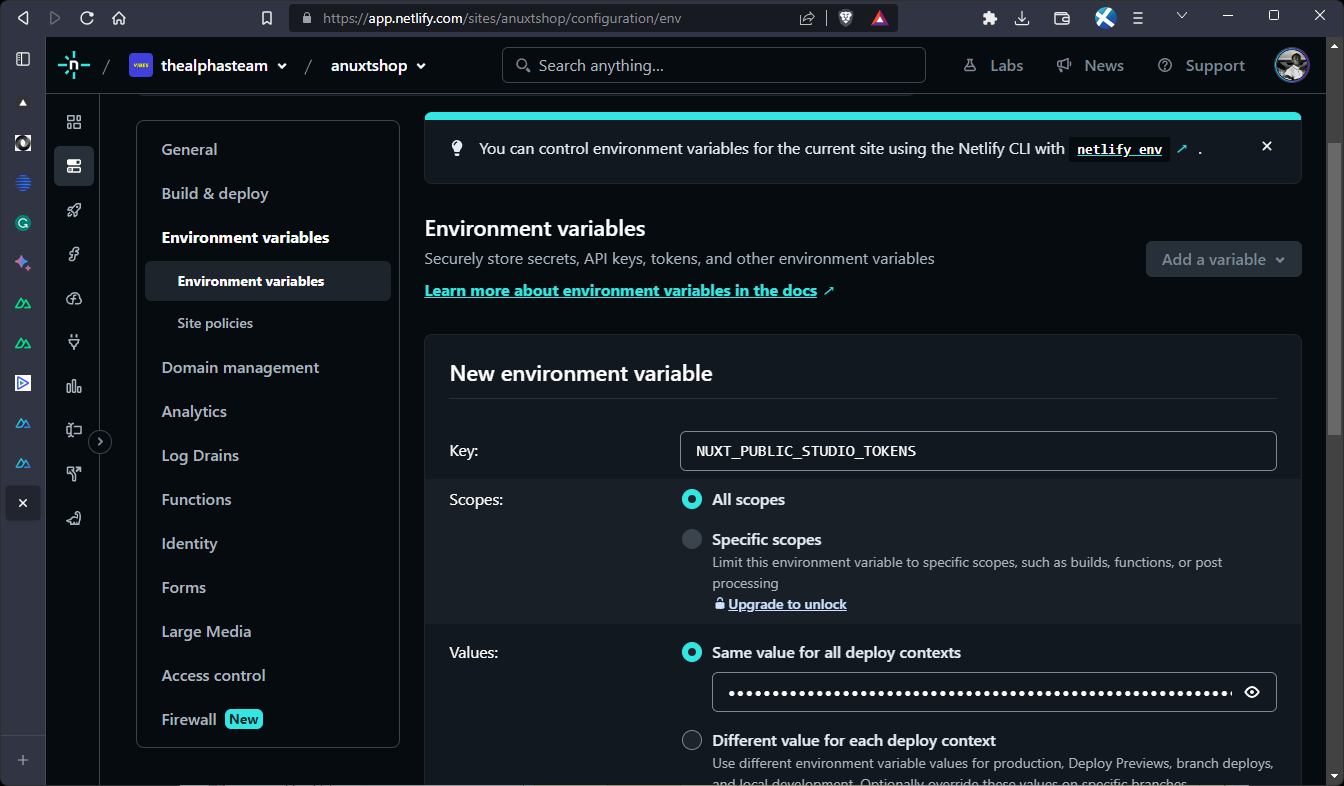
For self-hosted deployments, Studio needs to verify that you own the domain using a verification token. We can find this token in the deployment block within the self-hosted section:

To set the verification token, we need to define the NUXT_PUBLIC_STUDIO_TOKENS environment variable and assign it your verification token.
The example project is deployed on Netlify, so environment variable can be added in the site configuration:
Now a deployment can be triggered for the changes to take place.
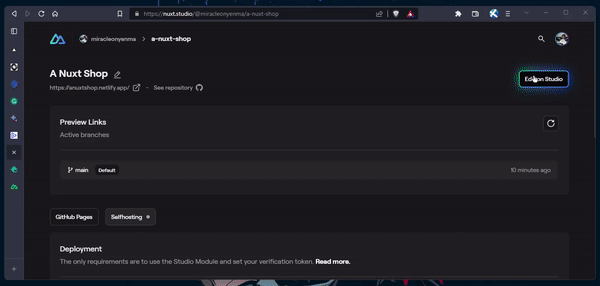
Once the requirements are met and your website is deployed, you will be able to enter the deployed URL and save it.
Let’s see it in action:
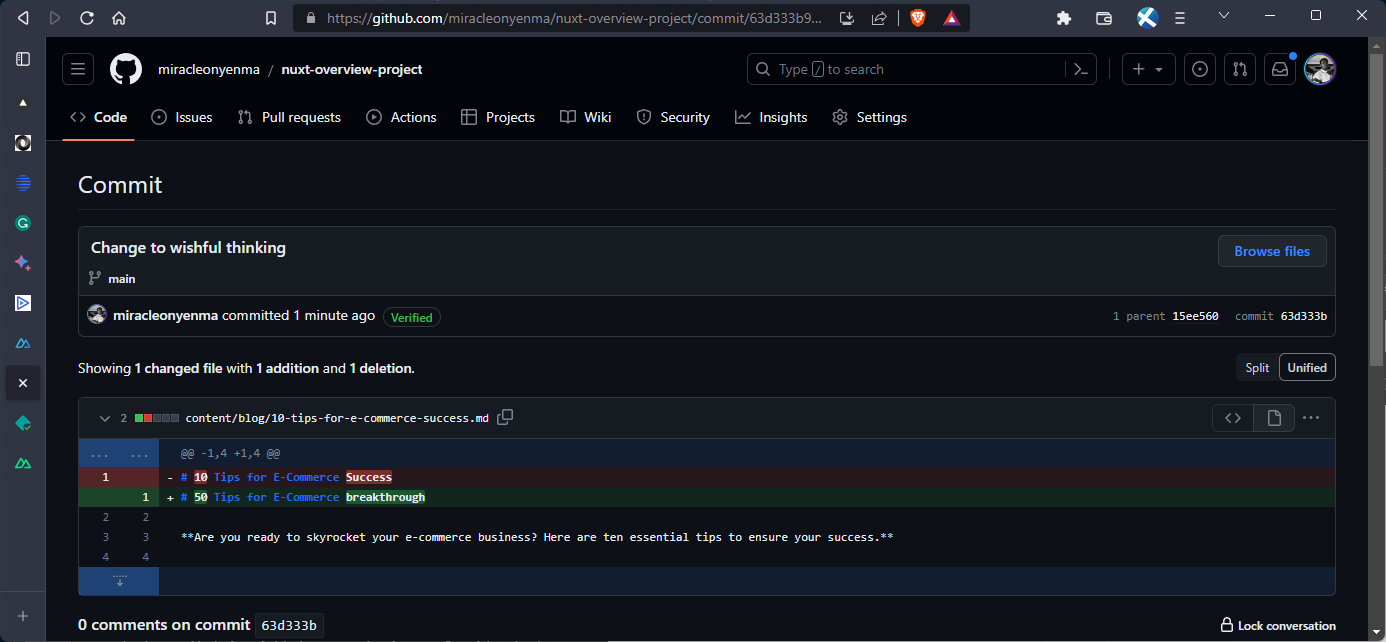
Here, we can see the changes made on GitHub:
Awesome!
Nuxt DevTools
Nuxt DevTools, an experimental module within the Nuxt ecosystem, offers an insightful toolset to understand and optimize your Nuxt applications. Designed to enhance transparency and streamline app management, Nuxt DevTools provides a range of insights that empower developers to deliver optimized user experiences.
Nuxt DevTools comes pre-installed and enabled in recent Nuxt projects, discreetly residing as the unobtrusive bubble at the bottom of your app pages. Just click on it to access a wealth of valuable insights.
Here are a few of the features and capabilities of Nuxt DevTools:
- Snapshot of your app: the Overview view presents a digestible summary of your app's components, pages, plugins, and modules. You can also upgrade Nuxt and modules with a single click.
- Pages and dynamic routing: the Pages tab allows you to seamlessly navigate through your app's routes and experiment with dynamic route parameters.
- Component insights: the Components tab helps you understand your app's components and their relationships. You can also use the Inspector feature to inspect your app's DOM tree.
- Modules, plugins, and hooks: the Terminal tab provides a clear view of installed modules and streamlines updates. You can also gain insights into plugins and monitor hooks' behavior.
- Simple app configuration: the Settings tab allows you to modify app settings and configurations on the fly. You can see the immediate effects of your changes as you experiment.
- Explore more: delve into payload and data management insights. Additionally, discover integrations like virtual files and Vite, allowing you to understand how your app's code transforms during development.
Let’s explore it a little:
To learn more, check out the overview of Nuxt devtools from the release announcement or official documentation.
Conclusion
Nuxt, with its ever-evolving ecosystem, continues to empower developers with an array of remarkable tools and features. From seamless Vue integration and enhanced type support to dynamic elements and improved performance, Nuxt is undeniably at the forefront of modern web development.
As we've explored, Nuxt Content v2 simplifies content management, Nuxt Studio revolutionizes content editing, and Nuxt Devtools provides an intuitive way to debug and enhance your projects. These tools collectively enhance your development workflow, making the creation of interactive and engaging web applications an enjoyable journey.
With each version release, Nuxt introduces innovative solutions that drive the web development landscape forward. Whether you're a seasoned developer or just starting, Nuxt's ecosystem offers a range of resources to empower your journey.
Further reading and resources
For deeper insights and additional resources on Nuxt and its ecosystem, consider exploring the following:
- Official Nuxt documentation: dive into the heart of Nuxt with its official documentation, offering comprehensive guides, tutorials, and best practices.
- Nuxt Content: learn more about Nuxt Content, its features, and how to leverage it effectively by exploring the official documentation.
- Nuxt Studio: discover the power of Nuxt Studio for content editing and management by delving into its official documentation.
- Nuxt Devtools: to enhance your debugging capabilities and streamline development, explore the features and usage of Nuxt Devtools.
- Vue.js: deepen your understanding of Vue.js, the foundation of Nuxt, by visiting the Vue.js documentation.
Resources
Happy coding!