- 13 min to read
Integrating passwordless authentication in a Next.js application using Clerk
Discover the hassle-free and secure approach of passwordless authentication with Clerk in Next.js 13 applications. Say goodbye to password-related issues and enhance user security.


Introduction
Authentication is a critical component of web applications that handles the task of confirming and validating the identity of users accessing an application. The imperatives of data protection, tailored experiences, accountability, and access control cause the need to authenticate web applications. Based on provided credentials or some other factors, users get verified against who they claim to be.
From a general point of view, authentication classifies into password-based and passwordless authentication based on the method employed to verify a particular user's identity.
Password-based authentication is the traditional way of confirming user identity, which entails prompting a user to give a unique combination of a username or email address and a password. It relies on the secrecy and difficulty of the password as the primary form of authentication.
Passwordless authentication does away with the necessity for standard passwords and offers new techniques for authenticating users. It uses custom links, social media accounts, biometrics, and so on, to verify user identity.
Password-based authentication systems are open to various attacks, including brute force and dictionary attacks, among others, in contrast to passwordless authentication systems, which provide a more secure approach to authentication.
This article serves as a guide to integrating passwordless authentication in a Next.js application using Clerk. Next.js is a React framework for building fast and scalable web applications with a couple of modern web features. On the other hand, Clerk is a full-fledged user authentication and management system. It provides features for passwordless authentication that is easy to use and does not require much effort to set up.
By combining Clerk's passwordless authentication capabilities, we can build an application that not only provides a seamless user experience but also maintains a high level of security.
Let’s get right to it!
Here is a link to the finished application on GitHub. Also, you can see the preview running on CodeSandbox.
Requirements
To follow along with this article, you need to have:
- Node.js installed on your computer.
- A basic understanding of Next.js.
Understanding passwordless authentication
Passwordless authentication is a modern authentication approach gaining popularity in web applications. It entails authenticating the identity of users accessing a system or application without relying on passwords or other knowledge-based secrets.
Passwordless authentication has several advantages over standard password-based authentication. Let's look at a few of them.
- Less burden with password management: Passwordless authentication alleviates the work of securely storing and managing passwords, resulting in enhanced scalability and simpler authentication system maintenance.
- Improved Security: It removes the dependence on passwords, which is the principal target of attackers, boosting the security of the authentication process.
- User Experience: Passwordless authentication reduces inconvenience and provides a more fluid and user-friendly experience.
- Flexibility: Passwordless authentication enables easy integration with modern technologies such as biometrics and facial recognition.
Passwordless authentication is often implemented in a couple of different ways. Some of the popular password authentication mechanisms may include:
OTPs (One-time passwords)
One-time password authentication involves sending a time-limited passcode (usually a string or numeric code) to a user’s registered email or mobile number. The user enters the code when prompted, granted access, and hence authenticated.
The application generates a new OTP every time a user wants to authenticate. Once used, the OTP becomes stale and cannot be reused by the user nor a third party.
Do not confuse the “password” in OTP with traditional passwords in a password-based authentication system. OTP is some randomly generated numeric or string code while the latter is user-defined or managed.
Custom authentication links
This approach works similarly to the OTP-based approach. Here, the application generates and stores a token added as part of a custom link that gets sent to a user’s email.
When the user opens the link, the application retrieves and verifies the token from the custom link. If it matches, it grants access, otherwise, returns an error.
The unique link, like one-time passwords, has a time limit and expires after a single use.
Social sign-in
Here, a user signs in using an existing social account. Users can, for example, use their Google or Twitter credentials to log into an application, streamlining the authentication procedure.
Instead of manually filling out forms in the application, the necessary details are fetched automatically from the social account.
Biometrics
To validate an individual's identity, biometric authentication utilizes distinctive physical traits, such as fingerprints, or unique physiological characteristics, such as facial features or iris patterns, captured through technologies like facial recognition or iris scans. Biometric authentication is generally simple and quick from a user’s point of view, and it also provides a higher degree of confidence.
Some other passwordless authentication mechanisms are WebAuthn, SAML Login, etc.
Popular use cases of passwordless authentication exist in applications like Slack, GitHub, Stripe, and all across the web.
Clerk and its features for passwordless authentication
Clerk is an easy, highly integrative, and secure authentication and user management platform. It relieves developers of the burden of managing complex authentication routines and provides pre-built UI components that integrate seamlessly into web applications.
With over 10 thousand applications and countless great reviews, Clerk has proven to be quite handy and popular among developers.
The Clerk team focuses not only on delivering an authentication solution but also on user management as a whole, allowing developers to stop reinventing the wheel and focus on their primary business.
Clerk provides UI components for sign up, sign in, user profile, sser button, and others that mount directly in web applications. These components are highly customizable and can be easily localized.
Clerk also provides third-party integrations and SDKs for popular front-end and back-end frameworks, making it easy to get up and running.
With Clerk, we can implement both password-based and passwordless forms of authentication. However, in this context, we’ll work only with passwordless. Some of Clerk’s features for passwordless authentication include one-time passwords, custom authentication links, and social sign-in.
Before we begin working with Clerk, let's develop a sample Next.js application in the next section, which we will demo with for the rest of this article.
Setting up a Next.js application
In a preferred directory, run the command below to install the latest version of Next.js (version 13+) using the create-next-app CLI tool. This tool automatically sets up and configures the Next.js project.
Enter a name for the project and fill in the prompts with the defaults as shown below.
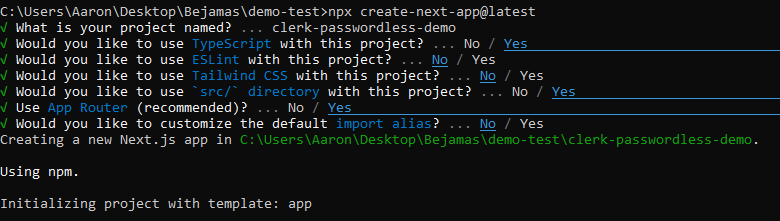
On successful installation, the tool creates a new project folder that has nested in it the default folder structure and files. Here, we name the project clerk-passwordless-demo.
Change into the newly created project folder.
And start the development server with the command below.
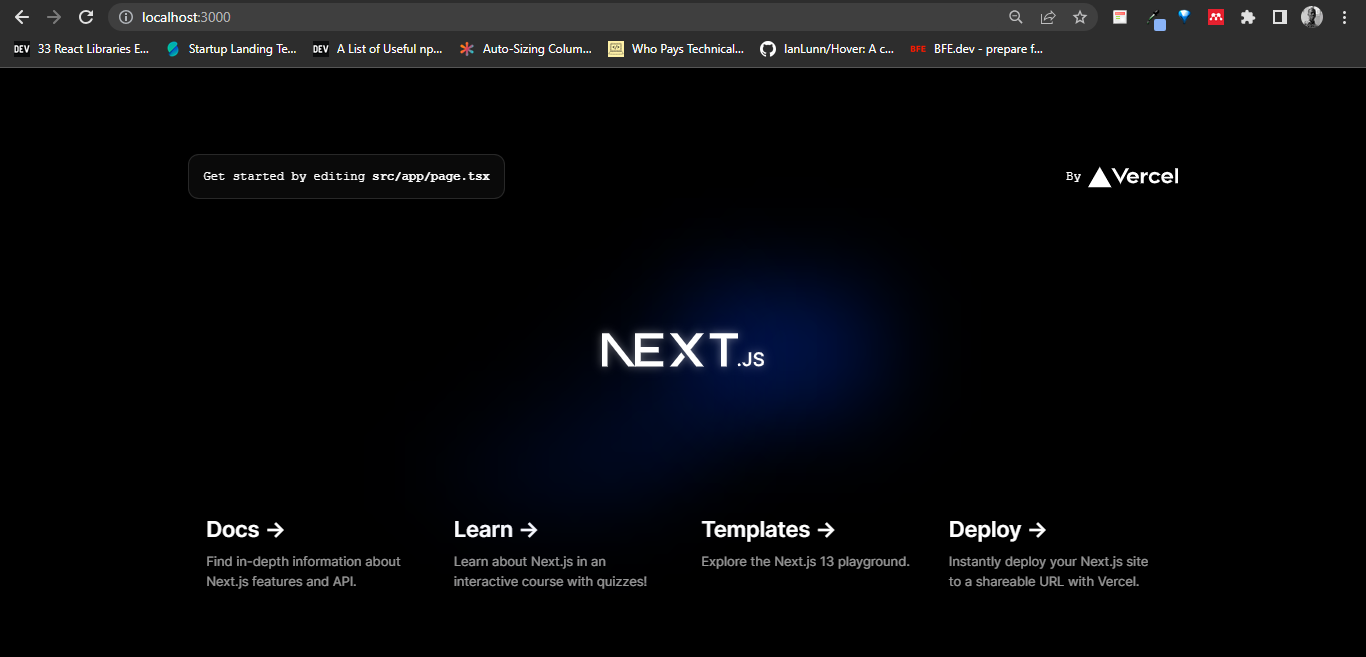
The application gets assigned localhost:3000 by default. Open it in your browser to see what we’ve got.
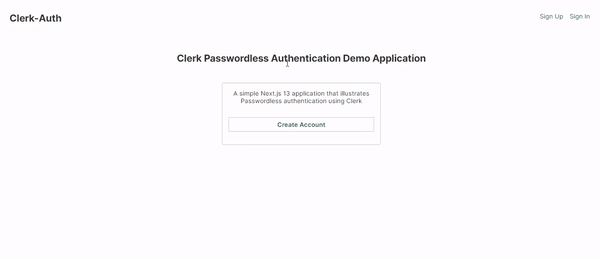
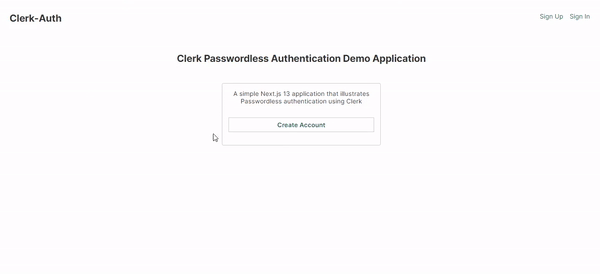
Moving forward, let’s remove the template code and create a demo application with three pages: the Home, Auth, and Main page.
The Home page is the entry point to the application, Auth is where authentication takes place, and Main is a page that should get loaded when authentication completes.
For now, we’ll only format the pages. In a subsequent section, we’ll add the necessary restrictions with Clerk.
To start with, let’s create a Header component for easy navigation. Open the project in your code editor and create a /components folder in the src/app/ folder of the project.
Create a new Header.tsx file in the src/app/components/ folder and add the code below:
Here, we created a client component header with Link components that point to some routes that we will define later in this article.
Next, let’s add the Header to the application’s layout. Open the layout.tsx file in the src/app folder and edit the code as shown below:
Here, the code imports the Header component and renders it adjacent to the value of the element from the children prop.
To create the Home page, open the page.tsx file in the src/app/ folder and replace the template code with the code below:
The code above defines a default Home component with some sample content.
To create the Auth page, add a new /auth folder to the src/app/ folder. Also, add a /[action] to the newly created /auth folder to depict a dynamic route for the Auth page.
A dynamic route gets added so we can differentiate between when a user is signing up or signing in.
Next, add a page.tsx file to the src/app/auth/[action]/ and add the code below:
The code above defines a simple component for the Auth page.
Lastly, create a main folder in the src/app/ folder for the Main page and add a page.tsx file to the main folder. Open the file and add the code below:
Here, the code also defines a component with sample content for the Main page.
You may have noticed that the code has been using CSS class names up to this point. Yes, I have prepared some basic styles to make the application look a bit more appealing. You can style the application however you want.
Open the globals.css file in the src/app/ directory and replace all the styles defined in it with the styles in the GitHub repository.
Next, save the changes and test the application in the browser. The application will now be visible and you should be able to navigate between the created pages.
Creating a new Clerk application
Integrating Clerk into our demo application requires having a Clerk account. Add a new Clerk application instance for the subject application, and configure the authentication options.
Open clerk.com in your browser to get started.
Sign up to create an account, or Sign in if you already have one.
Once done, a prompt to create a new Clerk application becomes visible.
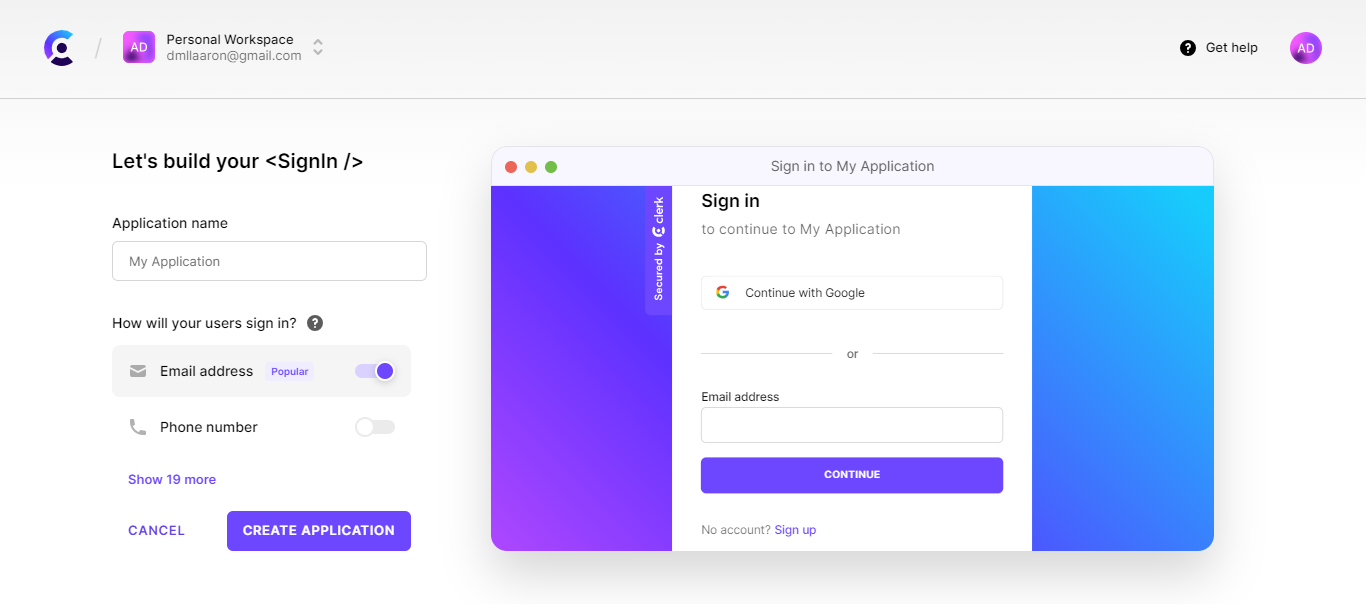
Enter the name of the demo project and click on Create application button. Ignore the other parts, as we will configure the application later to allow passwordless authentication.
Next, the website redirects to the dashboard of the newly created Clerk application. From the dashboard, we can manage our users, set configuration options, and so on.
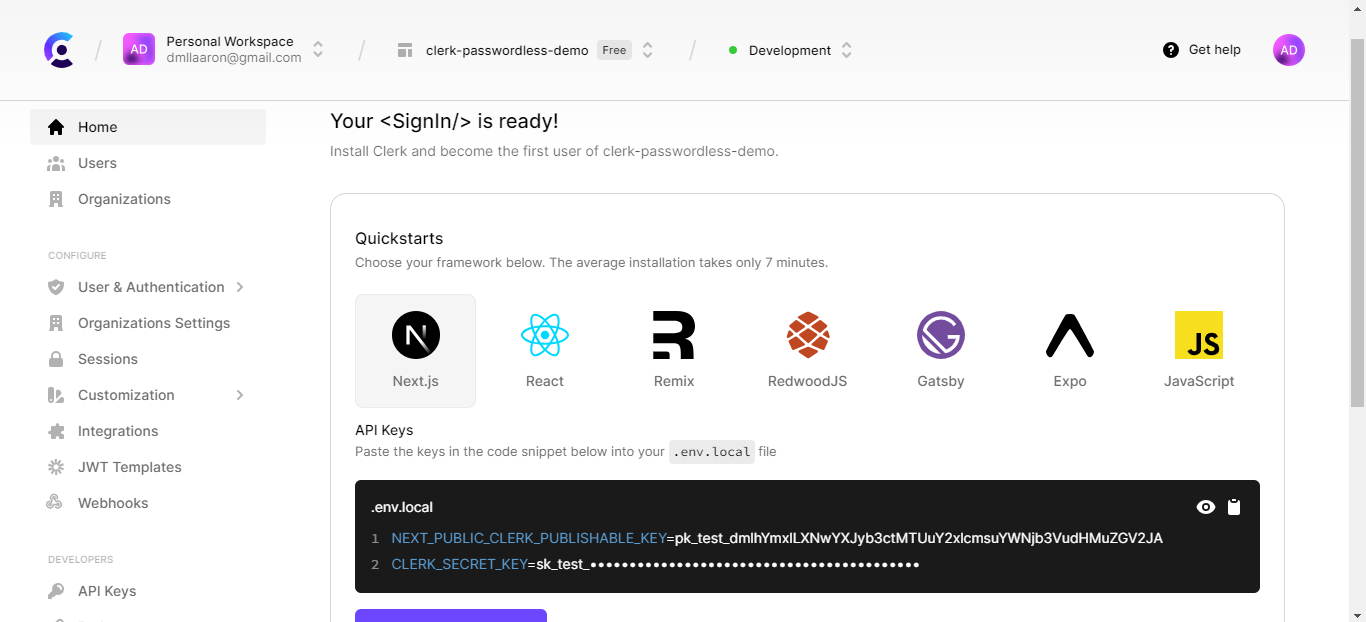
The application’s API keys become visible immediately. If not, click on API Keys on the sidebar to access the keys. The keys will aid communication with the created Clerk application.
To configure the application and allow for passwordless authentication, click on User and Authentication on the sidebar and click Email, Phone, and Username from the nested options.
On the loaded page, a couple of authentication options become visible. We can switch some of these options on and off. However, to set up passwordless authentication, scroll down to the Authentication factors section of the page and trigger off the Password option.
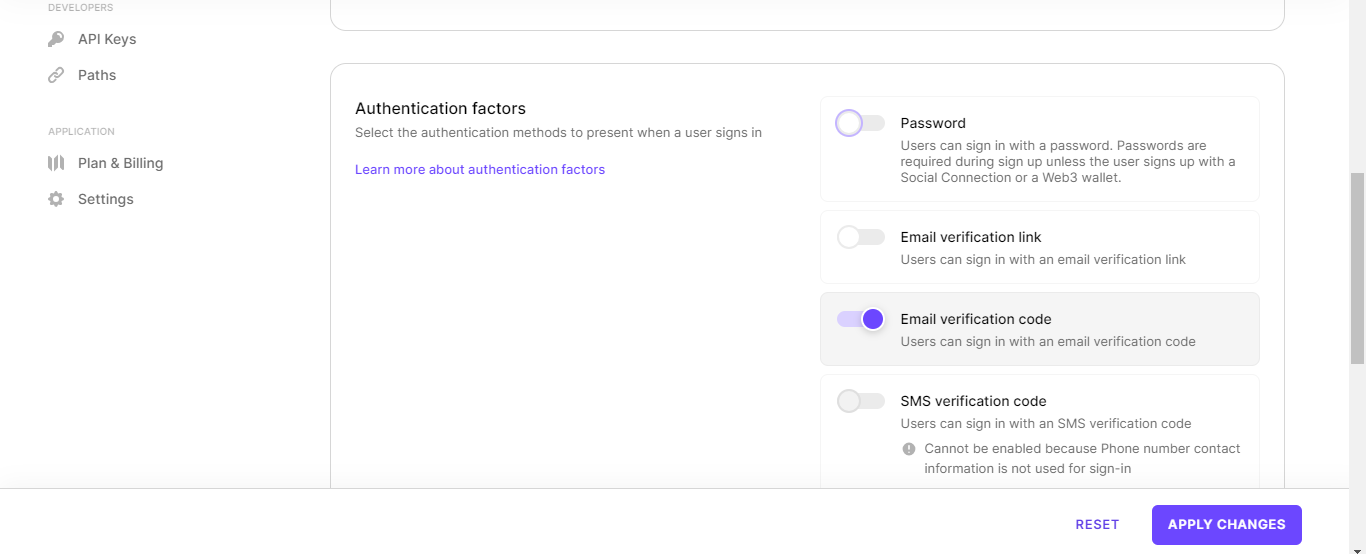
With that, passwordless authentication is set. Next, it is mandatory to select at least one of the other options in the Authentication factors section. You can choose to allow authentication by email verification link or code and SMS verification code, but it mandates choosing at least one.
Scroll down and trigger the name option from the personal information section, and we can now leave the rest as defaults.
With everything completed, we are now ready to begin working with Clerk.
Installing the Clerk Next.js package
The Clerk team offers a Next.js SDK for quickly adding secure and fast authentication to Next.js applications. It provides access to prebuilt components and hooks, as well as Next.js API routes,server-side rendering, and middleware utilities.
To install the Clerk SDK, run the command below:
Next, at the root level of the demo project’s folder, create a .env.local file and define your API keys as shown below:
Replace the placeholders with your API Keys. Remember it is accessible from the dashboard.
Integrating Clerk into the demo application
Via the Next.js SDK, we now have access to a <ClerkProvider> wrapper component. The component encapsulates a Next.js application to offer active session and user context to Clerk's hooks and other components.
It recommends wrapping the entire application with the component so its capabilities become attainable from anywhere within the application.
Open the src/app/layout.tsx file and update the code to reflect the <ClerkProvider> component.
The code above imports and wraps the <ClerkProvider> wrapper around the <body> of the application.
Note that the <ClerkProvider> component works only with server components. We are working with Next.js v13+ here, so the RootLayout component is a server component by default.
To add a protection layer across the application, the Clerk SDK also exposes a middleware, authMiddleware, to implement this.
Create a middleware.ts file in the src/ folder, on the same layer as the src/app/ folder, and add the code below:
With that done, the entire application is now protected, and all attempts to access it redirect to Clerk's default authentication page.
However, we can make some pages public by passing a publicRoutes argument to the authMiddleware function. The argument accepts an array of routes that should be public.
Edit the authMiddleware function in the src/middleware.ts file as shown below:
Here, the Home and the Auth pages are public.
The middleware function is still entirely new and there is a lot more we can do with it. You can learn more on the authMiddleware reference page.
Embedding Clerk's pre-built components
Clerk offers a number of pre-built components and helper functions used to add authentication and user management functionalities to a Next.js application.
To complete a full authentication circle, we need to implement sign-up, sign-in, sign-out, and user account management functionalities in our demo application.
Sign up, sign in, and sign out
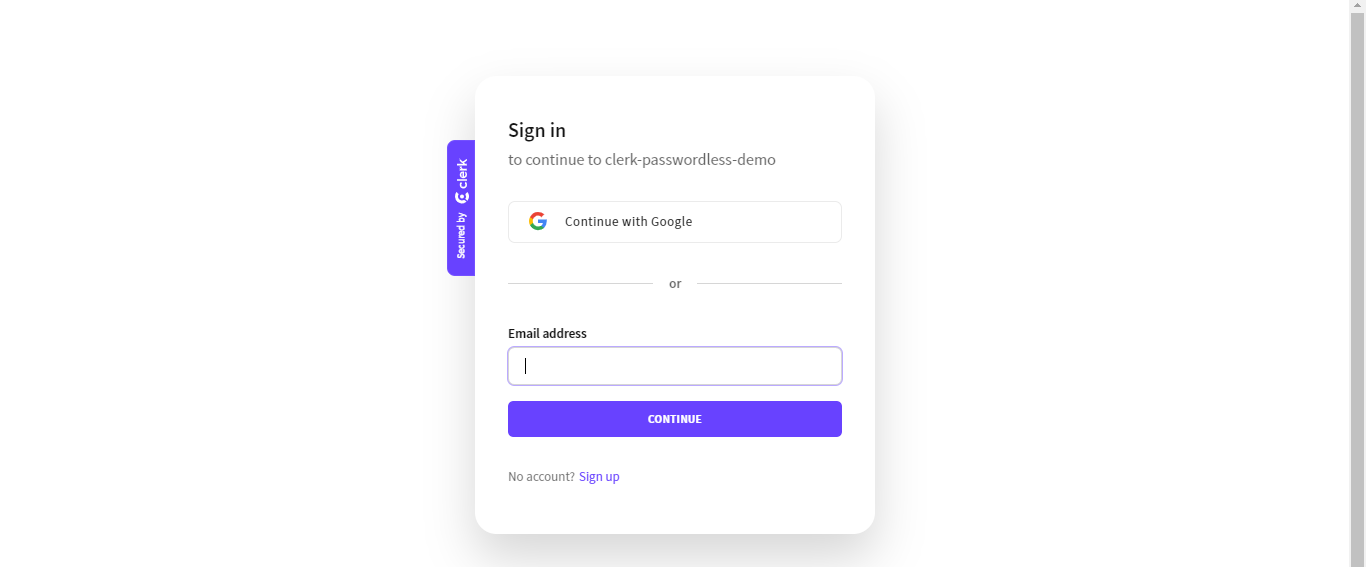
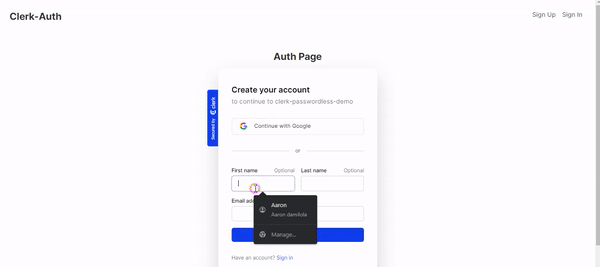
The Clerk SDK exports a <SignUp /> component that adds a nice-looking UI with the choice of required fields and social sign-up providers of the linked Clerk application.
The <SignUp /> component accepts some props used to customize its behavior. For instance, it allows a string type redirectUrl prop that specifies the full URL or path to navigate after successful sign up.
The component also accepts an appearance prop that controls the overall look and feel, a routing prop that defines the routing strategy for the pages, and so on. Click here to learn more about the <SignUp /> component and all its other valid props.
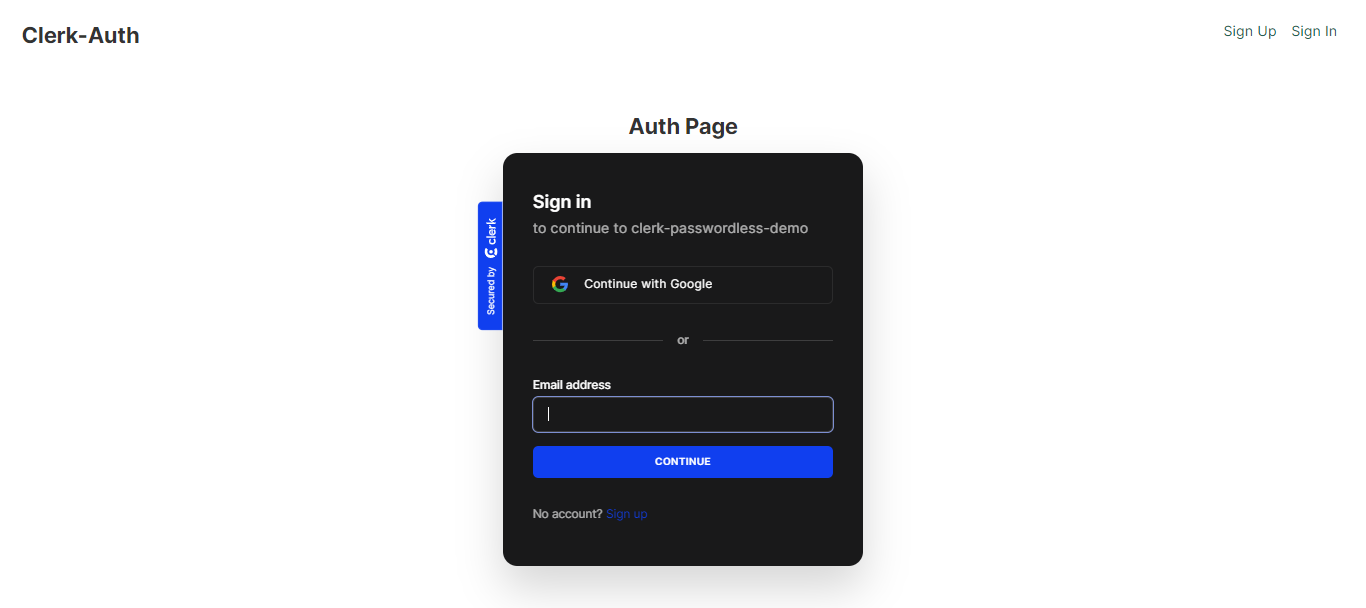
Similar to the <SignUp /> component, Clerk provides a <SignIn /> component that adds a full-featured UI for adding users to the application. The <SignIn /> also accepts a redirectUrl prop, an appearance prop, a routing prop, and a couple of other props. Click here to learn more.
To add the <SignUp /> and <SignIn /> components to the demo application, open the src/app/auth/[action]/page.tsx file and update the code as shown below:
The code above renders a <SignUp /> or a <SignIn /> component based on the params value. The redirectUrl prop was also defined to link to the Main page.
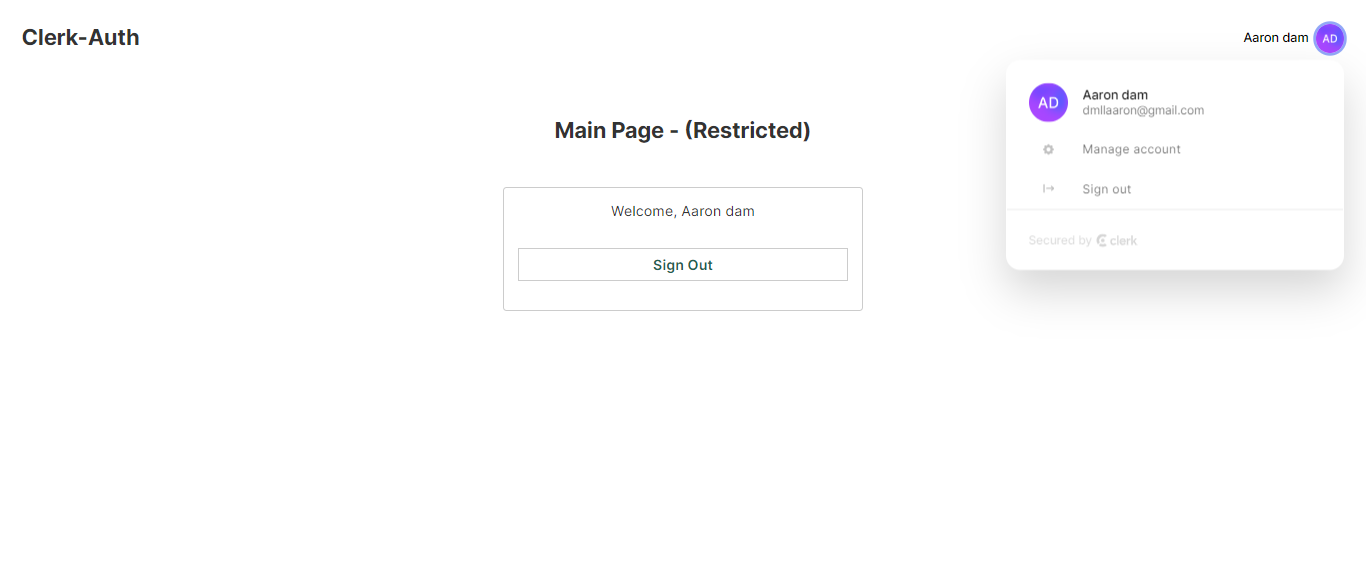
Clerk offers a <SignOutButton /> that renders a button to sign out a user. The button can be wrapped around children elements.
Open the src/app/main/page.tsx file and update it as shown below:
The code above adds a sign-out button that becomes functional immediately.
Reading user and session data
Clerk provides a collection of hooks and helper functions for accessing the active session and user data in a Next.js application. Let’s learn about some of them.
- The
authhelper: an asynchronous function that provides access to the current auth state - The
currentUserhelper: an asynchronous function that helps retrieve the user object for the currently logged-in user - The
useUserhook: a client-side hook to access the data of the currently logged-in user - The
useAuthhook: a client-side hook to access the current auth state
Click here to learn more about some of these hooks and helpers. However, let’s get a user’s details on the Main page of the demo application using the currentUser() helper.
Open the src/app/main/page.tsx file and update the code as shown below:
The code replaces the “User” placeholder text with the logged-in user's first and last name.
User account management
In addition to the previously highlighted components, Clerk also offers a <UserButton /> and a <UserProfile /> component that allows users to manage their accounts.
The <UserButton /> component renders a clickable user avatar which, when clicked, serves as an access point for a user to manage the account, switch accounts, or sign out.
The <UserProfile /> component renders a full-featured account management interface that allows users to manage their profile and security settings.
Let’s add a <UserButton /> component to the header of the demo application. Open the src/app/components/Header.tsx file and update the code as shown below:
The code imports the useUser hook and only renders the <UserButton /> when the user gets loaded or signed in.
The <UserButton /> accepts a couple of props. In the code above, we added an afterSignOutUrl that indicates the redirect link when the user signs out via the user button. Click here to see some of its other valid props.
Save the changes and preview the application in your browser.
Adding customization
To implement customization, Clerk offers an appearance prop that adds globally to the <ClerkProvider /> or individually to any of the Clerk components.
Specifically, we can set a theme, change the default layout, define custom variables, and style individual elements of the components.
Clerk provides a set of predefined themes out of the box in a @clerk/themes package. To use a theme, we first need to install the package.
Run the command below to install the @clerk/themes package.
Next, open the src/app/layout.tsx file and update the code as shown below to change the default theme:
Here, we imported the dark theme from @clerk/themes and passed it as a value to the baseTheme key of the appearance prop.
Click here to learn more about other customization mechanisms.
Using Clerk with Next.js route handlers
Using Clerk with Next.js Route handlers is quite straightforward. Some of the helpers offered by Clerk allow direct usage in Next.js API route handlers. For example, shown below is a code snippet that uses the currentUser helper function explained in an earlier section of this article.
Here, It also aids in retrieving the user object for the presently logged-in user.
Conclusion
Using passwordless authentication can decrease the difficulties associated with password-based authentication. Clerk makes the implementation quick and seamless with its prebuilt components, helper functions, and hooks.
This article covered a brief overview of passwordless authentication and what Clerk is. It also illustrated the process of creating a simple Next.js 13 application that integrates Clerk’s passwordless authentication and user management feature.
Dive into the official documentation to learn about other cool features Clerk offers.
Useful resources
- A complete guide to passwordless authentication (Clerk blog)
- Clerk’s Next.js SDK documentation
- How to Add Passwords Authentication and Login in Next.js with Clerk (Colby Fayock)
- Stable Support for the Next.js App Router, plus a Middleware Update! (Clerk blog)
- Passwordless Authentication: Which Option Is Right for Your App (Clerk blog)
- The complete guide to passwordless authentication flows (Arengu blog)