Knowledge Hub
Building a Jamstack event management system with Sveltekit, Netlify Functions, and Vercel Functions
Introduction to Jamstack
Jamstack is an advanced web development architecture that employs client-side JavaScript, reusable APIs, and prebuilt Markup. Its primary advantages are improved performance, security, scalability, and developer experience.
Jamstack is an excellent choice for an Event Management System because it allows for the rapid processing of dynamic data, smooth content changes, and robust scalability to accommodate a wide range of event sizes and needs. Another feature that makes Jamstack a viable choice for this type of web application is its speed and security.
Setting up your development environment
To start with SvelteKit, Netlify Functions, and Vercel Functions, you need to set up your development environment. Below are the necessary tools you need to get started:
- Node.js and npm: Node.js is a runtime environment that executes JavaScript outside a web browser. npm, which comes with Node.js, is a package manager you'll use to install JavaScript libraries.
- MongoDB Atlas Cluster: you need to set up and deploy a MongoDB Atlas cluster.
- SvelteKit: SvelteKit is a framework for building extremely high-performance web apps. It is built on top of Svelte.
- Netlify CLI: Netlify CLI is a command-line tool that allows you to build, deploy, and manage your Netlify sites from your local machine.
Ensure Node.js is installed by running node -v and npm -v in your terminal. If not, download and install Node.js from the official site. Once Node.js is installed, install SvelteKit and Netlify CLI globally with npm install -g svelte-kit netlify-cli. The code for this tutorial is available on my GitHub repository, feel free to clone and follow along.
Creating a new SvelteKit project
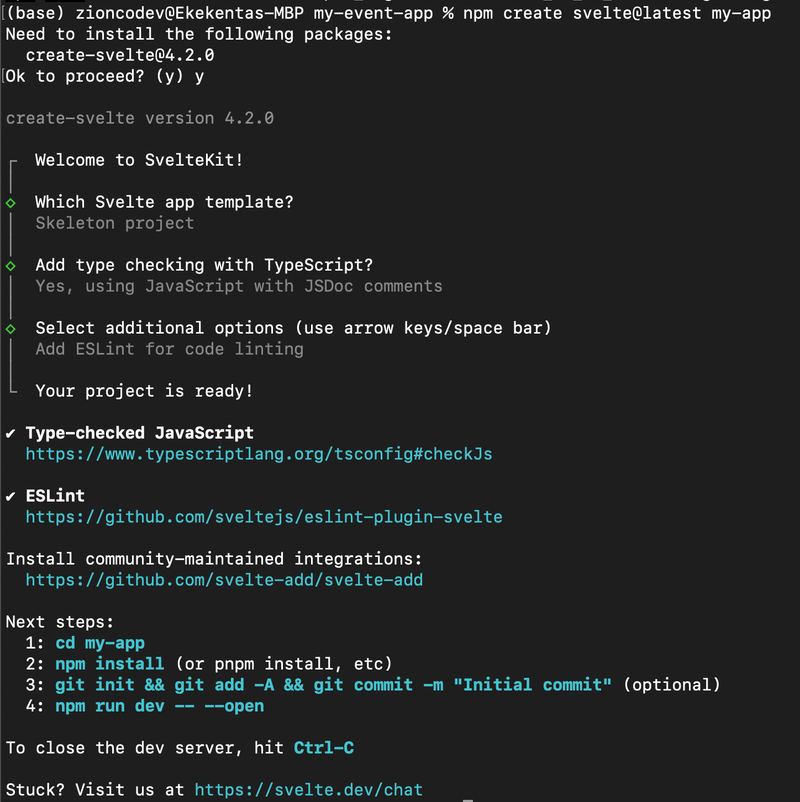
To start, create a new SvelteKit project by running npm create svelte@latest my-app in your terminal. You'll be prompted to answer a few questions regarding the setup. For the purpose of this tutorial, the selection should be like the one on the screenshot below:
Next, change the directory into the project folder and install the required dependencies with the following commands:
cd my-app

npm install
Now run the development server with the command below:
npm run dev -- --openThe above command will run the Svelkit application on http://localhost:5173/.
Introduction to serverless functions
Serverless functions, also known as Lambdas, are single-purpose, programmatic functions hosted on managed infrastructure. They're used for handling backend logic on the server-side. We'll be using Netlify Functions, but we'll also discuss Vercel Functions for comparison.
Both Netlify and Vercel offer a similar Function-as-a-Service platform, providing easy ways to build and deploy serverless functions. They both support multiple languages, have similar request and response formats, and offer built-in environment variable support. However, the key differences lie in their pricing structure and cold start times.
Creating and deploying serverless functions with Netlify
Netlify's serverless functions are instrumental in creating a powerful backend for your SvelteKit Event Management System. To manage event data, we will create two serverless functions to perform CRUD (Create, and Read) operations.
First, create a netlify folder in your root directory. Inside it, create another folder named functions. Then create an utils/db.js file in the netlify folder to connect the serverless function to a MongoDB database with a code snippet:
const { MongoClient } = require("mongodb");
async function connectToDatabase() {
  try {
    client = new MongoClient(process.env.MONGODB_URI, {
      useUnifiedTopology: true,
    });
    const connection = await client.connect();
    const collection = connection.db("databaseName").collection("event"); // replace "databaseName" with your actual database name
    return collection;
  } catch (err) {
    console.log("Error connecting to database" + err.message);
  }
}
module.exports = { connectToDatabase };
This code exports an asynchronous function named connectToDatabase that sets up a MongoDB client, using the MongoClient imported from the MongoDB module. By using MongoClient with the connection string process.env.MONGODB_URI, and the useUnifiedTopology: true option, establishes a connection to a MongoDB database. Once the connection is established, it accesses a specific collection from the database by calling connection.db("databaseName").collection("event"), where “databaseName” should be replaced with the actual name of your database. This function then returns the accessed collection for future operations. If any error arises during this process, the function catches it and logs the error message to the console. The connectToDatabase function is then exported for use in other modules with module.exports = { connectToDatabase }.
Next, create these four files inside the functions folder: createEvent.js, readEvent.js, updateEvent.js, deleteEvent.js. Each file will export a handler function that performs the corresponding operation. In the createEvent.js, we will define a function to create new events.
// netlify/functions/createEvent.js
const { connectToDatabase } = require("../utils/db");
const uri = process.env.MONGODB_URI;  // set this environment variable on Netlify
exports.handler = async (event, context) => {
  const newEvent = JSON.parse(event.body);
  const collection = await connectToDatabase(uri);
  const result = await collection.insertOne(newEvent);
  return {
    statusCode: 200,
    body: JSON.stringify(result),  // the inserted document
  };
};
The above function imports the connectToDatabase function from a local utility module, along with a connection string from an environment variable, MONGODB_URI. Within the handler function, data from the incoming event is extracted, parsed into a JavaScript object, and then inserted into the database collection. Set your MONGODB_URI environment variable on Netlify to your MongoDB Atlas connection URI.
Then, in readEvent.js, we will define a function to retrieve all event details in the database:
// netlify/functions/readEvent.js
const { connectToDatabase } = require("../utils/db"); // set this environment variable on Netlify
exports.handler = async () => {
  try {
    const collection = await connectToDatabase();
    const results = await collection.find({}).limit(10).toArray();
    return {
      statusCode: 200,
      body: JSON.stringify(results),
    };
  } catch (err) {
    return { statusCode: 500, body: err.toString() };
  }
};
Here we created a function to retrieve all the events in the database. To optimize our code by limiting the number of data that MongoDB sends over the network to our application.
Deploying the Serverless Functions
Now that we've got our serverless functions all set and ready to go, it's time to bring them to life on the web! In this section, we'll be traversing the path of deploying these functions on Netlify.
Committing the Code to GitHub
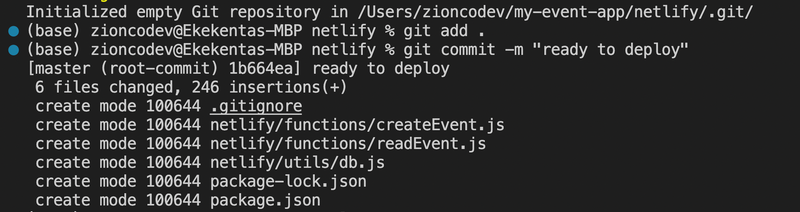
Before you can deploy anything, you need to ensure that all your changes are committed and pushed to your GitHub repository. If you haven't already done so, initialize a Git repository in your project folder using git init. Add all your changes using git add ., then commit these changes using git commit -m "Your commit message". Finally, push your changes to your GitHub repository using git push origin main. Make sure you replace main with the name of your branch if it's different.
Connecting the repository to Netlify
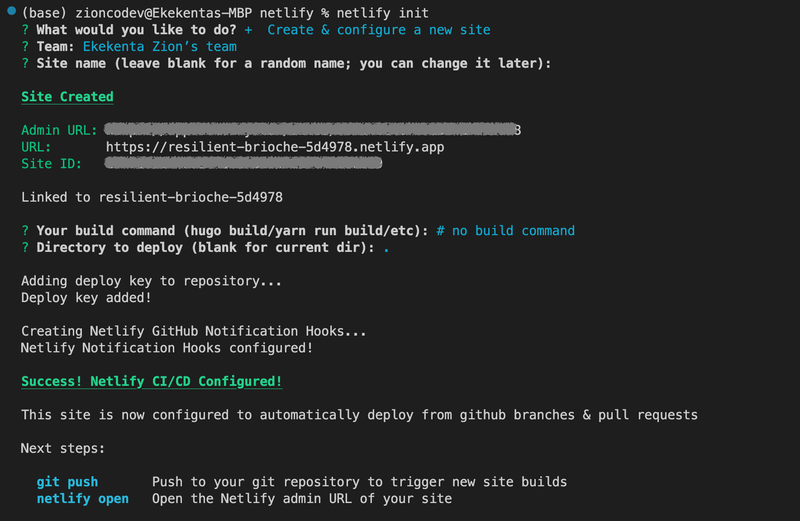
After pushing your changes, the next step is to connect your GitHub repository to Netlify for continuous deployment. This can be done through the Netlify CLI or through the Netlify dashboard. If you're using the CLI, navigate to your project directory and use the netlify init command. You'll be prompted to authorize Netlify to access your GitHub account, after which you can select your repository and set up the deploy settings.
Deploying the Netlify Function
To deploy your function, you can simply push your changes to GitHub. Netlify will automatically detect the changes and start a new deploy. Once the deploy is complete, you can test your function by going to your-netlify-url/.netlify/functions/your-function-name. Replace your-netlify-url with the URL of your Netlify site and your-function-name with the name of your function.
Remember to set up any environment variables your function needs in the Netlify dashboard. You can do this by going to your site's settings, clicking on 'Build & deploy', and then 'Environment'.
That's it! You've now successfully deployed a serverless function using Netlify. Keep in mind that while Netlify's free tier includes some usage of Functions, you might need to upgrade your plan if your function gets a lot of traffic or runs for a long time.
Integrating Serverless Functions with SvelteKit
Our next step is to integrate the serverless functions with our SvelteKit application and create a user interface for interacting with these functions. In the src/routes directory, create a new file named +page.server.js for the server side of our page route and add the code snippet below:
export const load = async () => {
  try {
    const response = await fetch(
      "https://your-netlify-url/.netlify/functions/readEvent",
      {
        method: "GET", // or 'POST'
        headers: {
          "Content-Type": "application/json"
        },
      }
    );
    const events = await response.json();
    return {
      events,
    };
  } catch (e) {
    console.log(e);
  }
};
In the above code snippet, we created a load to get the data from our Netlify readEvent function and export it to make it available on the page through the data prop.
Now update the code in the +page.svelte file to use the data returned from the load function and display them on the page:
<script>
  export let data;
  const events = data.events;
</script>
<ul>
  {#each events as event (event._id)}
    <li>
      <h2>{event.title}</h2>
      <p>{event.description}</p>
    </li>
  {/each}
</ul>
<style>
  ul {
    list-style: none;
    padding: 0;
  }
  li {
    margin-bottom: 0.5em;
    background-color: #f0f0f0;
    padding: 1em;
    border-radius: 4px;
  }
</style>
Here we are accessing the events array from the data prop and using each loop to iterate over each event to display its details.
Next, update the +page.server.js file to add a form action to add new events to the Netlify serverless function. SvelteKit form actions are the mechanisms used to handle the data input from a user. Let’s do that with the code snippet:
export const actions = {
  default: async ({ request }) => {
    try {
      const formData = await request.formData();
      const title = await formData.get("title");
      const description = formData.get("description");
      const location = await formData.get("location");
      const organizer = await formData.get("organizer");
      const date = await formData.get("date");
      await fetch(
        "https://your-netlify-url/.netlify/functions/createEvent",
        {
          method: "POST", // or 'POST'
          headers: {
            "Content-Type": "application/json",
          },
          body: JSON.stringify({
            title: description,
            date,
            location,
            organizer,
          }),
        }
      );
    } catch (e) {
      console.log(e);
    }
  },
};
This code is basically setting up an action, named default, that processes a form submission. When this action is triggered, it first gathers the submitted data by extracting fields like "title", "description", "location", "organizer", and "date" from the form data.
Once it has collected all the necessary details, it sends this data to a server function called "createEvent" on your server, using a POST request. This is done using the fetch API.
If anything goes wrong while processing the form or sending the data, the function catches the error and logs it to the console for debugging purposes.

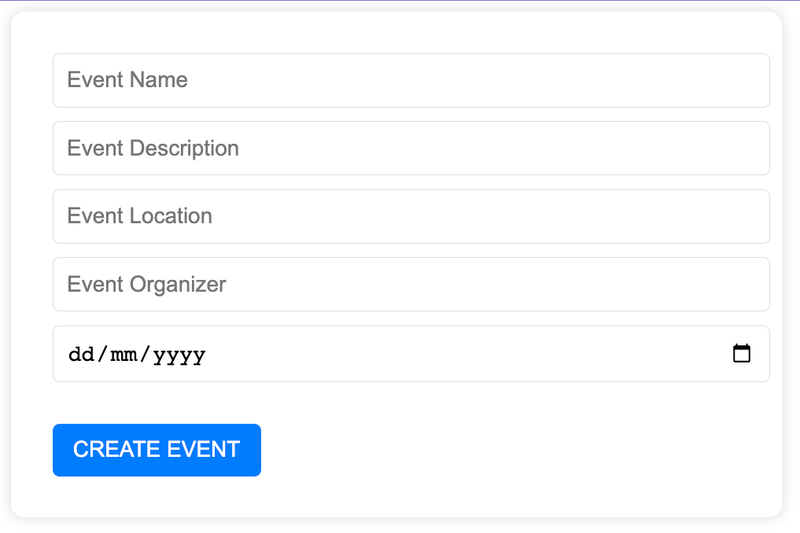
Now add HTML forms to collect the user's input to the +page.svelte file:
...
<form method="POST">
  <input name="title" placeholder="Event Name" required />
  <input name="description" placeholder="Event Description" required />
  <input name="location" placeholder="Event Location" required />
  <input name="organizer" placeholder="Event Organizer" required />
  <input name="date" type="date" required />
  <button type="submit">Create Event</button>
</form>
...
With the POST method attached to the form, when a user submits the form, it will trigger the default action we defined in the +page.server.js file to send the form data to the createEvent function. Also, update the stylesheet and some basic styling to the form:
<style>
...
form {
    background-color: #ffffff;
    padding: 30px;
    border-radius: 10px;
    box-shadow: 0px 0px 10px 0px rgba(0, 0, 0, 0.15);
    width: 500px;
    max-width: 100%;
  }
  input {
    border: 1px solid #ddd;
    border-radius: 5px;
    width: 100%;
    padding: 10px;
    margin-bottom: 10px;
    font-size: 16px;
  }
  button {
    background-color: #007bff;
    color: #ffffff;
    border: none;
    border-radius: 5px;
    padding: 10px 15px;
    font-size: 16px;
    cursor: pointer;
    text-transform: uppercase;
    margin-top: 20px;
  }
</style>
Now you can go ahead to add new events to the database.
Creating and deploying serverless functions with Vercel
Creating and deploying serverless functions with Vercel is a simple and effective solution to handle your application's backend functionality. In this section, we'll go over how to create serverless functions for an event management platform. These functions will handle creating new events and reading existing events from a MongoDB database. We will then deploy these functions on Vercel.
Let's create a new directory and initialize it as a new npm project:
mkdir my-vercel-function && cd my-vercel-function
npm init -y
Next, we're going to set up our Vercel functions. These functions will be housed in the /api directory. To begin, let's create the api folder. Within this folder, we'll create two functions files: createEvent.js and getEvents.js:
mkdir api && cd api

touch createEvent.js getEvents.js
Creating serverless functions using Vercel
Let's create our serverless functions. Start by installing the mongodb module, which we'll use to interact with our MongoDB database:
npm install mongodbThen, let's create two functions: createEvent.js and getEvents.js inside the api directory. The createEvent.js file will handle creating new events data with the code snippets below:
// api/createBlog.js
const { MongoClient } = require("mongodb");

module.exports = async (req, res) => {
  try {
    const client = new MongoClient(process.env.MONGODB_URI);
    await client.connect();
    const collection = client.db("databaseName").collection("event");
    const newBlog = req.body;
    const result = await collection.insertOne(newBlog);
    res.status(201).json(result);
  } catch (err) {
    res.status(500).json(err);
  }
};
In this function, we're connecting to our MongoDB database using MongoClient and the MONGODB_URI environment variable, which should hold our database's connection string. Then, we're inserting the new events (received in the request body) into our event collection and returning the inserted event as a response.
Next, update the getEvents.js file to handle the fetching of all events:
// api/getBlogs.js
const { MongoClient } = require("mongodb");

module.exports = async (req, res) => {
  try {
    const client = new MongoClient(process.env.MONGODB_URI);
    await client.connect();
    const collection = client.db("databaseName").collection("event");
    const blogs = await collection.find({}).toArray();
    res.status(200).json(blogs);
  } catch (err) {
    res.status(500).json(err);
  }
};
Similarly, this function connects to our MongoDB database, but it fetches all events from the event collection and returns them as a response.
Deploying Vercel Functions
With our serverless functions ready, we can now deploy them using Vercel. To do that, follow the steps steps below:
Commit your code to a Git repository - start by saving your changes and pushing them to a Git repository. You can do this by running the following commands:
git add .
git commit -m "Add serverless functions for event operations"
git push origin main
Link your repository with Vercel - start by running the vercel dev command. This will prompt you to set up a Vercel project and link it with your existing GitHub repository. Once that's done, head over to your Vercel dashboard. Look for the project you've just created and select it. Then click on the 'Connect Git Repository' button and select your GitHub repository.
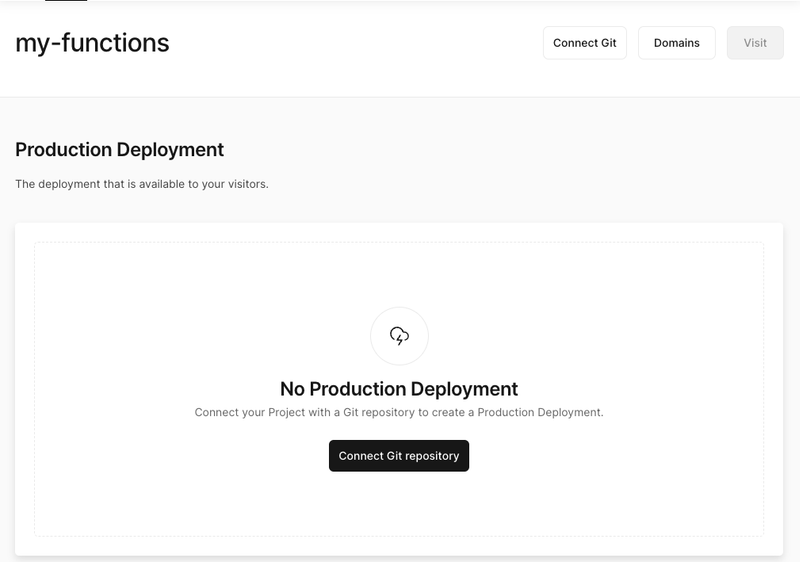
Deploy your project - once your project is connected, Vercel automatically deploys your project and provides you with a unique URL where your functions are live and ready to use.
Set environment variables - navigate to Settings → Environment Variables, and add the MONGODB_URI to your environment variables.
Test your functions - you can use the provided URL to make HTTP requests to your serverless functions, either directly from your browser or using tools like curl or Postman.
Managing events with Vercel Functions
With your serverless functions now live on Vercel, you can easily manage your blog application's events. Creating a new blog is as simple as sending a POST request to the createBlog function with the blog's details in the request body. Similarly, you can fetch all blogs by sending a GET request to the readBlogs function.
Deployment
Deploying your SvelteKit application might seem daunting at first, but with platforms like Netlify and Vercel, the process becomes quite manageable. Both these platforms offer robust solutions for deploying front-end applications and include features for continuous deployment from Git. Let's discuss each in turn.
Deploying your SvelteKit application on Netlify
Here's a step-by-step guide to deploying your SvelteKit application on Netlify:
- Push your code to a Git repository - Netlify uses Git-based deployments. Make sure your SvelteKit application is in a Git repository, and all recent changes are committed and pushed to the remote repository. So push the Sveltekit application we created to your GitHub repository.
- Create a new site on Netlify - log in to your Netlify account and create a new site. When asked, connect your GitHub, GitLab, or Bitbucket account and select the repository where your SvelteKit application lives.
- Configure your build settings - you need to specify the build command and publish the directory for your site. For the SvelteKit app, these typically are
npm run buildandbuild, respectively. If you're using an adapter for Netlify, the publish directory may bebuild. - Deploy your site - once you've finished setting up, click the 'Deploy site' button. Netlify will pull the latest code from your repository, install the necessary dependencies, build your site, and deploy it.
Deploying your SvelteKit application on Vercel
Now, let's move on to deploying your SvelteKit application on Vercel. The steps are quite similar:
- Push your code to a Git repository - since you’ve already pushed the SvelteKit application to your GitHub repository, you’ll have to skip this step.
- Create a new project on Vercel - log in to Vercel and create a new project. Connect your GitHub, GitLab, or Bitbucket account and select the repository where your SvelteKit application is located.
- Configure your build settings - Vercel is quite intelligent and can automatically detect the correct settings for a SvelteKit app. If necessary, you can customize the build command and output directory (
npm run buildandbuild, respectively). - Deploy your project - click 'Deploy', and Vercel will take care of the rest. It will pull your code, install dependencies, build your site, and deploy it.
Understanding the continuous deployment feature of both platforms
One of the main advantages of both Netlify and Vercel is their support for continuous deployment. This means that every time you push a change to your Git repository, these platforms will automatically rebuild and redeploy your application. It is a powerful feature as it ensures your live site is always up-to-date with your latest code changes.
To use continuous deployment, all you need to do is keep pushing your changes to the Git repository connected to your Netlify or Vercel site. These platforms will detect the changes and start the deployment process automatically.
Conclusion and further exploration
In conclusion, we've navigated through the creation of serverless functions to power an event management system and a blog system, utilizing SvelteKit for the front end, MongoDB for data storage, and deploying our application using Netlify and Vercel. We learned how to write, deploy, and manage serverless functions and how to leverage these skills to bring dynamic functionalities into our static sites.
We learned how to interact with a MongoDB database from our serverless functions to perform CRUD operations, including creating and reading data from the database. We also explored the deployment process of SvelteKit applications, understanding the continuous deployment feature provided by both Netlify and Vercel.
However, the journey doesn't end here. Our event management system is ripe for improvements and additional features. Some potential enhancements you can add include:
- Enhanced search functionality - implement advanced search options allowing users to search events based on criteria like location, date, or event type.
- User authentication - incorporate a user authentication system to allow users to create accounts, RSVP to events, and even create their own events.
- Integration with third-party services - consider adding integrations with services like Google Calendar or Eventbrite to enhance the system's functionality.
As you continue your journey, remember that the tech landscape is ever-evolving. Stay curious, keep learning, and don't be afraid to experiment with new tools and technologies. Happy coding!