Knowledge Hub
Getting started with the Next.js serverless framework
Serverless architecture is a sort of cloud computing that enables developers to create apps without the need for server management.
Instead, the cloud provider handles all server management, allowing developers to focus on designing features and delivering apps.
The Serverless Framework enables developers to quickly configure and deploy their applications. It provides developers with the ability to customize events, functions, and triggers, as well as the resources required to run their applications.
Developers may rapidly put up a highly scalable serverless architecture to deploy their apps by combining Next.js and the Serverless Framework.
With the help of the Serverless Framework (SLF) and Next.js, developers can quickly and easily build highly scalable serverless apps.
To take advantage of serverless architecture, developers may quickly and easily set up a serverless architecture to deploy their Next.js applications to the cloud using SLF.
With the help of the Serverless Framework's extensive configuration options, developers can also quickly define events, functions, and triggers, making it easy for them to deploy and customize their apps.
In this article, we'll examine serverless functions in Next.js and discuss how to create them for a Next.js application. To comprehend the execution of Lamda processes, we'll discuss certain requirements for using Next.js serverless framework for your applications as well.
These are some of the concepts we'll be covering in this session:
1. Introduction to Serverless Next.js
2. Benefits of using Serverless Next.js
3. Drawbacks of Serverless Next.js
4. Setting up Next.js serverlessenvironment
5. Developing your first Next.js serverless application
6. Exploring the Serverless Framework
7. Bottom line
Introduction to Serverless Next.js
Let's first define what "serverless" means. Does it imply that no servers are used? The answer is plainly no. It means that you are not in charge of overseeing or providing for the servers.
It's essentially about delegating server functionality to cloud providers, freeing up developers to write code and maintain business logic.
The advantage of using serverless as a framework is that you only need to pay for the exact amount of resources required to run your entire infrastructure, which means cost reduction.
Serverless code is a stateless function that is initiated or executed in response to the occurrence of events, such as network events (HTTP request/response cycles).
Function contexts tied to certain events must run before the completion of those events in serverless applications.
The concept is that the state is not maintained over multiple or different function calls or contexts.
Additionally, each new event caused by a function call is handled in a fresh instance of the container, which is automatically activated.
Benefits of using Serverless Next.js
When dealing with a Next.js function, an event must be triggered before the lambda function can be executed. When this occurs, various resources are assigned to the serverless architecture in order to meet the expectations of this event.
In such a situation, resource distribution is mostly determined by the number of incoming or contemporaneous events or requests.
This is purely determined and handled/provided by the cloud providers that offer these services including
Some of the advantages of serverless applications include:
- Organizations may simply scale their apps with serverless architecture without worrying about the infrastructure.
- Developers can concentrate on creating business logic while the infrastructure is handled by the serverless architecture.
- By implementing Serverless Next.js, organizations may significantly reduce their infrastructure costs by doing away with the requirement for a dedicated server.
- When compared to conventional server-side rendering, Serverless Next.js delivers improved performance.
- Security updates or patches are handled for you.
- The cloud providers manage all other technological details, allowing engineers to concentrate on feature implementation and maintenance of the core applications.
Developers may focus on providing users with business value thanks to the serverless architecture that unburdens them of routine administration tasks.
Serverless applications are stateless and are susceptible to cold starts, which might cause timeout problems. This is so that the events that are activated by functions can trigger isolated containers with particular contexts or configurations.
The serverless architecture enables businesses to launch new products more quickly and achieve shorter reaction times.
Drawbacks of Serverless Next.js
Function as a service (FaaS) is not necessarily the best option.
- When using serverless architecture like serverless Next.js, the idea of vendor lock-in should be taken into account.
- It is challenging to move an application from one cloud provider to another because the Next.js framework is cloud provider dependent.
- For long-running applications, for instance, it may not be the ideal option because it can be more expensive than using a virtual machine or a container that has already been configured.
- Lack of control is another disadvantage of serverless. The Next.js framework does not offer total control over the environment and infrastructure at its foundation.
Setting up your Next.js serverless environment
Prerequisites for going serverless with Node.js
Let’s get started:
- Install npm and node on our computer
- Basic understanding of JavaScript
- Possess a working knowledge of the command line
To create a Next.js project, run the following command:
npx create-next-app@latest
# or
yarn create next-app
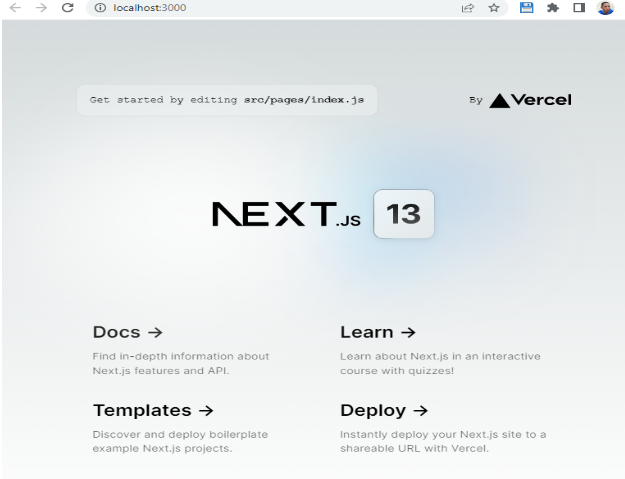
After the installation is complete, start your app by running yarn dev. When you visit localhost:3000, you will get the welcome home page as follows:

How routes work in Next.js
Each page in Next.js is powered by a component. A "Home" page will have a "Home" component, for instance, while an "About" page will have an "About" component.
Routes in Next.js are built using files found in the src directory. A file added to the page's directory instantly becomes a route.
For instance, if you place a file with the name product.js in the pages directory, /product will point to it. By including files with the [id].js naming convention, you can also establish dynamic routes.
If you add a file with the name [id].js to the pages directory, for instance, it will be accessible at /.../[id].
Since each page component has a file inside the pages folder, the file name and location of each page component are linked to the route of that specific page.
To elaborate on this, navigate your browser to localhost:3000/product, and you will get a 404 error (page not found).
Similarly, folders can also be used to create nested routes. For example, by creating a folder named Pages and a file inside that folder, Next.js will create the /pages/product route.
To create a product.js file, inside the pages directory, add the following code:
// src\pages\product.js

// import React and Next components
import React from 'react';

// create the product page component
const ProductPage = () => {
  return (
    <>
    <h1>Hello dear, This is the product page.</h1>
    </>
  );
};

export default ProductPage;
This file contains JavaScript that builds the ProductPage for the Next.js component. This element's function outputs an element with an h1 tag that displays a message.
The component is then exported to be imported into other files and used.
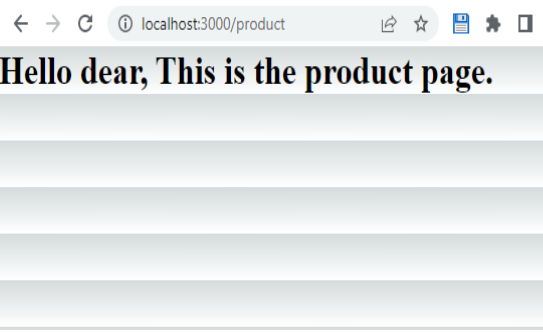
Now, revisit localhost:3000/product and you get: product;

When you created the Product component in the pages folder, Next.js automatically created a route to serve the Product component. Thus, the route name is tied to the file name.
Dynamic routes in Next.js
Next.js pages can support dynamic routes. This is an advantage since complex applications require more than just defining routes and utilizing established methods.
By adding brackets to the name of a page component in Next.js, for example, [param].js, you can create a dynamic route.
The page's id, description, elegant URLs, etc., are shown here as [param]. It is possible to match any route, such as /users/123 or /users/abc.
The query object will be present in the matched route /users/abc of dynamic route pages/users/[param].js:
The dynamic route leading to the page is as follows:
For example, the route /users/abc will have the following query object:
{ "param": "abc" }Similarly, the route /users/abc?foo=bar will have the following query object:
{ "foo": "bar", "param": "abc" }This is beneficial since complicated applications necessitate more than simply setting routes using predetermined pathways.
Create a user folder, and inside it, create a component named [name.js].
// \pages\users\[name].js

import { useRouter } from "next/router";
const User = () => {
    const { query: { name } } = useRouter();
    return (
        <div>
            <h1>Hello! Welcome {name} </h1>
        </div>
    );
};
export default User;
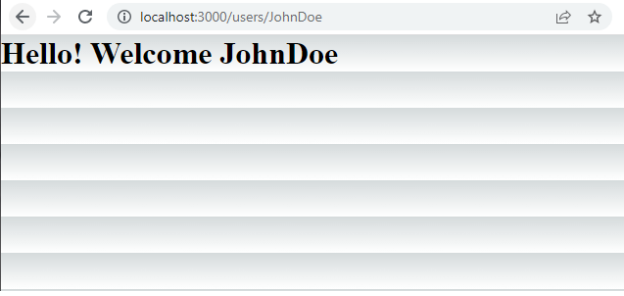
Now, when you visit http://localhost:3000/users/JohnDoe, you will see that Next.js automatically matches /users/JohnDoe with the dynamic route pages/users/[name].js. Thus, whatever username is passed in the route will be displayed on the page.
On running the code above, we get:

Next.js will send the matched path parameter as a query parameter to the page. If there are other query parameters, it will link the matched path parameter with them.
For example, if the dynamic route is pages/users/[param].js, and the matched route is /users/abc, the query object would be {"param": "abc"}.
The matching path parameter will be supplied as a query parameter to the page and integrated with the other query parameters.
Developing your first Next.js serverless application
Building applications with back-end endpoints using the Next.js framework is possible thanks to API routing using Next.js Serverless Functions.
By utilizing hot reloading and a single development pipeline, they allow us to create back-end application endpoints.
This indicates that the front-end and back-end are both included in the Next.js framework. We can create scalable, full-stack Next.js applications quickly.
In my GitHub repository, there is a working demo that you can use to follow the code. A live working demo of the entire tutorial can be found under the code-sandbox link.
The Next.js API routes are considered endpoints, but the page routes deliver Next.js pages like web pages. The API routes are stored in the /pages/api folder, and Next.js assigns any file stored there to the address /api/*.
This service allows Next.js to render data saved in the Next.js app or data that has been received using Next.js API routes on the front end, which makes it incredibly intriguing.
Next.js automatically builds an example API route, the /pages/api/hello.js file when you bootstrap your application using create-next-app. Next.js builds and exposes a function called the handler inside of /pages/api/hello.js that produces a JSON object.
Create JSON data
To get started with the serverless function, first build the API route and create a JSON folder. Create the folder path data\item.json inside the data folder with the following code:
[
    {
      "id": 0,
      "Title": "IphoneX",
      "Description": "XYZ Apple Os",
      "cost": "$599.99"
    },
    {
      "id": 1,
      "Title": "Item 23457",
      "Description": "5G network enabled",
      "cost": "$999.99"
    },
    {
      "id": 2,
      "Title": "Item 23458",
      "Description": "multi screen colour",
      "cost": "$899.99"
    }
  ]
Handling the request-response cycle
Next.js supports the application of req and res objects, which are used to manage requests and responses utilizing the Hypertext Transfer Protocol (HTTP) and its actions and status codes.
You might be interested in learning more about the res and req handlers - what they represent and what they do in practice.
The req==request, to put it simply, is an object that contains details about the HTTP request that triggered the event.
You use res==response to send the desired HTTP answer in response to req.
There are a few HTTP actions available. They can perform certain operations and produce a status code.
- Client response errors (400–499)
- Response from the server (500–599)
- Successful responses (200–299)
The default export is a function that takes a request and response variable as the function parameters.
The function below configures the API endpoints. It is possible to import and utilize the function elsewhere in the application because it is being exported as the default export.
The request and response objects, req and res, are the two inputs that the function accepts.
export const handleAPIRequest = (req, res) => {/* Handle an API request*/}Next.js by default creates a serverless lambda and passes the request and response objects from that server.
It will also by default parse the request object for the body, query, and cookies since these are frequently used in most request handlers.
Now, in the pages/api/name/ folder, create a new file called name.js with the following code:
// pages\api\name\name.js

import item from '../../../data/item.json'

export default function handler(req, res) {
    res.status(200).json(item)
  }
In the API route above, the handler function imports the JSON data, posts, and returns it as a response to a GET request.
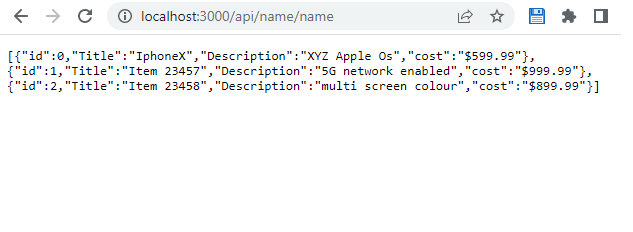
When you run the code above by visiting the URL http://localhost:3000/api/name/name,you return the JSON data from item.json as follows:

Inside the [name].js, you can retrieve the name value from the request object inside the req.query object:
// pages\api\name\[name].js

import item from '../../../data/item.json'
const nameHandle = (req, res) => {
    if (req.method) {
      try {
        const { name } = req.query;
        const items = item.find((items => items.id === parseInt(name)));
        res.status(200).json(items)
        console.log(items)
      } catch(err) {
        res.status(404).json({"message": `please try again: ${err}`})
      }
    }
}

export default nameHandle;
With the help of this code, a named API endpoint that searches a JSON data file for a particular item by name may be reached. Importing the item.json file from the /data directory is the first step in the code.
The nameHandle() function, which accepts a request and a response object as parameters, is then declared. To determine whether the request method is legitimate, an if statement is used inside the function.
If it is, the code locates the requested item in the item.json file and returns it with a response status of 200.
In the event of an error, the code will provide a 404 response and an appropriate error message. The nameHandle() function is exported last.
Match the name/0 with the path http://localhost:3000/api/name/0.
The dynamic route pages/api/name/[name].js will be automatically matched with routes like name/1 and name/2 with the help of the abovementioned snippet.

The request handler function described above locates the requested item in the array using the given [name].js and then provides it to the client.
To separate POST requests from GET requests and other HTTP requests like PUT, DELETE, and PATCH, you can use the request.method object as seen below to handle other HTTP requests as follows:
export default (req, res) => {
  switch (req.method) {
    case 'GET':
      // get request
      break
    case 'POST':
 //  post request
      break;
    default:
      res.status(404).end('Method Not Allowed')
      break;
  }
}
Error handling
You can also account for errors. You can simply use the res.status() method which will set the status code for the response and send appropriate headers.
export default (req, res) => {
   res.status(400).json({
      statusCode: 400,
      message: 'Not Found'
    });
}
Req and res are the two input parameters. It sends a JSON object with the 404 status code and the message "Not Found" when it is called, setting the response status to 404.
Commonly, an API will use this to say that the requested resource was not retrieved.
Exploring the Serverless Framework
Next.js API routes are deployed as serverless functions in Vercel. This means they can be deployed to many regions across the world to improve latency and availability.
The traditional Vercel platform, AWS, or AWS amplify may all be used to quickly and easily deploy a Next.js serverless application.
Having a solid understanding of the serverless architecture, we approach deployment differently when working with a serverless architecture.
Deployment is the process of installing, configuring, and enabling a program to work with the software system that is available for usage, such as making a certain URL accessible on a server.
Next.js serverless framework functions by dividing the app up into smaller chunks upon deployment; this enables developers to make use of serverless architecture while maintaining the developer-friendly, integrated environment of Next.js for creating full-stack applications.
Serverless approach to deployment
Imagine working on a huge application where efficiency and speed are priorities. How developers publish new code will affect how quickly a product can adapt to needed changes and the effectiveness of each modification made.
You simply need to package your modified code and deliver it to your provider when using a serverless architecture third-party provider — also known as function as a service(Faas) — that is in charge of managing the code execution.
Continuous-integration and continuous-delivery (CI/CD) pipelines are in charge of automatically distributing new versions of code patches and upgrades.
New containers with the most recent features and upgrades in your code are launched by CI/CD pipelines. Make sure all of your nodes are replaced if you have any form of high-availability configuration.
Your provider will be in charge of making your revised code accessible for any upcoming requests. The upgrade won't affect any code functionalities because each function is isolated in its own context.
The infrastructure for serverless deployment is quite flexible. Your services are automatically scaled to handle the load. Instead of paying for each request, you only pay for the request you make use of.
As serverless functions are cost-effective and enable you to run your code on demand, they remove the need to manage infrastructure or upgrade hardware.
Bottom line
This tutorial has looked at how the Next.js serverless framework may be used to create full-stack applications.
You learned how to configure page routing and API routes in a Next.js framework and how to use Next.js Lambda (serverless) functions to manage dynamic routes and retrieve data from APIs.
By leveraging Next.js Lambda functions, you can outsource particular chores to the cloud and focus on providing your users with a high-quality user experience.
Next.js serverless functions can help you reach your goals, whether you're constructing a basic SPA or a sophisticated full-stack application.
Next.js may be used to develop webhooks and integrations with external APIs in addition to APIs and serverless services. It can be accomplished by creating a serverless function that listens for requests from external sources and triggers actions within your application.